


Look! Something you can make for a man! Father’s Day anyone??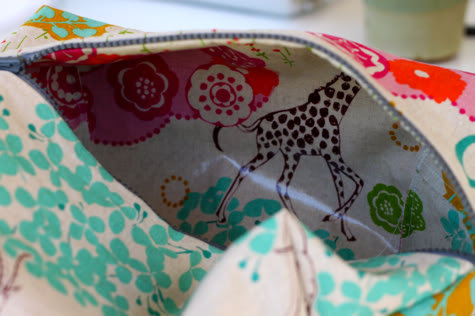
OK, so this one is for my friend Felice. Not a man. But a woman who enjoys cosmetics and bags and just had a birthday. It has a canvas outside and oil cloth inside for spill containment and easy wiping clean. But oil cloth not required.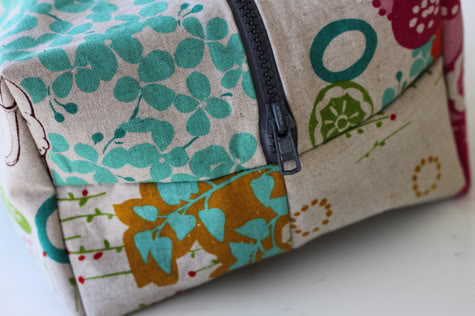
Get the full Boxy Toiletry Bag DIY after the jump…
Boxy Cosmetic Bag Tutorial
I used Echino by Etsuko Furuya, Quiet Ground, Oil Cloth in Natural and the matching canvas, both available at Fabricworm.
Sizing is up to you. My finished boxy make up bag is quite large. You might want to make yours smaller. I don’t know any man that would need this much space for his toiletries.
So my pieces measure:
2 pieces canvas outer 16X14
2 pieces oil cloth lining 16X14
One 16″ zipper
but i suggest, for a more normal size, going 14X12 with a 14″ zipper
1. Cut your fabric.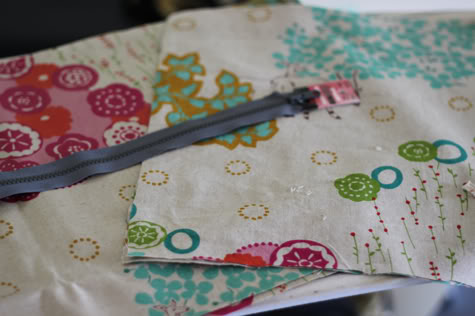
2. Lay one piece of canvas (or whatever outer fabric you are using) right side up. Lay your zipper facedown with the zip to the left with the top edge of the zipper lined up to the top edge of the fabric. Now lay a lining piece (oil cloth) facedown on top, with top edges lined up, like so: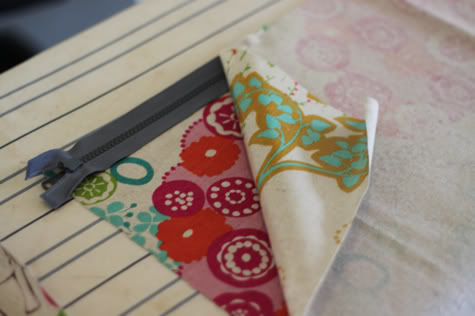
Sew in place with your zipper foot: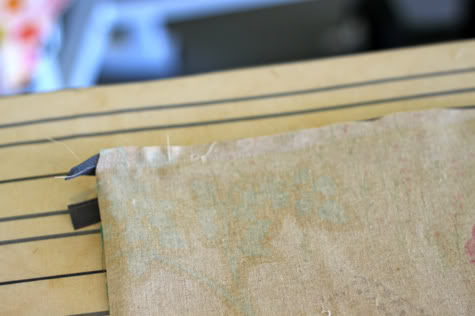
Now fold your pieces wrong sides facing. Lay your other outside piece right side up. Now lay your zipper and assembled pieces with the outside fabric face down and the lining fabric facing up as pictured. The zipper will be face down with the zip to the right this time. Make sure all the top edges are lined up: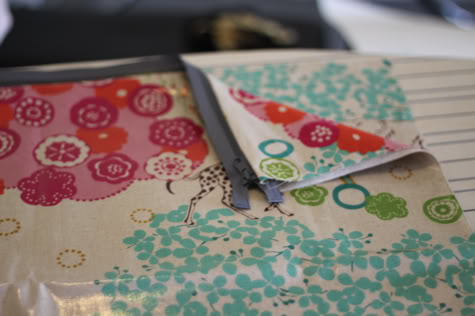
Lay your other piece of oil cloth (lining) right side down on top with the edges aligned. You can pin at the very edge (pins leave holes in oil cloth but you won’t see these in the final bag):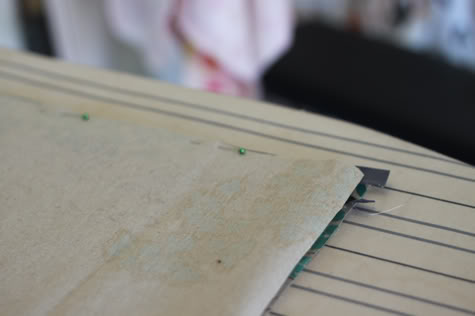
Sew in place with your zipper foot.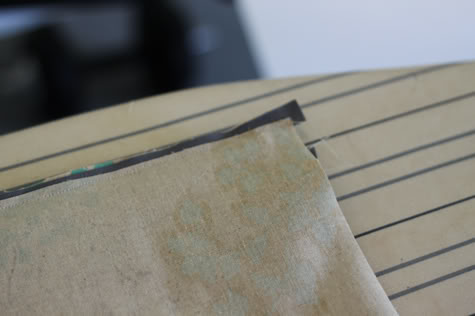
3. Flip all the pieces around so the zipper is at the top and your oil cloth (lining) pieces are on the outside right side up. Sew straight across the bottom: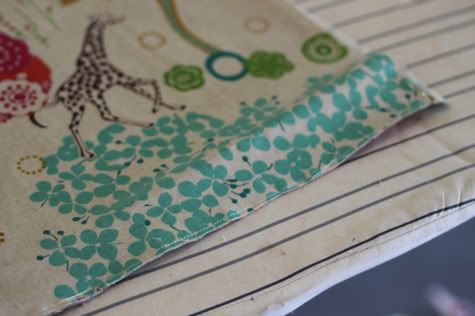
4. Now bring the seam you just sewed to the center, above the zipper like so. Unzip the zipper halfway so you can turn it inside out when you’re done: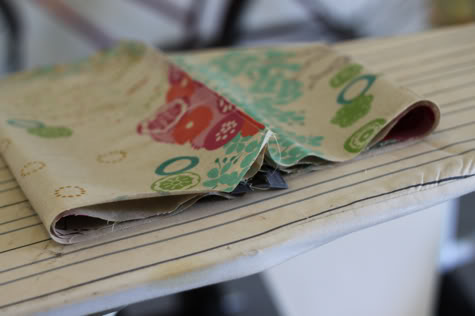
Flatten it out and sew up each side, across the zipper. Reinforce the zipper edges by sew back and forth over them a few times. Trim your edges: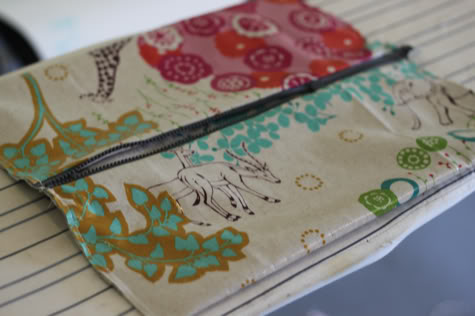
4. Now pouf up your bag, still with the oil cloth to the outside. Pinch each corner in and pin it. Determine what height you like and draw straight line at the same measurement across each triangulated corner (i did 5″):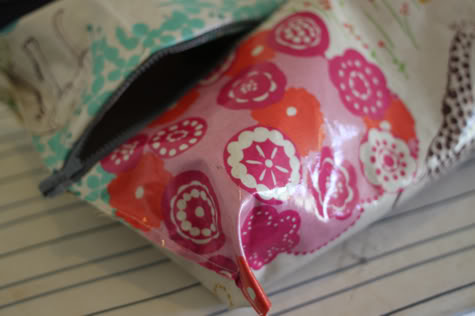
Sew that line with a straight stitch:
Cut off the triangle: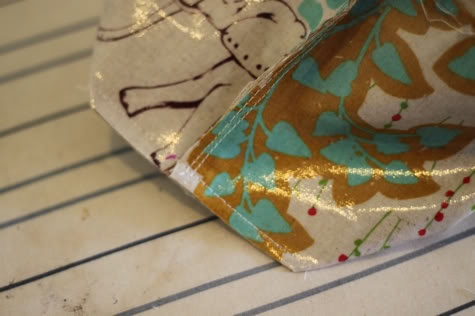
Repeat pn al four corners. Now your bag looks something like this: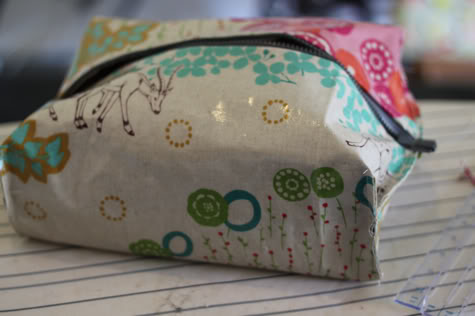
Turn it right side out. You’re done!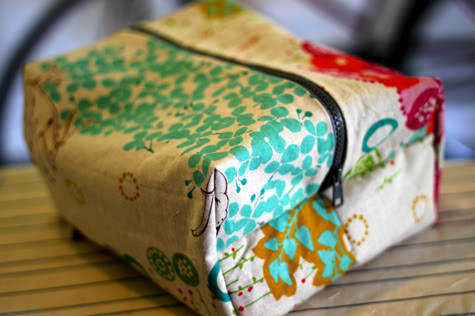
Pretty quick and simple right?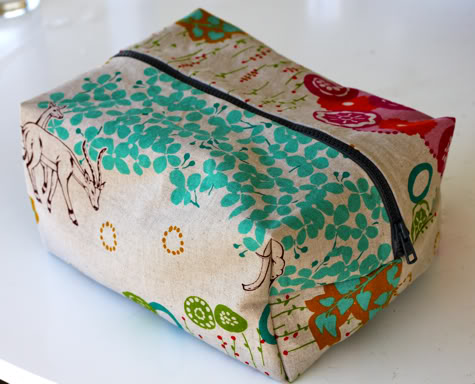
Stuff with sunscreen and the like. Don’t worry about spills, you can wipe it clean!
I just love everything about this tutorial thank you so much for sharing. I'm a total beginner and need some guidance. How many yards of fabric do I need to purchase to make this bag?
Elle- 1/2 yard!
This is great – manly projects are always hard to come by.
I'm finding that I really want to own every single thing you make these days. Yet here I am with a 7yr old SOAPnet toiletry bag. I hope that "Felice" is actually code for "Jacinda" even though I knew Felice. lame. Oh, but beautiful! I think this might be my most favorite fabric ever in the history of fabrics.
I have to echo Jacinda– best fabric ever. As in, EVER.
Just revisited this post and I agree … I have not seen a fabric this cute yet.
hee hee ha ha, i'm so lucky! i love my boxy cosmetic bag!!
Thanks for posting this! I just made one, its so simple!
robynjoy…picture!!!
ok, so where do you get your oilcloth??
Can you give me finished dimensions??? I need a big bag for travel (I share with the hubby.) I love everything you make! Thanks!!
Awesome, looks so easy and looks like it would work well w/o oilcloth, but add interfacing.
TINA we get every fabric we use at FABRICWORM, they are the best.
hmm, jaimie that is a very reasonable question and i probably should have measured it before i gave it away. i will ask felice
wait, i can do it with my old friend MATH. ok, calculations complete – my bag is 8.5" wide, 10" long and 5" deep. it's pretty big.
What an awesome tutorial and I am simply in love with that oilcloth fabric! Thanks for the link!
I am stuck on the step where you sew across the bottom with the oilcloth on the outside. My machine just won't feed the fabric through. It just sits there, and I broke two needles trying to urge it along. Any ideas? Can I lather my machine up with some butter or something?? (If you can't tell, I'm a total beginner.)
Oh! Just figured it out. Scotch tape worked well. Got the tips here: http://sewmamasew.com/blog2/?p=5
I made this this afternoon and love the finished product. I did have a small fight with my machine and had to upgrade to a thicker needle and a more durable thread (heavy duty thread). So I recommend that to the folks who might not know that off the top of their heads!
hey ladies! yes the scotch tape trick is great if your machine isn't feeding the oil cloth through. if you are using a thicker oil cloth or vinyl that will help sooo much as well as a thicker needle. for a thinner oilcloth/laminated fabric you probably wont' need to do that.
Do you tape the scotch tape over where you are sewing? Someone else told me tissue paper works too.
I just KNOW this was a great project b/c my husband, who doesn't "get" most of what I make, said, Wow! Can you make me one?
I'm going to cut up an old leather skirt I don't wear anymore and make one for him.
JUST MADE ONE OF THESE! I wanted to use fabric I already had so I lined it with fusible fleece and it worked great! : ) I'll send you the link when I post a photo!
This is a beautiful gift for someone. I tried making one smaller (http://agirlnamedsu.blogspot.com/) and it didn't come out as good so I am going to make it again using the sizes in the tutorial.
Love the tutorial! Next time, I'll add in a tab to hold onto the other end when zipping closed. I used vinyl covered cotton on the outside, and a thick white vinyl on the inside as well.
http://www.flickr.com/photos/birdandbicycle/4949490753/in/photostream/
I'm going to use this pattern to make a wet bag for my diaper bag! I knew I didn't need to shell out the $20 for a bag to store used cloth diapers in!
Wow!
Thanks for such a cute pattern 🙂
I love this…. and thanks so much for having great photos!!!
Just made one for my boyfriend with cotton pinstripe suiting and a cotton liner for traveling for ballroom competitions. (I know he won't wipe it out if there is a vinyl/oilcloth lining, but he can/will throw it in the wash, ha!)Love all of your practical AND cute projects, but your can-do attitude even more. Thanks!
Thanks for the tutorial! My makeup bag is too small, I think this will be perfect!
I am just in love with this! Adoring, swooning, etc. But I don’t sew. I can’t even sew a button back on a shirt. Yes, it’s sad. That being said, how much might you charge a girl like me to have you make one of these for me?? Thanks! 🙂
Fantastic! I’m always looking for something to make my son….I will take your advice and make it starting with 14″ x 12″ pieces. Thank you!
I finished it! Next time, though, I’ll make the sides only 4″ deep rather than 5″. It’s super cute!
[…] syede efter unikarinas DIY og den var ret fin – jeg brugte dog også denne, men den er på engelsk. Skriv kommentar 0 Kommentarer […]
Such a cute bag and very nicely done tutorial. Before I begin, are there raw edges on the inside that show?
I loved this tutorial. I used clear plastic for the lining (table top stuff I’ve seen my Grandma use for her table). I made it for my husband, as he works in camp, it needs to be wiped out easily when he returns home. As for the inner seams, when still inside out, I cut the outer shell so itr was smaller than the lining, pushed all 4 layers to one side and sewed a seam, then turned it right side out. I did this so it could be wiped down easier so that the outer canvas, on the inside seams, wouldn’t get wet and gross over time.
me ha encantado la idea es sencilla y facil de hacer, espero hacerla pronto, gracias por compartir esta excelente idea. Hasta pronto, le mando muchos saludos. bye
[…] I wanted to make a make-up bag that would fit all my make-up so I decided to follow this tutorial. I found this adorable elephant and started sewing. It’s actually a very easy project, […]
[…] Shaving Kit Bag: Made from oil cloth, perfect for toiletries and travel gear. Shaving Bag from PRETTY […]
Morning! Has anyone tried to put a divider in this type of bag? That is sooooo outside my comfort zone, and its a specific request from the DH! 🙂
[…] En este tutorial de Prudent Baby, nos enseñan como hacer este neceser tan práctico. En el tutorial utilizan otra […]
[…] Toiletry BagMen should have a nice bag for their shaving gear and toothbrush too! […]
Just made one of these, not a bad effort, not happy with the exposed seams in side so need to work out how to change that, definatley needs a tab at one end of the zip I think, but overall I’m pleased with my first attempt, great tutorial.
[…] 2. Tutorial para coser un estuche neceser […]
[…] Toiletry Bag (Dopp Kit) Men should have a nice bag for their shaving gear and toothbrush too! […]