


I promised you this free downloadable bag pattern when we offered up the Simplicity Bias Tape Maker Giveaway as a great first project for your Homemade Bias Tape, so here goes…
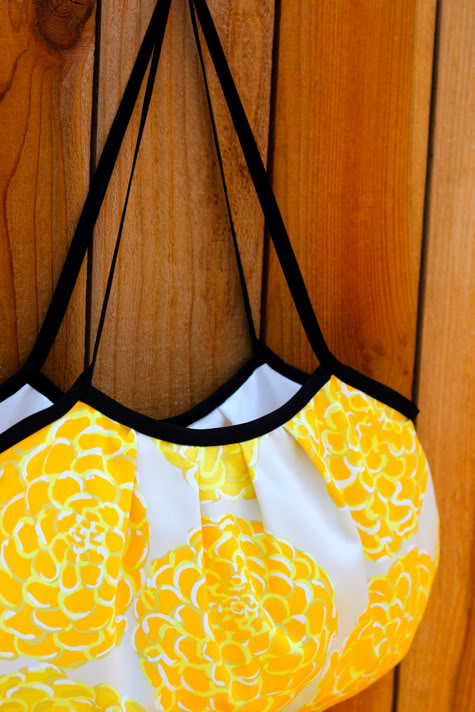
I’ve made a couple so far, and I usually don’t like fabric bags (i’m a leather lover) but I actually adore these for summer. They are super quick to whip up (under an hour) and are also reversible, so you can get a couple different looks in one swoop.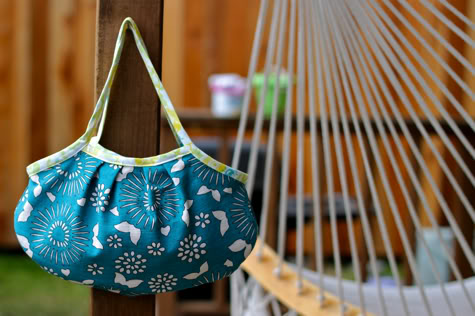
You could also use store-bought bias tape, like I did for the big one (oh, and you can blow up or shrink the pattern to make different sizes – Scarlet’s been using the littler one as her lunch bag). Either way I think it’s a sweet & simple summery project. But I’m dying to know, what do you think?? 
Get the full Beginner’s Bias Tape Bag Tutorial and free downloadable pattern after the jump…
Beginner’s Bias Tape Bag
The smaller version is made with the following fabrics: Bias Tape – Heather Bailey Washday Ticking in Dandelion, Amy Butler Sweet Jasmine in Navy, and Kei Barkcloth Woodcut in Teal. The bigger bag is made with my own stash of Valori Wells Dell Hi Home Decor fabric, store bought black double fold bias tape![]() , and some white suiting for the lining.
, and some white suiting for the lining.
1. Start by downloading our Free Purse Pattern and printing it out. The smaller blue bag pictured was made with the pattern printed at 100% (exactly as is). The bigger yellow one was made by printing the pattern out tiled at 200%, then cutting it out and taping the pieces together. Get the pattern free from google docs here: Beginner’s Bias Tape Bag.
2. Trace the pattern onto the back of your fabrics. You need two pieces for the lining and two pieces for the outer. You’ll also need double fold bias tape. You can buy some or make your own, check out our post How To Make Bias Tape to get the details. And of course, a Simplicity Bias Tape Maker![]() made creating the bias tape a breeze.
made creating the bias tape a breeze.
Here is how I made the bigger bag, by cutting out the pattern tiled at 200% and taping it together: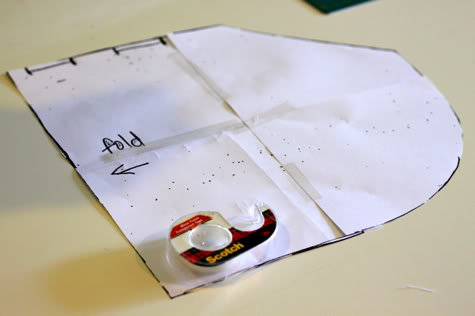
3. Note the boxes on the top of the pattern. Mark them on the back of your fabric. Turn the pattern over and line up the marks on the back to mark the opposite side of the fold.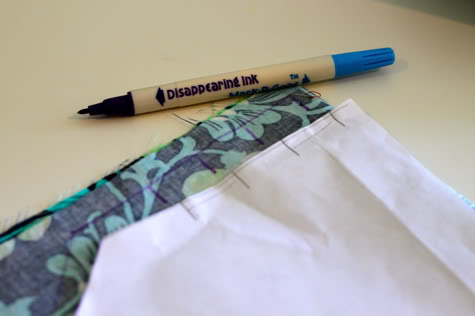
So here are all your pieces: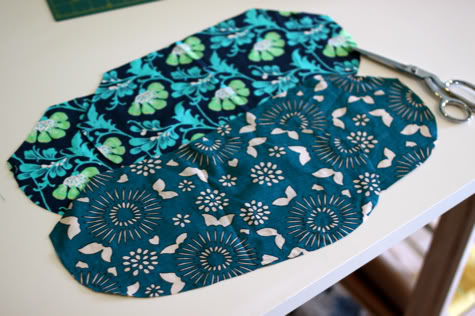
4. Now we will create pleats. So with your fabric still wrong side up, pinch the edges of each box you marked so the ends line up like so:
Fold the pinched fabric to the outside edge of the bag and pin it down: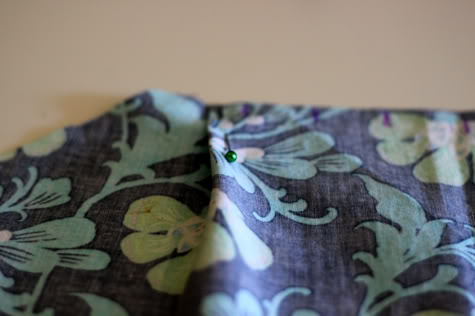
Pinch the next marks and do the same: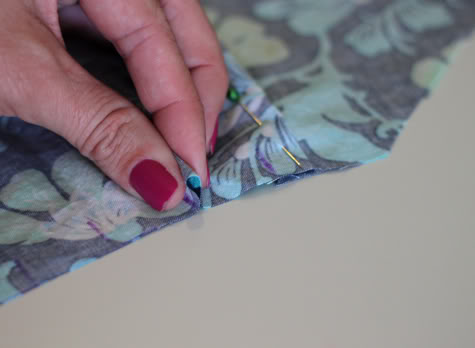
For the pleats on the other side of the bag towards the opposite edge, so your panel looks like this: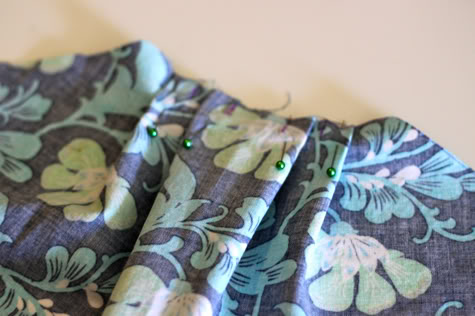
Repeat on all four pattern pieces: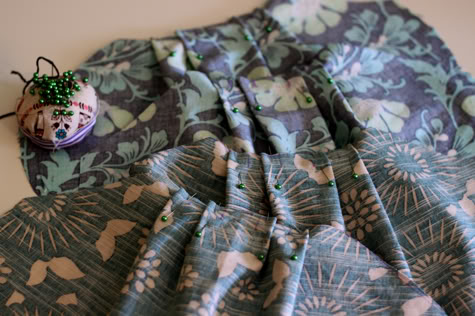
Baste 1/4″ from the edge across the top to hold the pleats in place. Basting is just sewing a straight stitch with the longest seam allowance your machine has, usually a 5: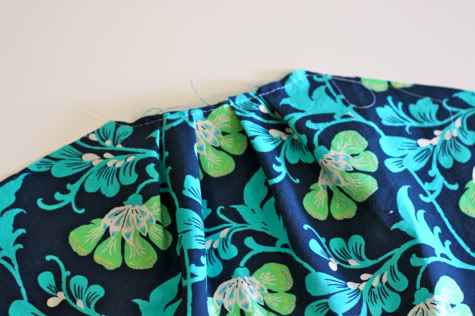
5. Now take your two lining pieces and lay them right-sides facing and pin along the bottom and up the sides (the rounded edge):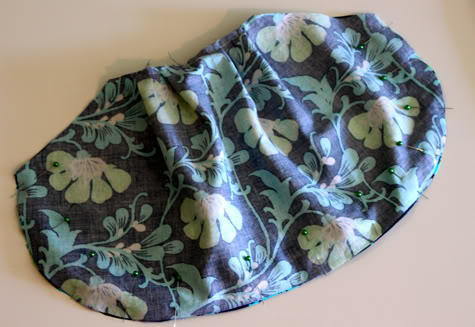
Sew together with a straight stitch with about 1/4″ seam allowance and trim the edges: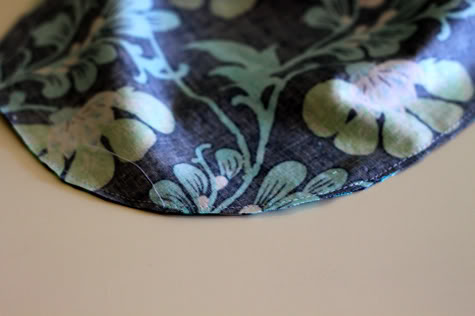
Repeat with the outer pieces: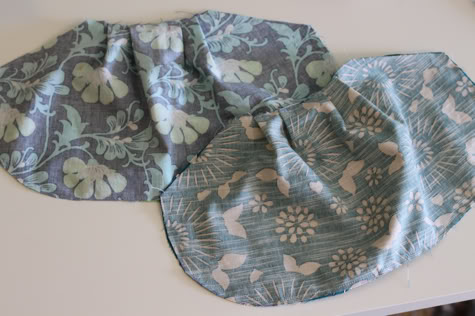
6. Leave the lining inside out, and turn the outer right side out. Stuff the lining into the outer and pin it at a few places on the top edge (not on the pleats though):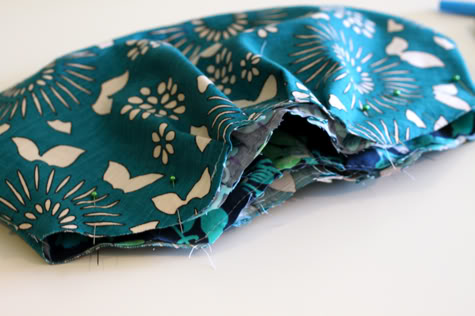
here’s another view: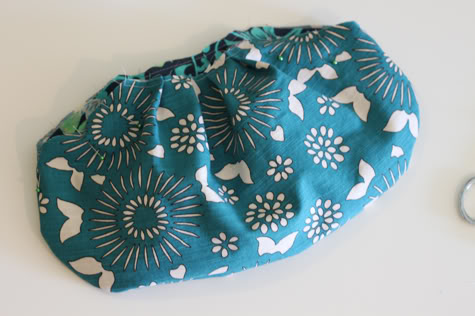
7. Open a piece of bias tape, open it and pin it to the inside edge of one side of your bag, through all the layers with all the edges aligned: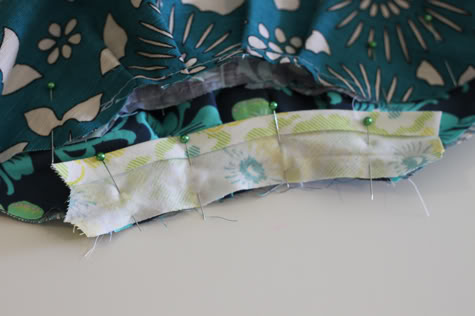
Sew in place along the fold: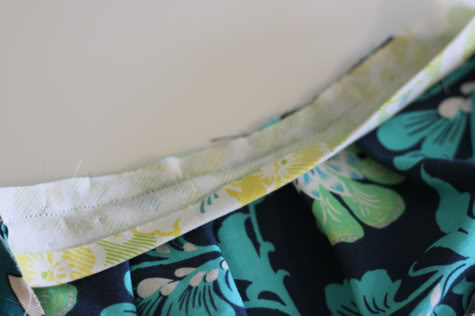
Fold the bias tape back up and flip it around to the outside and pin in place: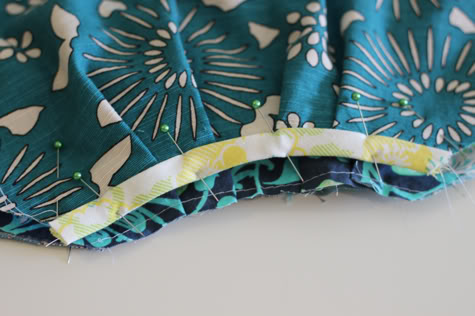
Sew in place along the edge: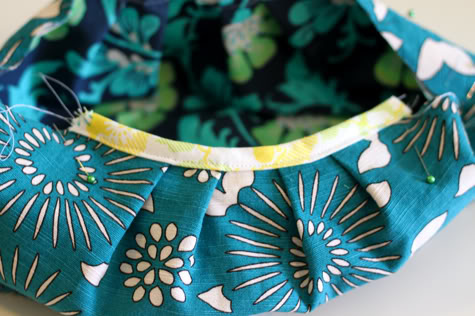
Repeat on the other side of your bag: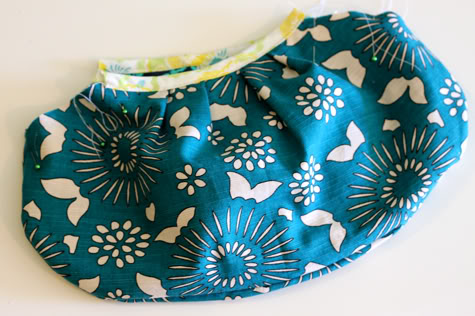
8. Now you want to turn your bag inside out. Open your bias tape and start on one side, pinnin it all the way around with the edges aligned. At the center where you’ve already sewn your bias tape is where your handles are. Make sure they are the same length: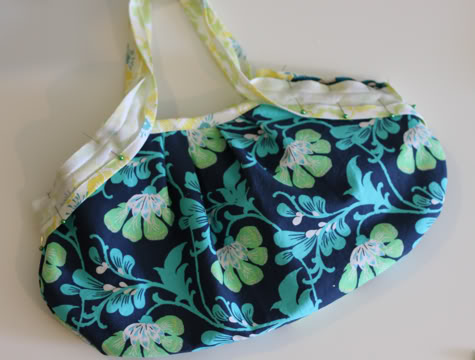
Here is a top view: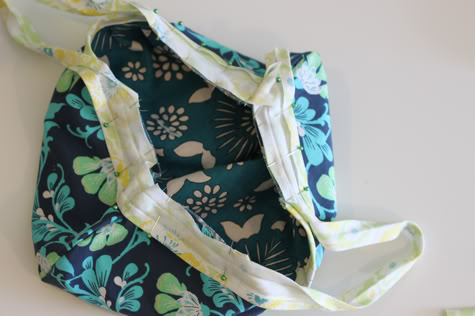
Sew in place on the fold along the unfinished bag edges (don’t sew the handles yet):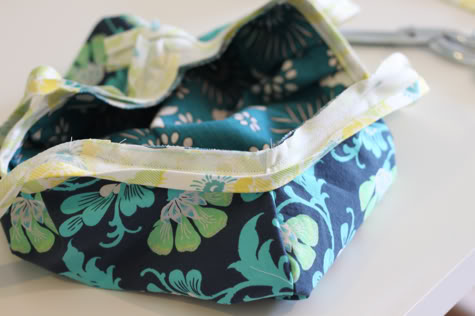
Fold the bias tape back up, around the unfinished edge, and turn the bag right side out. Pin in place: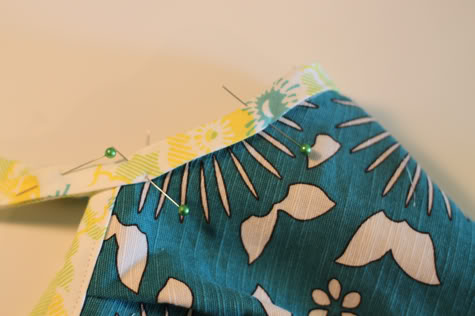
Also pin along the handles in a few spots: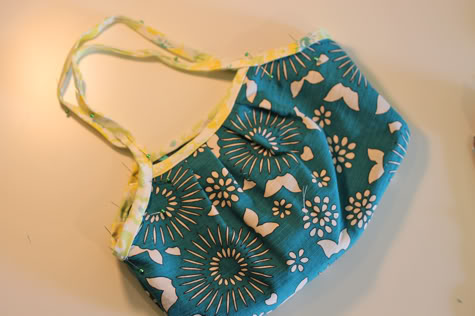
Sew along the edge of the bias tape all the way around, including across the handles: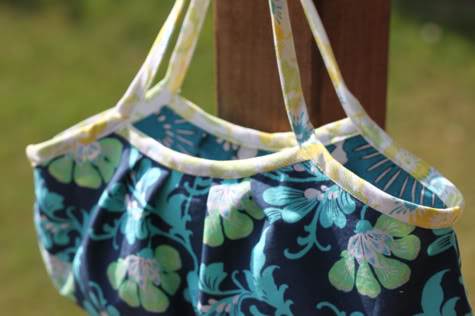
Done…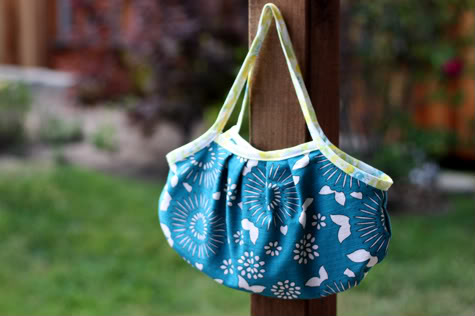
…and Done!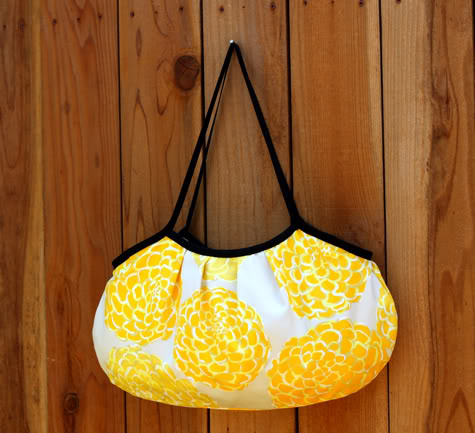
Thank you so much! I am loving my bias tape maker, it is such a time saver!
I adore your site! This is such a great tutorial =) Thank you so much for sharing so much with such grace!
What a fabulous bag!!! I linked to your tutorial over at Craft Gossip Sewing:
http://sewing.craftgossip.com/tutorial-beginners-bias-tape-bag/2010/06/21/
–Anne
oooo this is wicked cute! I ca't wait to make one or two or more! lol thanks for the free pattern & tute! I always wondered about bias tape, it doesn't seem soo evil now! 🙂
I'm so glad I found your blog! It has such fun crafts on it. I think I'm going to make this for my sis-in-law for Christmas. THANK YOU!
Adorable! Thanks you!
I am definitely going to make one! You've converted me to a fabric bag lover too! That Valori Wells fabric is just gorgeous.
Gorgeous! I love it. Thanks for the pattern.
Would it make a sturdier bag to use a slightly wider bias tape and include a welting cord in it? I love the clean lines of this bag, it's such a great Summer look!
THANK YOU for the free purse pattern, can't wait to make this – with my bias tape maker too! =P
Thank you Thank you so glad to come across you on this lazy Tuesday morning (winter hols in AU) I am off to have a go at one of these gorgeous bags many thanks. 🙂
GREAT Tutorial!!!
I heart bags, and this although have never used bias before (yep, I'm a bis tape virgin..) this does not look too daunting!! 🙂
Thanks gals!
Love,
Bird
Such a cute bag. Thanks for the tutorial!
I LOVE the yellow bag! I want!
They are so adorable and cute. Thanks for the downloadable pattern. I would really love to make one. I think the bigger version would be a perfect baby gift for my friend's upcoming baby shower.
Thanks for the tutorial! I used it to make my own super adorable bag: http://saltyoat.blogspot.com/2010/06/sewing-project-bias-tape-bag.html
Thank you!
I tried this pattern out and it took exactly an hour from start to finish!! Thanks so much for sharing this pattern. If anyone is interested here is the bag I made
http://letsgoflyakiteuptothehighestheight.blogspot.com/2010/06/last-day-of-school-teacher-gift.html
ladies! your bags look so cute!!!
Love this!
Hi! Thanks so much for this adorable bag! I am brand-spanking new at sewing. I found this and decided to make it. It was my 2nd project. (I made a dress for my first project – didn't look so hot!). But this turned out so cute. I posted it on my blog here:
http://evamscott05.blogspot.com/2010/06/black-white-purse.html
I love this bag! And the bias tape tutorial is much easier to follow than my mother's instructions… thanks!
What a cute little bag! Thank you for your tutorial, I might try making one of these as a little craft bag for toting around small crafts on the go. 🙂
I loved making this bag! Thank you so much for the tutorial.
I just made one!! I altered the pattern a little to make it a deeper purse so I can haul all my stuff around. I love that it is reversible!! Thanks!
Was amazed at how good mine turned out – I can't even sew straight! Great tutorial & love the easy bias tape tutorial too. Thanks! http://www.facebook.com/photo.php?pid=4820440&l;=4be02d0f0a&id;=750637082
Is there any way to make this bag more durable? I don't like how flimsy the straps are, but I love the bag.
I finally made of these for my daughter for Christmas! I'm making a few later on this week for 3 birthday presents I need. Great idea!
Thanks for this great tute! I bought a bag similar to this a while back & always wanted to try & make one. I never knew where to start, but now I'm set. Now, I just need to find some free sewing time! 🙂
This is such an adorable bag – it's going right to the top of my to-do list!
Hi Ladies! I'm a new fan!!! Loving your tutes and ideas. Thanks so much for sharing. I can't wait to try this one out. Any chance you can upload this template to google docs too? It's archived over at Scribd…
Hi Season! Thanks for the heads up. I updated the tute above with the google docs link and here it is: Beginner's Bias tape Bag Free Pattern
XO
Thanks, Jamie!
Oh, I love this bag! I was just searching for a baby bag to make for my cousins (yes, plural!) who are expecting. This is perfect! I think that I may add a pocket on each fabric so that the bag will have one pocket on the inside and one on the outside when it is used. Thanks for posting this! Your blog is wonderful!
I can't wait to make this! My purse just bit the dust! (I am linking to this from craft blog Polly Want a Crafter next week on the 15th so that my readers can come over and make one too, I hope that is okay!)
Hi I love your stuff! I struggle on this bag though trying to work out how to join the two bits of bias tape at the side seam. Any tips? It doesn't seem to say anything about it in the tutorial and I'm really not a sewer!
I just made this! It turned out so well. I just started working with bias tape so I figured this would be good practice. The side seam thing was really hard for, me too. That part turned out surprisingly well, though.
I added a clasp and interfacing. (If you decide to add a clasp, make sure you make it low enough that it won't interfere with the bias tape. Messed that up the first time)!
Such a clever Idea!
What a lovely bag! And I enjoyed the tutorial!
Thank you so much for the tutorial! I made one and blogged about it http://anestinthemaking.blogspot.com/2011/05/evolution-of-my-blog-stalking-went.html!
Great tutorial! I've made 4 bags so far and had so much fun making them. The recipients all loved the bags. Thanks a bunch!
See the pictures on my blog:
http://tingtingmamma.blogspot.com/2011/06/bias-tape-hand-bags.html
[…] the weekend, I started and finished a project I’d been wanting to make. I’d found the beginner’s bias tape bag on Prudent Baby in a purse tutorial round-up awhile back and pinned it to make […]
[…] Beginner’s Bias Tape Bag with Free Downloadable Pattern | Prudent Baby Baste 1/4″ from the edge across the top to hold the pleats in place. Basting is just sewing a straight stitch with the longest seam allowance your machine has, usually a 5: […]
[…] I’ve made a couple so far, and I usually don’t like fabric bags (i’m a leather lover) but I actually adore these for summer. Beginner's Bias Tape Bag with Free Downloadable Pattern | Prudent Baby […]
I want to make the bigger bag. How can i print it at 200%? I’ve opened it in Adobe Reader… I love this bag!!!
This looks so cute!, but I can’t get the pattern to come up? I tried the link to google doc, but nothing.
[…] Top (tutorial) by Betz White for Craftzine, Beginner’s Bias Tape Bag (free pattern) by Prudent Baby, Reversible Swim Cover-Up (tutorial) by Jenny Garland for Moda Bake Shop, Lickety Split Mini-Bags […]
[…] Top (tutorial) by Betz White for Craftzine, Beginner’s Bias Tape Bag (free pattern) by Prudent Baby, Reversible Swim Cover-Up (tutorial) by Jenny Garland for Moda Bake Shop, Lickety Split Mini-Bags […]
Will someone make this bag for me?? I love it!
thank you so much for sharing this. i made my sister a reversible one with hello kitty fabric on one side and a funky cool paisley floral fabric on the other. it is the regular size one. she loves it!
I would really like to make this bag but for the life of me I can not find the link for the download! Help?!
Love the yellow bag!! So summery =)
Thank you for this great tutorial! I’m so pleased with how my little bag came out!
http://scrivnerburg.blogspot.com/2012/09/i-love-this-cute-little-bag.html
Olá!
Muito bom…obrigada!
Bjo,Nena
[…] Beginner’s Bias Tape Bag with Free Downloadable Pattern | Prudent Baby. […]
[…] ***** My new thing has been sewing bags – making my own gym bag, a cute bow purse, and recently what I like to call the “Swayback” purse (below). […]
The bags are really cute! I really like the black and yellow one
Thank you so much for sharing this pattern. Its so cute. Keep them coming
Hello,
I would like to make this little bag, but I do not find the pattern. :/
Would you be so kind to helping me! 🙂
Thank you in advance, hugs
Timici
Hungary
[…] innså også at stoffet var perfekt for å prøve seg på den lenge påventede Beginners Bias tape bag. Har hele tiden tenkt at veska virker litt grunn, og fikk helt rett, men den var utrolig enkel, og […]
[…] δείξω. Το πατρόν και η ιδέα για την τσάντα είναι από το PrettyPrudent.com και τώρα μπορείς να τη φτιάξεις και εσύ εγκαίρως για […]
[…] Beginner’s Bias Tape Bag from Pretty Prudent […]
[…] 2011 naaide ik immers een heel simpel tasje voor de dochter, en aangezien ze er zelf niet meer naar keek, had ik dit al enkele dagen […]
I could not find the download. I would like to make the bag.
Here is a link to the pattern Agnes!
Hi Jacinda, I’m having the same problem as Agnes…and your link above in the comments does not work either. Please help – I’d love to make this bag! 😀