


Elisabeth from Growing Home is here to share her A-DORABLE John John DIY with us. See, BOY STUFF! Isn’t it the cutest? I’m starting to think I can get excited about boy clothes! Take it away, Elisabeth…

If you are a boys’ mom, you know that the options for little boys clothes are a bit limited. You can buy inexpensive clothes with words and graphics printed on them (not my always my fave) or you can pay an arm and a leg for one among the handful of traditional offerings that look masculine enough for a boy. I usually settle for shopping consignment sales and haunting the racks at TJ Maxx. [If any of you out there are looking to start a business, please note that there is a gaping hole in this market!!] Because my life isn’t exactly aligned for an entrepreneurial venture at the moment, I’m trying out a different tactic: do-it-yourself boys clothes. And right now, this style is my favorite accomplishment…the John John.
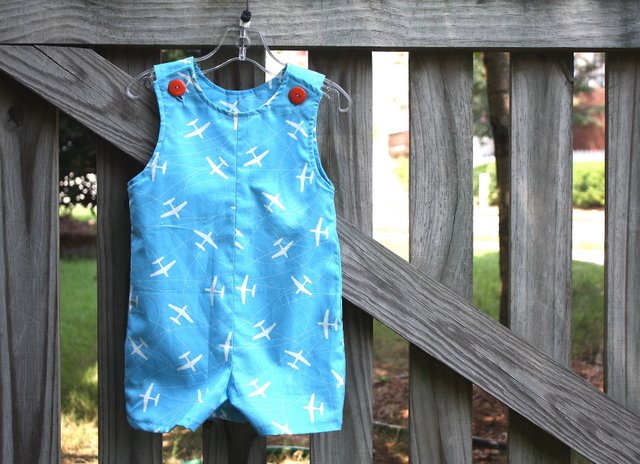
This style goes by lots of names (confusingly many): romper, coverall, jumpsuit… The most common name, however, comes from John F. Kennedy, Jr., who wore these outfits during his father’s presidency. Here in the South, little boys wear smocked or appliqued versions of the John John for dress up. You can add those things to it (I’ll discuss appliqueing below; Jim does not allow smocking unless it depicts football, trucks, or other equally masculine things, so it hasn’t seemed worthwhile to learn:)). The greatest thing about the John John it is that it is relatively easy to make and will only cost you about $15, if you have sewing supplies and another John John (to use for your pattern) on hand. That’s right, about $15…not $60 (or more). This is reason enough to learn to sew, my friends!

There are two parts to the process: making the pattern (which you can use over and over) and constructing the John John. My guess is that, if you worked without stopping (not even close to a reality in my life), it would take you about four hours…IF you’re a beginner. If you’re a macho-sewista, it will likely take you far less.
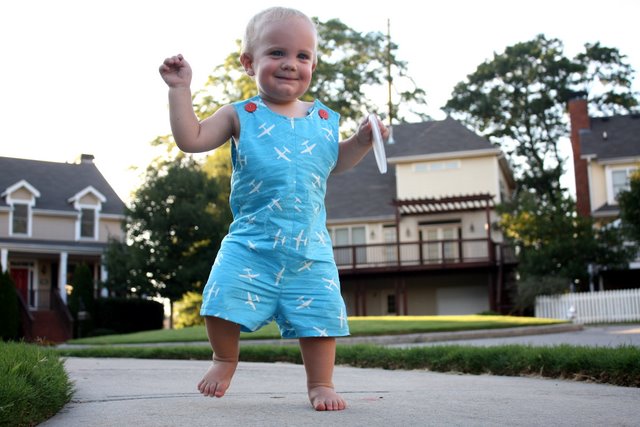
Little Brother was so thrilled with his new airplane suit that he decided to take a romp in the yard on Sunday afternoon…and then a test flight down the block. He worked so hard that he thoroughly wrinkled himself and sweated through his clothes. So…hurray! Our creation passed the boy test. And now I’m going to go wash it:).

See the full instructions (including a bajillion pics of the process) after the jump.
And don’t forget! Leave a comment on this or any post this week and you might win the Wool-Blend Felt pictured up there on the left.
Materials
a Jon Jon that fits your son/nephew/very lucky little friend
Tracing or freezer paper
Sharp pencil
Scissors
Fabric – I needed a yard for a size 2T John John
Coordinating thread
Fusible interfacing
Fabric scissors
Pins
Sewing machine and basic supplies
Seam ripper (because you will mess up, and you can undo it!)
Two cute buttons for the shoulders
Snap tape for crotch (if desired)
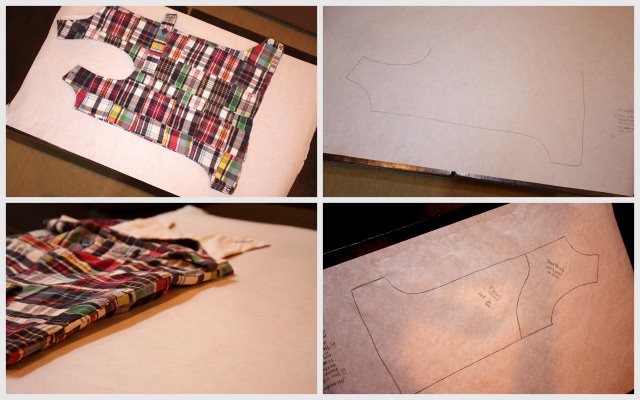
1. Fold your pre-existing John John along its center seam and trace the front from the top to the bottom of the side seam, as shown.
2. Refold the John John along the side seams (as you would normally), and place it face down on your paper, lining it up with the lines you’ve traced. Now, trace the side seam from under the arm to the bottom of the garment. Retrace all lines and work out the little bumps.
3. Add 5/8 inch for seam allowance all around your tracing, except the bottom—there add about an inch, so that you can have a nice thick hem. Add seam allowance by placing your ruler perpendicular to the traced line and marking a dot every inch or so. Then connect the dots. Mark this piece “FRONT – cut 2.”
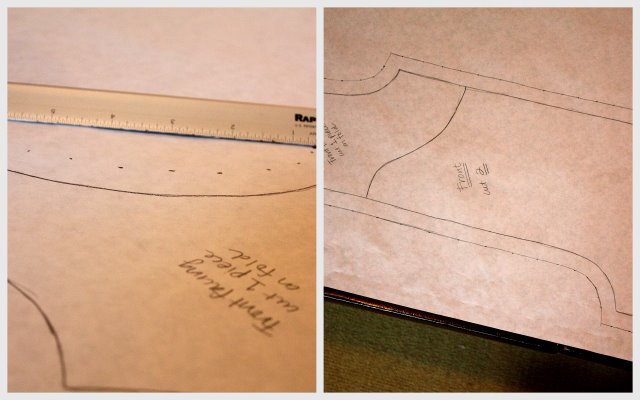
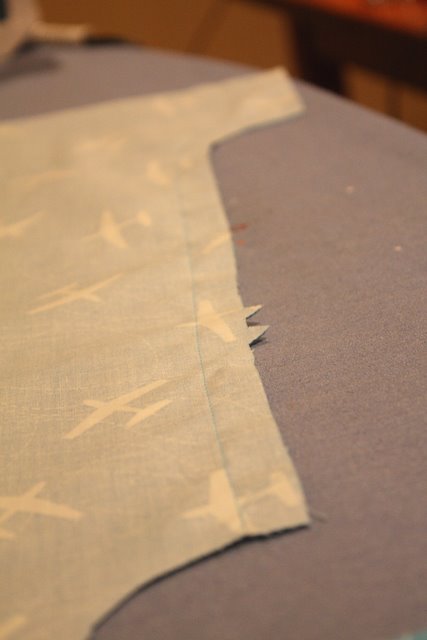
4. Repeat this entire procedure with the back of the garment. Mark it “BACK – cut 2.” Now, mark both pieces with the size of your traced John John so that you can use the pattern over and over. (Disregard the little triangular notches on my pattern and fabric–I was trying something that wasn’t worth the time).
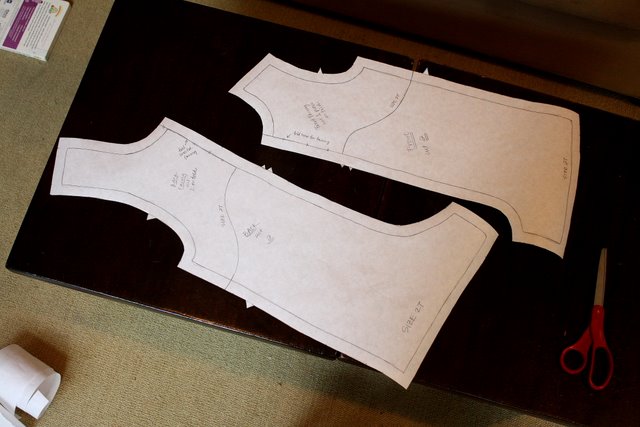
5. Make facing pieces by drawing a sloped line from the center seam to a point about 3 inches under the arm on the front and back sections (see pic). Trace these sections onto separate pieces of paper with ONE CHANGE: exclude the 5/8 inch seam allowance on the center seam side, as shown. Your original line on this side will become the fold line for cutting facing pieces.

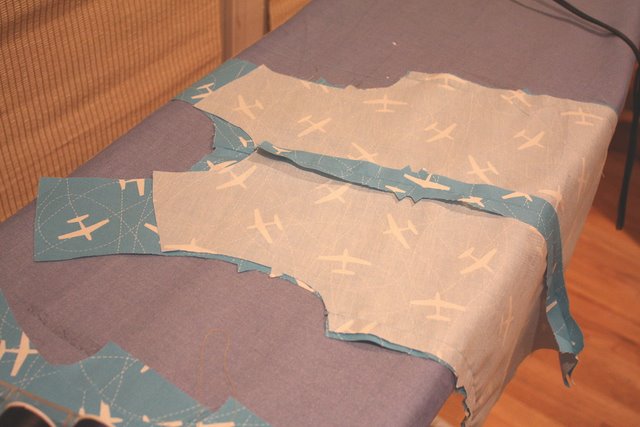
7. Cut out all pattern pieces and pin them to fabric. Fold your fabric as shown, so that selvages (edges of the fabric) run right down the middle like the crack between a set of double doors (you should iron the fabric first, even though I didn’t). Make sure that the facing pieces are aligned with the folds.

Now cut it all out. Before you put up the scissors, go ahead and pin the two fabric facing pieces to your fusible interfacing (wrong side of fabric should face the bumpy side of the interfacing). Cut interfacing to match the fabric. Now it’s time to sew.
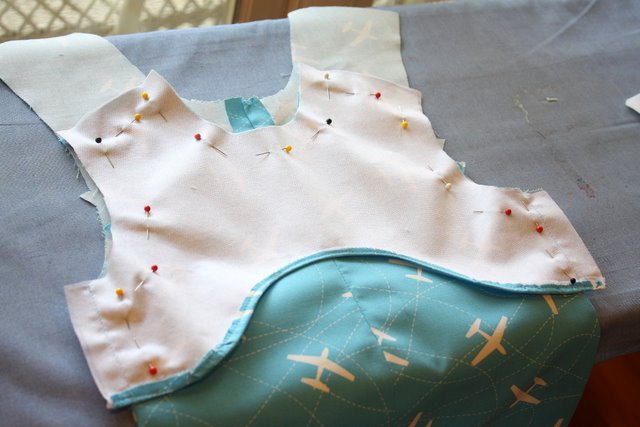
8. Pin the two front sections together, right (printed) sides facing, and stitch the center front seam, leaving a 5/8″ seam allowance. Pin the two back sections together, right sides facing, and stitch the center back seam. Press the seams open.
9. Pin the front and back together by aligning the pieces at the underarm.

Stitch them together at the side seams, and press the seams open.

Here’s what we’ve got at this point. Look how far we’ve come!
10. Now, following the instructions on your interfacing, fuse the interfacing to your facing pieces.
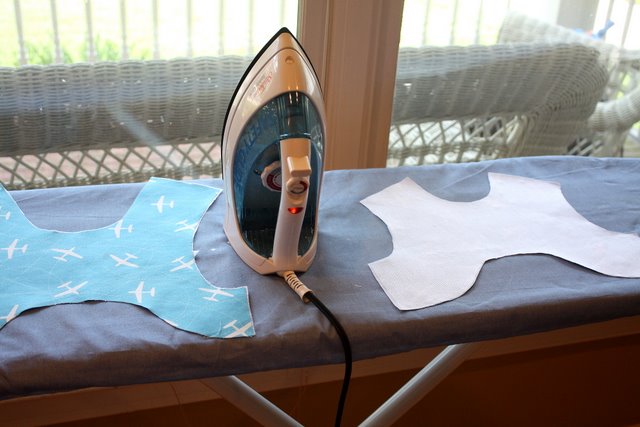
(Ahhh…finally a photo with some natural light. I wish it had lasted longer…someone woke up from his nap.)
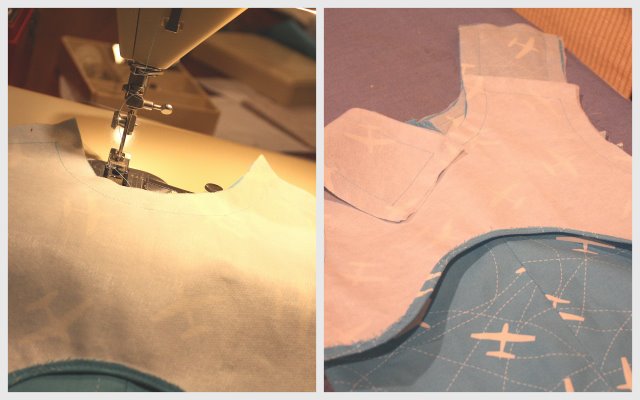
11. Stitch the side edge of facing sections that is directly under the arms. Continue to use a 5/8 seam allowance.

12. Finish the bottom edge of facing. Previously, I’ve used a zig zag stitch over the edge, but it always ended up messy, or led to sewing machine seizures. This time, I stitched ¼ inch from the edge, then turned fabric under along the seam and re-stitched. Much nicer result.
13. Pin RIGHT side of facing sections to RIGHT side of neck edges, matching the side seams and centers.
Stitch the neck, shoulder, and armhole edges. Before you do, MAKE SURE that the side seams are pressed open inside your John John.
14. Now, clip the curves. Clip a triangle off of the squared edges at the shoulders, and clip little triangles into the seam allowance around all curves. Turn facing to the inside of garment, using point turner to form corners. If it’s puckering on the curves, clip out more. Press.
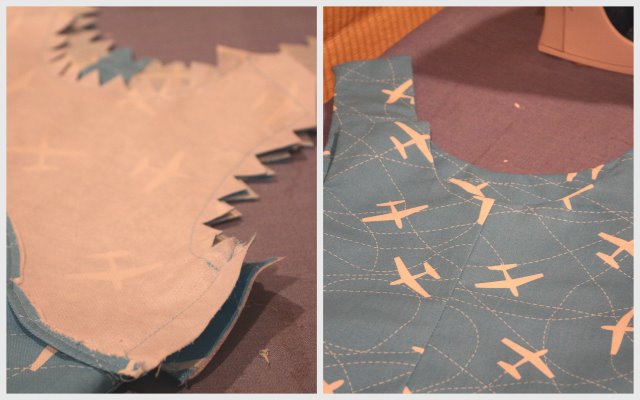
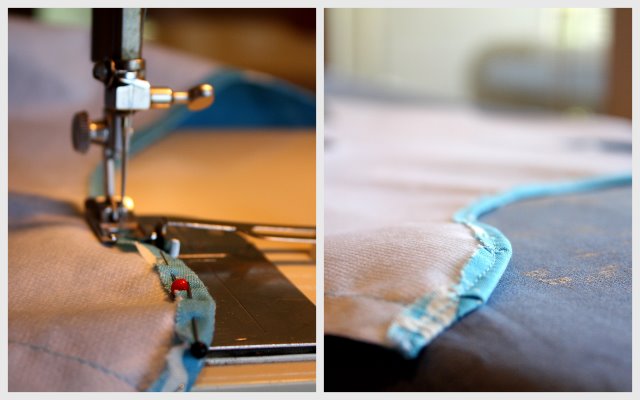
15. To keep the facing from rolling out of place, stitch facing to garment in the seam under the arm. This is called “stitching in the ditch.” Who knew?
16. On the outside of the John John, sew ¼ inch from the edge around the neck, shoulder, and armhole edges. This is optional—it’s reinforcement for the garment, and a tad decorative, but you could skip it if you’re in a hurry.

17. Make the button holes and attach buttons. For this, you’ve got to use your sewing machine manual because I’m guessing your machine is a ton newer than mine and will do the whole thing for you. (Mine is actually my mom’s from 1970 and is awesome, minus some of the shortcuts.) So, just use your disappearing fabric ink pen to mark the buttonhole location and proceed according to your manual’s instructions. Then use your pen to mark two dots through the button holes onto the shoulder straps where buttons should be, and sew on buttons by hand.
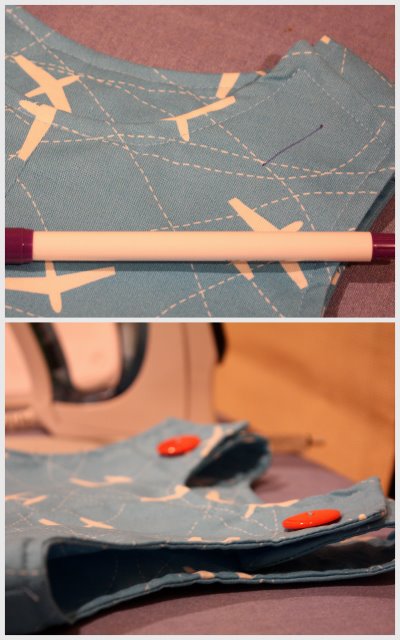
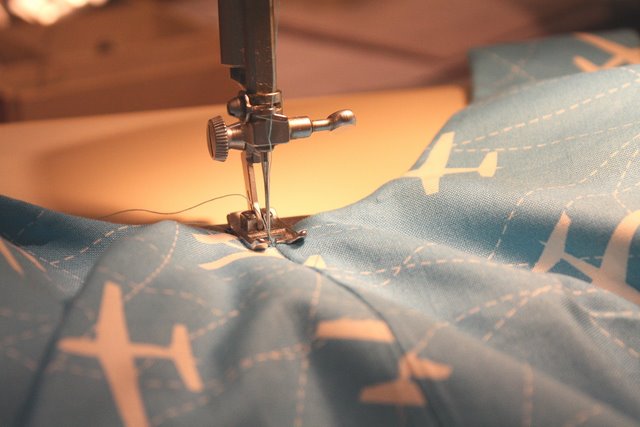
18. Press up the hem as high as you want; then press the raw edge under ¼ inch. Stitch hem as close as possible to the turned under top section. (I forgot to allow extra fabric for this, so my hem is too short.)

You’re SO close now. Can’t you smell the completion?? One more step…we’re going to apply the snap tape.
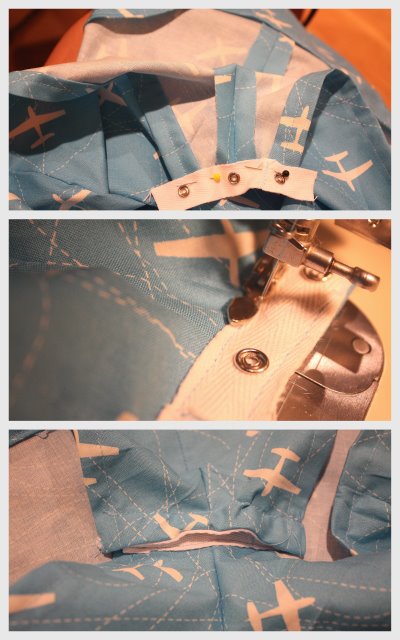
19. First separate the knob and socket halves of the snap tape. Now, with the KNOBS face up on the OUTSIDE front of your garment, pin the knob half of tape 5/8 inch over the raw edge at the crotch. Leave 1/4 inch of the tape on either side. Then turn under tape ends and stitch the inner edge of tape. Now, turn the tape to the INSIDE of garment and stitch the remaining edge and ends in place, as shown below.

20. With SOCKETS face up on the INSIDE of the back of your garment, pin the socket half of tape about 5/8 inch over the raw edge at the crotch. Check to make sure that sockets line up with knobs, and leave 1/4 inch of tape for turning under. Stitch close to the tape’s inner edge. Now, turn the tape to the OUTSIDE of garment and stitch remaining edge and ends of tape in place.
AND YOU’VE DONE IT!! You made a precious outfit for your little guy. I don’t know about you, but I’d like a margarita now. I might have to chase Little Brother instead.
Enjoy your creation!
A late breaking addition: if you want to add an applique, do so after stitching the center seam in the front section of your John John (just after step 8, above). You can use the same method that I did to make the boys’ Super Shirts (except that you won’t need two layers of applique–so it will be easier!).
Thank You Thank you Thank you!!!! I love giving handmade gifts to family and friends and have always struggled with creating cute (but not pretty) little boy outfits. This is just perfect!
OMG I have been waiting for this!!!!!!! 🙂 I have a boy and didn't know how to do this. Definitely going to be trying this when my fabric comes in. and you can make it pants instead of shorts very easy. AWESOME! Thanks!!
Do you know that cute fabric she used by chance? I love the airplanes and color.
Allison, I'm so glad that you like it! The fabric came from Hancock's–I loved it, too. It is from a collection called City Signature by M'Liss, and it looks like it's still available in their online store: http://www.hancockfabrics.com/M–39Liss-Airplanes-on-Blue-Cotton-Fabric-City-Signature_stcVVproductId98175852VVcatId551628VVviewprod.htm (sorry about the monster link).
Thank you Elisabeth!! Yes it's adorable! The red buttons with it give it that little extra something.
oh my goodness!! i am in the middle of nowhere but had to go find internet just so i could see this cuteness and say how much i love it! yay boys!
Back when my boys (now 20, 23 and 25) were young enough to wear mama-made clothes, "jams" were in style. Are you old enough to remember those? They were brightly colored, longer-length shorts. The kids also liked patterned long pants, too. So we sewing moms got to make cute things for the boys, too. Even the bigger ones!
I'm not sure what's in style now for boys, although they seem to like hoodies and jeans a lot.
I totally agree there is a lack of fun things to make for boys out there. It was a blast to sew for my daughter (now 25) but I also loved to see my boys in things I made. Your little guy and his outfit are just precious!
Thank you, thank you! I only have a little girl but I don't always want to be dressing her in cutesy little outfits. I've been looking around for a romper pattern!
Thank you! And I love that airplane fabric 🙂 (By the way, up here in Ohio, I've never heard a romper called a "John John.")
I love all of the cute girl clothes that I see posted but I have boys! This is the cutest little outfit! Thanks for posting!
Fantastic! Yay for boys stuff indeed! I can't wait to try this – I will let you know if I manage under four hours. 🙂 Hope it's OK – I added this to my blog. Thanks Elizabeth!
This is so cute!
I just HAVE to make one of these for my son, Johnny aka John-John!
I love how you listed "seam ripper" as a required tool for this. I've been using my seam ripper more than I ever thought possible in the last few weeks. But I think it's a good thing – it means that I'm stretching my skills. I will become a better sewer as a result.
Is "sewer" a word (besides the one under the street)? How about "sewman" or "sewist" or "fabricmaster". OK, "seamstress".
Hi! I came across your tutorial after searching all over for the perfect John John pattern for my boy – I suspected that I could puzzle it out myself, but I wasn't totally confident in my pattern making abilities (new-ish sewer here), until I saw this! Following your instructions (with a couple tweaks) I was able to finish mine in just a couple of hours and it is totally adorable.
Thanks so much! As a mama to four girls and just one boy, I am constantly searching for cool patterns and tutorials for the little guy. Yours is a lifesaver (and moneysaver, too)!
I keep trying to find the download for the precious little John-John outfit, but can’t find it anywhere. Can you please help me. Thank-you so much; have been trying to find something to click for over an hour, but see nothing.
What if I don’t have a John-John to copy from? Is there anyway you could email me a copy of your pattern? Please? I truly adore all you do and make as much as I can. Again, thank you
I would love a john john pattern too…. if at all possible! Thanks in advance to anyone who manages to email me one!
Hello! How do I go about getting the pattern? I can’t find anywhere on this page that has a link to a pattern and I’d love to make this for my nephew. Thanks very much.
I also would love the pattern for this romper. I want to make it for my nephew and I don’t have any rompers to trace. Please let me know if I could have one emailed, or where I could find a pattern. Thanks!
I also would love the pattern for this romper. I want to make it for my 3 year old grandson who lives with me. Thank you so very much!
[…] Here’s another version They call these jon jons, which I totally don’t get. Must be a regional thing. I just call […]
Where did you get this fabric I am absolutely in love with it!