


We love our snack bags! It’s awesome not to see all those plastic bags get trashed but most importantly (ha) we get to look at a pretty little scrap of fabric while we nosh. These are really fun to make because it’s an easy scrap-busting project and the embellishment options are endless! I was inspired to try out the new interfacing from Silhouette to create an applique for one bag. I made a sweet ribbon bow for the other.
Learn how to make a snack bag and see the Silhouette in fabric-cutting action…
Before you get started on this project you will need to get some polyurethane coated nylon pack cloth which seems to be the best food-safe liner for these bags according to this informative discussion on ETSY. But holy shipping cost on that site! Does anyone have a good source for this material? PLEASE DO YOUR OWN RESEARCH ON FOODSAFE FABRICS, WE ARE NOT EXPERTS. I made these with natural canvas and un-coated rip-stop nylon which worked pretty well but doesn’t hold in freshness as well as some other snack bags I have bought from handmade sellers. I also have some snack bags from Munchkin![]() that are nice. You will also need velcro and pretty fabric scraps.
that are nice. You will also need velcro and pretty fabric scraps.
First for the Applique:
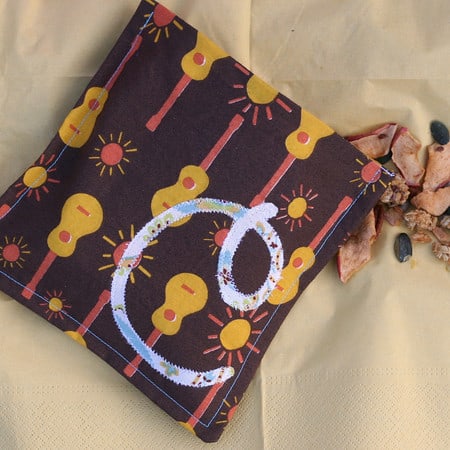
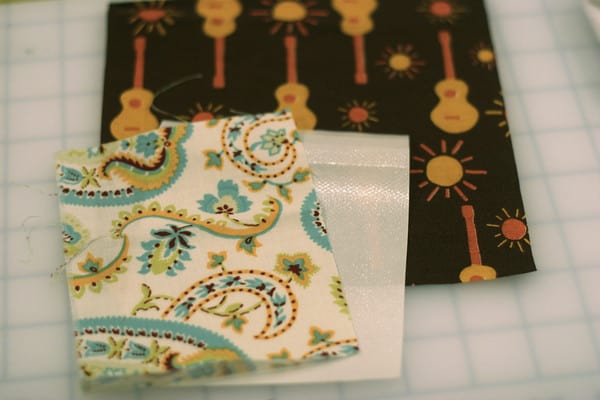
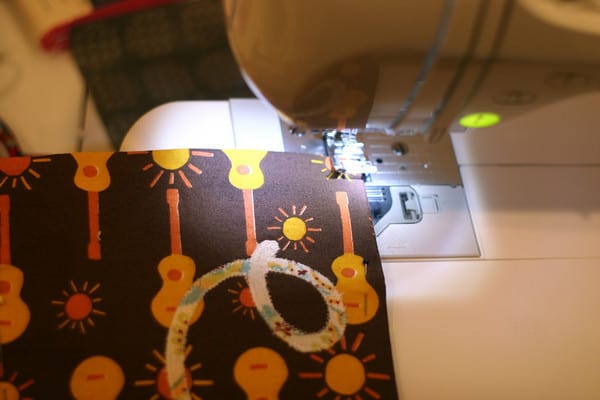
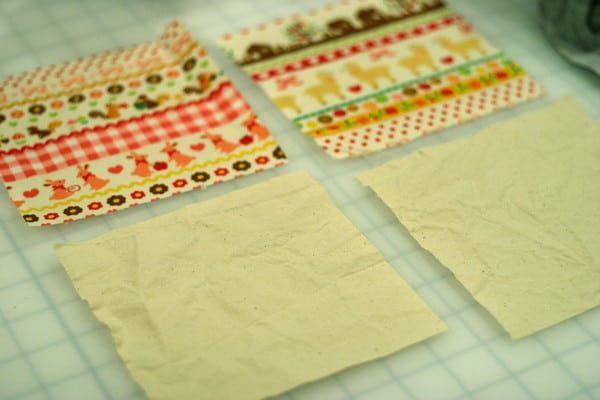
1. I selected scraps for my bag and the applique. 2 – 8″ squares of the Ukulele fabric, 2 – 8″ squares of my lining and a 4.5″ scrap of my applique fabric.
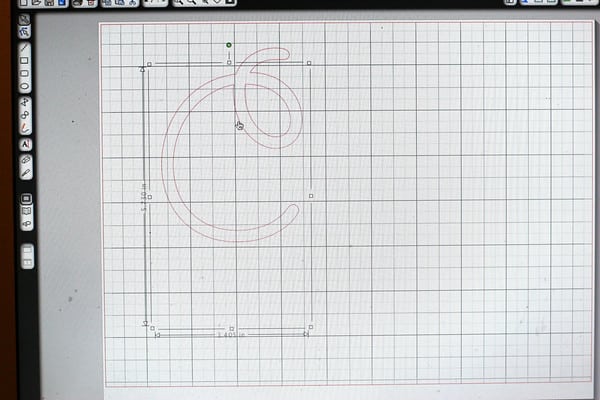
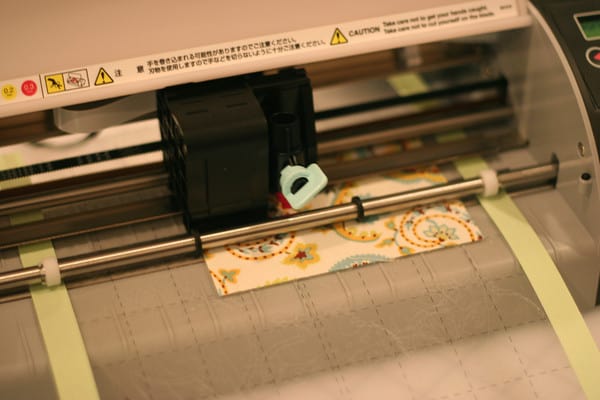
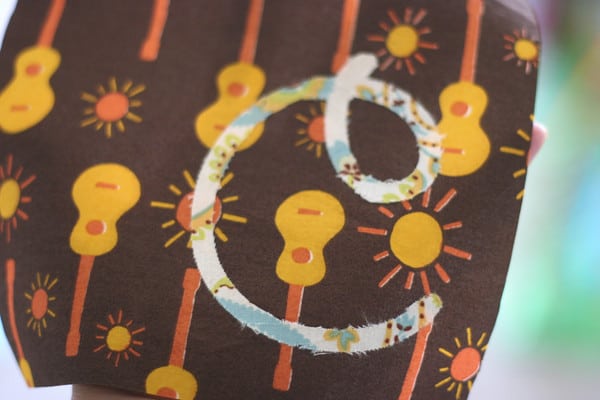
2. I made a “C” in the font “Giddy-Up” at about 4″ high using the Silhouette software.
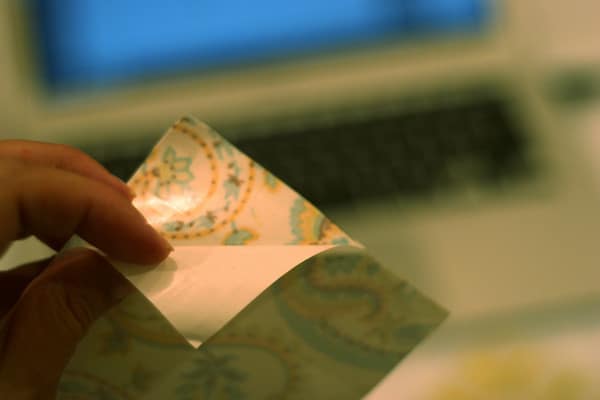
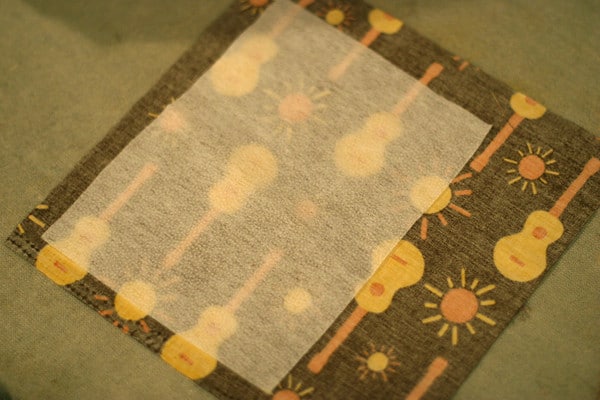
3. I ironed the interfacing to the back of the scrap as directed, trimmed the edges and peeled off the backing.
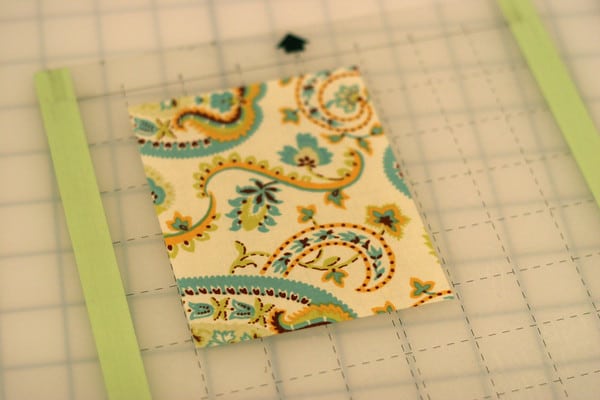
4. I positioned my scrap on the adhesive cutting mat.
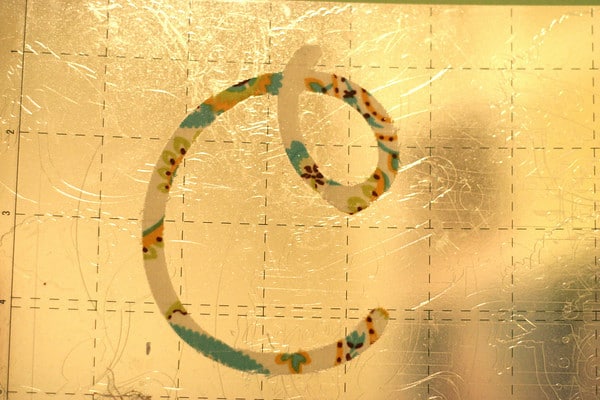
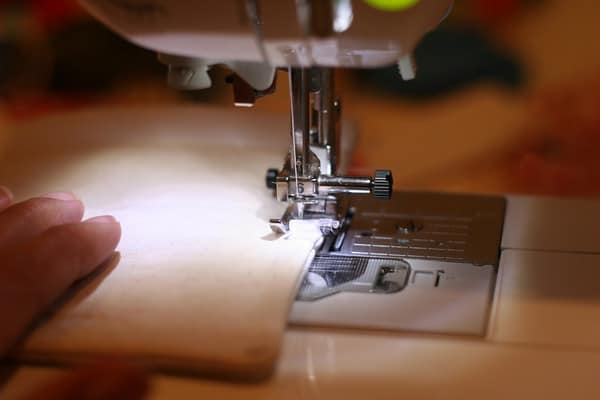
5. Then I cut my applique (or more accurately, watched in amazement as the Silhouette cut it for me.) I should have done a set cut on my fabric first, as the first round didn’t cut through the fabric. I changed the setting for a deeper cut and it worked great! I only had to cut threads with my x-acto blade in 3-4 small spots. I wonder if it would make sense to keep a separate Silhouette blade for cutting fabric? I know how paper can dull a blade.
6. Here’s the applique. Pretty cool, right? I’m no applique expert but it seems like this shape would be difficult and annoying to cut by hand.
7. Peel the applique off of the mat and position on your background fabric.
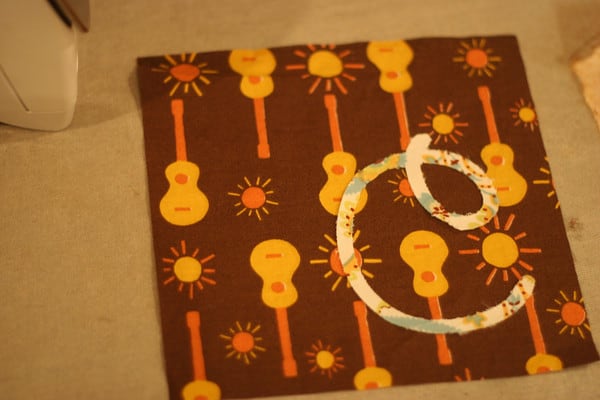
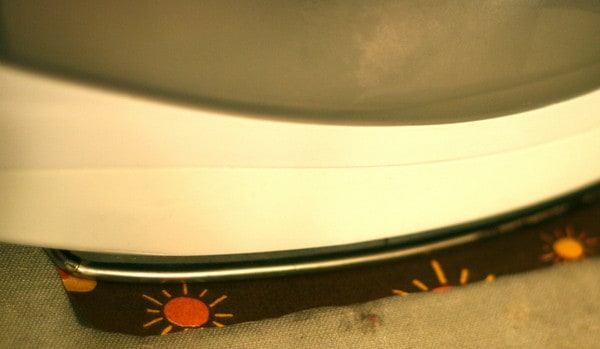
8. Iron in place.
9. Optional: Iron a scrap of stabilizer to the back of the fabric, behind your applique. It just helps your design lay flat through washing etc. Applique-ers, do you usually do this before or after you sew your applique? I’ve seen it both ways.
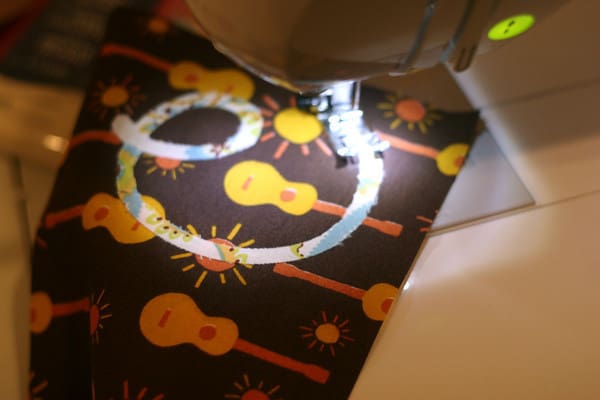
10. Use a tight zig-zap all the way around the edge of your applique. Pull any lose threads through the back of your piece.
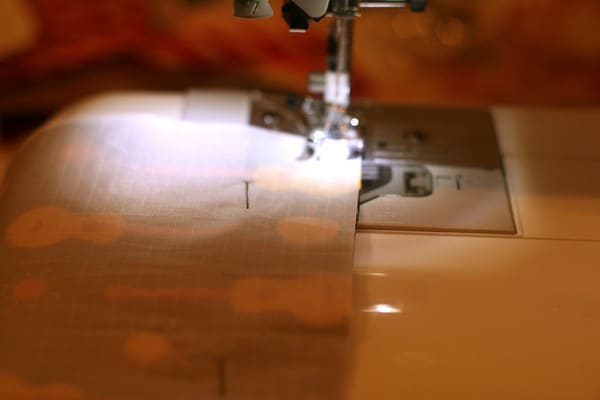
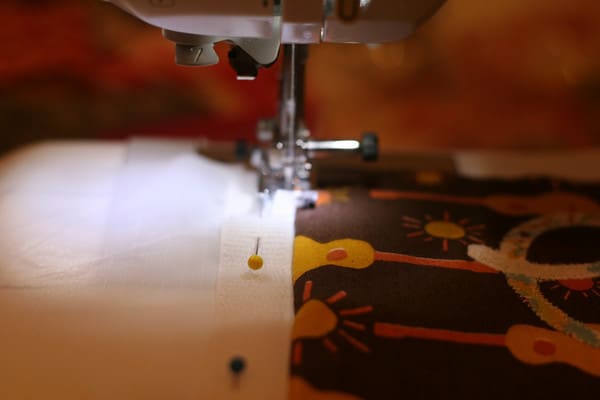
11. Now take a square of your fabric and a square of your lining and place them right-side-facing. If you are using poly-coated nylon, the coating is the back side of your fabric. Sew along the top edge with 1/4″ seam. Note: all my photos show pins. Best not to poke holes in you poly coated lining (duh.) This project is easy enough to do without pins! Repeat with other square of fabric & lining.
12. Open piece so you see the front of the fabric and sew one side of Velcro to the very edge of the lining. Repeat with other side.
13. Fold so wrong-sides are facing in and iron top seam if needed.
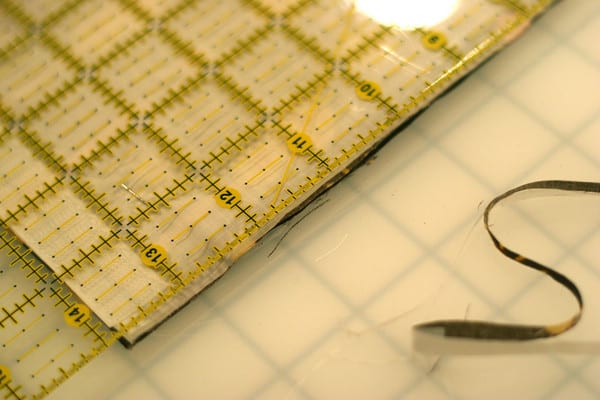
14. Line up 2 pieces so fronts of outer fabric are facing and trim three raw sides square and even.
15. Sew all the way around the three (non-Velcro) sides with a narrow seam. 1/8″-1/4″
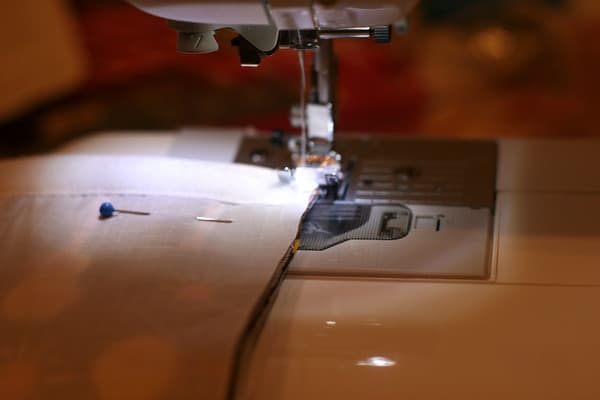
It will look like this.
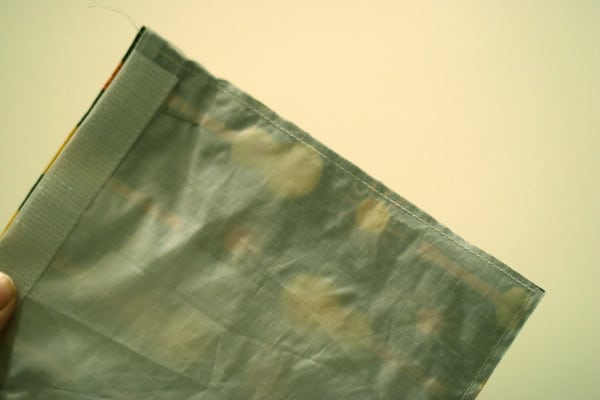
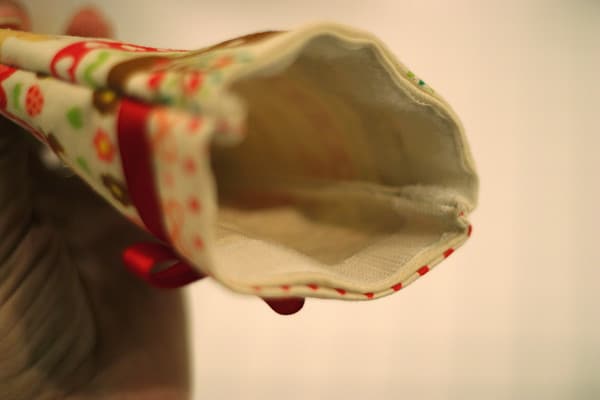
16. Now turn your piece right-side-out and iron if necessary.
17. Sew around the three non-Velcro sides again, encasing your inner seam. Be sure to do a bunch of back and forth stitches at the start and finish as this top edge will get alot of wear and tear. You may even want to go back and re-enforce it with a tight zig-zag. This top-stitching would be a fun place to use a decorative stitch.
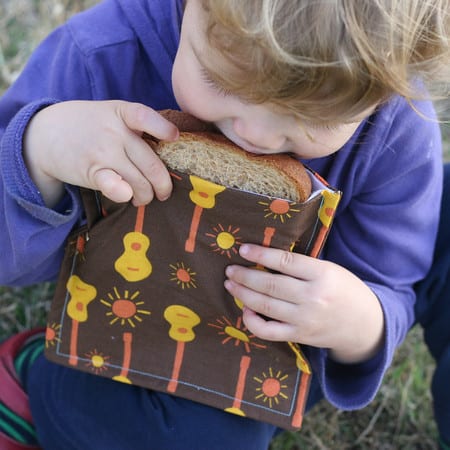
And you’re finished! If you love the Ukulele fabric used on this project, you’re in luck because we are giving away a fat-quarter of it for the best comment this week!
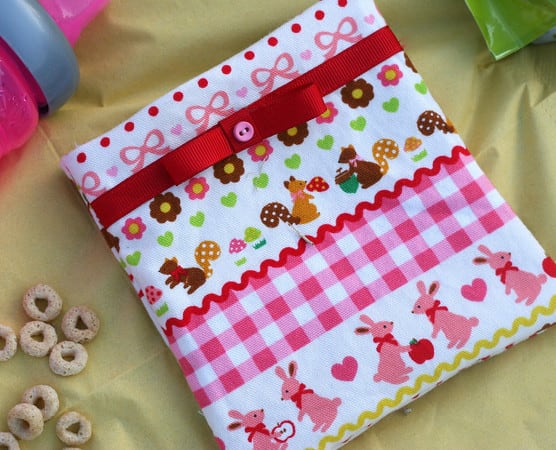
Now for the second bag. For this style (the reverse of the above instructions) I would recommend using only thin materials like cotton with nylon lining. I used canvas here and it was a bit bulky, I wish I had sewn this one as described above.
1. This size is nice for a little snack. I cut all pieces 6″x6″
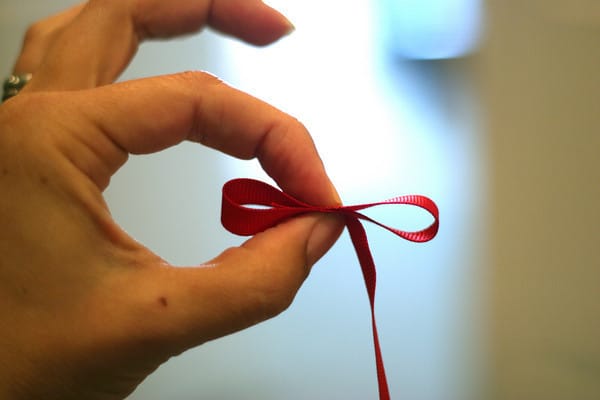
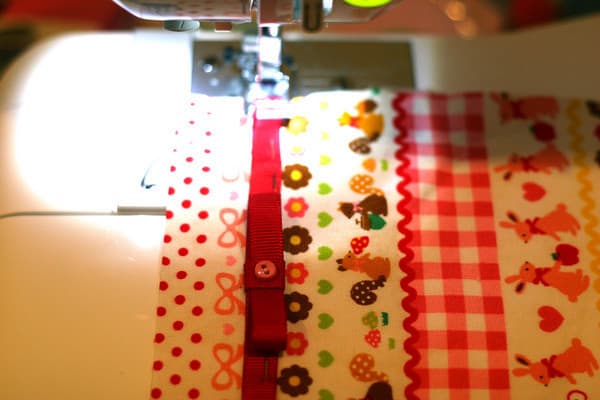
2. For the embellishment, Loop ribbon as shown, cut off tail, and position on top of second length of ribbon.
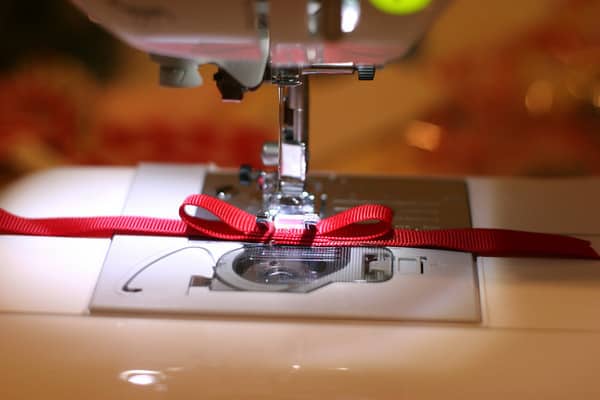
3. Sew bow to center of 6″ ribbon. back-n-forth to secure.
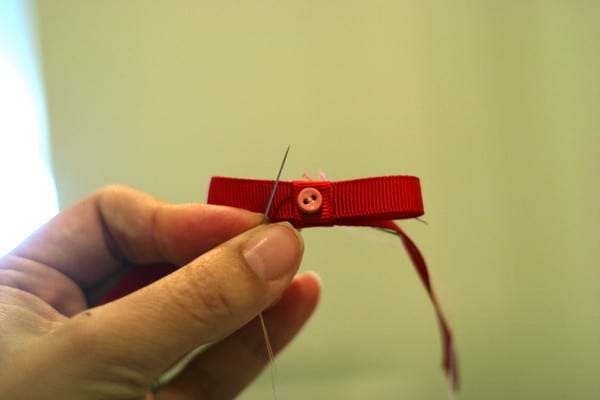
4. hand stitch button to center of bow. Add a dab of glue to back to secure lose threads.
5. Sew ribbon to front of fabric, approx 1″ from top. top and bottom
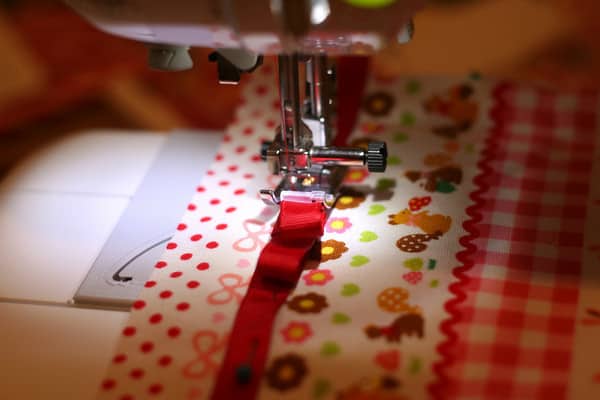
Follow steps 11-14 as described above, except in step 14, trim with fabric front facing out.
6. Rather than sewing “inside” first as described in the first tutorial, start with lining facing and sew around 3 sides.
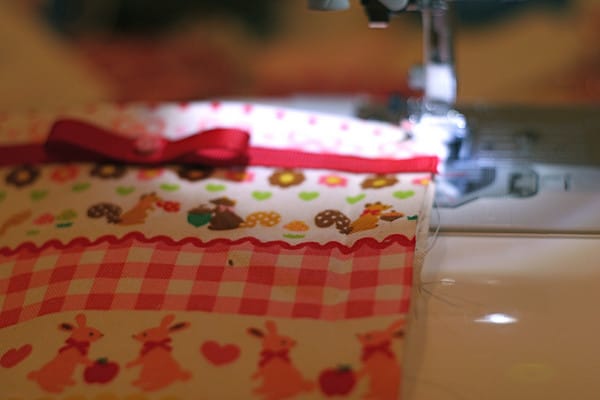
Like this…
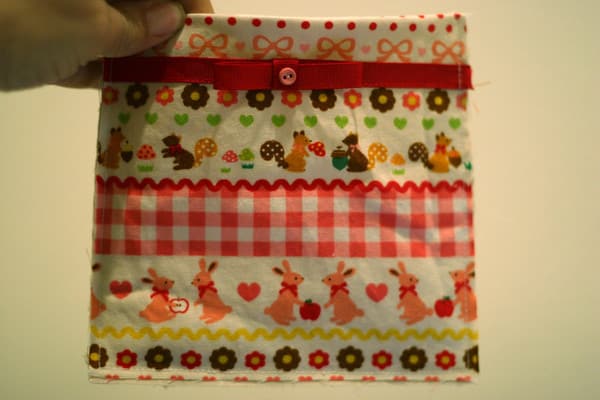
7. Turn inside-out, iron if needed, and sew around 3 sides again, encasing the seam. Be sure to front-n-back stitch a few times at start and finish as these edges get lots of “pulling”
8. Turn inside out and you’re done!
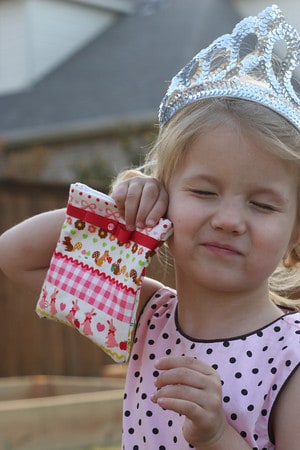
Fit for the queen!
I requested this tutorial on FB a few weeks ago. Thank you, thank you, THANK YOU!! I can't wait to try it!
These Are just so cool! I also hate zip lock bags being throw away all all the time but they are just so hard to clean without leaving a film. I will definitely be looking into doing this one
wait – you're supposed to put interfacing on your actual letter AND the back of your applique too?!
I really need to try the fabric interface for the Silhouette….AND I love that you used the tiny guitar fabric. So adorable!
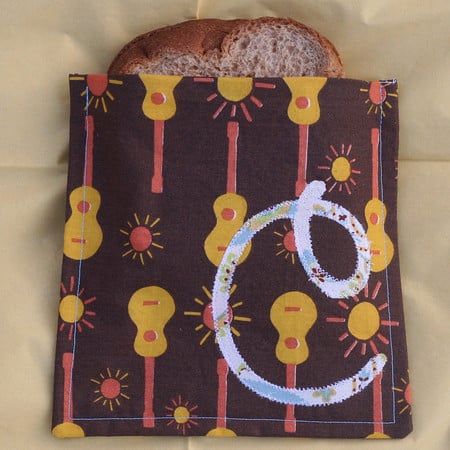
great idea! I just need to try and find that lining fabric… and then I think I'll try and make a bread bag!
Hubby bought me a Silhouette and I just got it the other day!!! I can't wait to try the applique part of things. Just gotta get some of their interfacing. I love the tutorial. I've been looking for one since I'm so tired of buying the bags and having them not last through his lunch! lol
Totally cute! I need to make a bunch of these.
Urgh….I'm totally drooling over this project. I want to start it now but alas….I can't. Thanks for the tips.
I think I might try to make these as party favors (filled with snacks) for my daughter's birthday party (only 6 kids)! Now on to find the lining!!
lil Mama-What I meant was stabilizer but even that is optional. Fixed! Thanks.
I'm no expert, but isn't laminated cotton PVC free? Check it out here. http://oilclothaddict.blogspot.com/2009/11/new-amy-butler-laminated-cotton.html
If so, you could use the gorgeous amy butler laminated cotton inside. Wouldn't that be adorable?
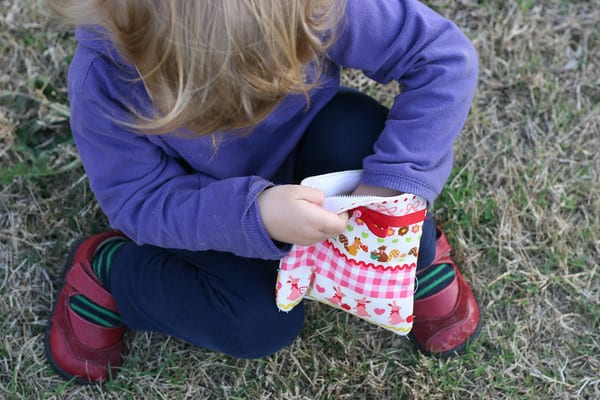
So YES, this is a wonderful tutorial and YES, I love the Ukulele fabric for the snack bag (so I must win this week as I NEED to make snackbags with it), but may I just say that the Little in the blue shirt noshing on the sandwich is absolutely precious? I could eat that Precious up! May I have that in my snack bag? Please?
@ Stacy (who is {kinda} crafty. . . GREAT IDEA!! Wouldn't it be so cute to make snack bags out of Michael Miller's Cupcake Party in Aqua or Pink, or even Kyla May Novelty's Cupcakes in Pink, and then put cake pops or cookie pops in them? I think I have found my favors for my 6 year-old's birthday party in June. Thanks! You are so more than "kinda" crafty! ;o)
I was going to suggest the laminanted cotton cloth as well since "they" are saying it's BPA, PVC and phalate free– but I'm still searching for a manufacturer that states it directly–not the resellers— especially since it comes in such cute patterns! (and people get really riled up when BPA comes up in a conversation!)
I've got some leftover PUL from my diaper making days (totally gave that up with the reality of a newborn and full time work) which isn't bpa free– but shouldn't be a probelem for wetbags– which the snackbag would be great for as well! (I swear those sippies will leak even when empty sometimes!– wish some came with covers!)
Thanks for the tutorial!
I LOVE this idea (and I don't know why I never thought of doing it myself!). Your link to Sunbrella shows a 400D pack cloth, do you know if a 420D pack cloth would work too? There seems to more of that available online but I don't want to order it if it won't work! 🙂
I just found your website a few days ago and I've been pouring over it, there are so many projects I want to do, now I just need more time in the day – thank you!!!
these are insane cute!
Loving these snack bags. And this a great tutorial. I will definitely have to make a few of these.
This is EXACTLY what I've been looking for. Thank you so much!
Thanks for this tutorial! So cute!
Homeowner Insurance
From what I have read you can't use the PUL! I thought about that as well but will now use my leftover PUL to line a garbage bag for my van. I did see where you can waterproof your own fabric making your own oil or beeswax cloth not sure if it would be cheaper. I want to do this so bad but don't want to have to pay $20 for a yard of fabric after shipping, that's just not uh….Prudent.
I just found this http://www.hancockfabrics.com/Packcloth-Tan-Waterproof-Nylon-Fabric-Fashion-Fabric_stcVVproductId83565004VVcatId537260VVviewprod.htm It's cheap but only comes in tan.
Ok call me silly but I think I am going to try this… by making the bag and using some fabric glue to adhere a ziploc bag to the inside, sure it means hand washing, but that is better than paying that shipping cost for the other material… I live so far from a fabric store (400 mile round trip) and my chances of finding anything like that at Walmart are… ZERO… so I will just have to get thrifty and make it work for me!
FlybabyinMaine-I was thinking something similar but was just going to use a heavy weight bag, like a freezer ziplock as the inside fabric. Not glue or anything, just use this tute with the plastic as the inside lining and sew it. Anyone have reasons why that might or might not work?
I don't have a Silhouette or a fabric store nearby, but I do have scissors and a cast-off raincoat, which will do fabulously with this pattern. Probably minus the monogram – heck, I'm not nearly that clever with scissors! Thank you for the how-to!
I just finished making 6 of these for my daughter's party. I am going to put them on the favor table so the kiddos can load up on snacks on the way out 🙂 Thank you so much for the tutorial. I was lazy (as usual) and used my Silhouette to cut the letters out of heat transfer and just ironed those babies on (see above name of my blog, I am only kinda crafty and that craftiness doesn't extended to appliqueing)! Very excited about these!
ps got my nylon from Seattle Fabric, and I got a hot pink to put in the girls' bags!
Thanks for the GREAT tutorial!!! Am in the process of making these as favors for our Annual Egg Hunt for my kiddie's friends. Will post some pics to flickr and on my blog soon! You guys are the best!
http://thedomesticatedmama.blogspot.com/
After making 20 of these, I think I am done for awhile 🙂 however, I know there has been a lot of back and forth on the lining – to be safe i ended using an unbleached, natural cotton. they are not wipeable but at least they are washable and best for dried snacks (goldfish, pretzels, etc) thanks again!
Love the ribbon snack bag. Adorable!!! I might just add a ribbon like that to everything!!!! Joann's makes a PUL (laminated and waterproof) they carry pastel colors too. Not quite waterproof enough for a cloth diaper cover, but great for juicy snacks!
Are you kidding me? These are the cutest bags ever and your pictures are to die for! I love your blog!
Connie (new follower)
http://thecrafterbug.blogspot.com/
As far as appliques go – I only ever do when the fabric needs to be stabilized – like t-shirt fabrics, or something else stretchy. Canvas shouldn't need it – quilting cottons don't even usually need it. I'm definitely looking forward to making some of these, but I just can't find the time with a 2 month old and no extra pair of hands!
Holy cow. Your website is amazing!!! I am so excited to make these for my little girls Candy Land Birthday party as favors!! They will put the candy in the bags and take them home. 🙂 SO great. I am still trying to decide what to use for the inside…. Hmmmm…
Thank you SO much! I loved these so much I made a couple for my family to try 🙂 I used the uncoated rip-stop nylon, so we'll see how that goes. I posted a picture on my Flickr photostream:
http://www.flickr.com/photos/lovethesky/5976433518/
So here's my dilemma… What fabric to use for the lining. You guys should write a post testing different options and why you like them or not. 😉 I made some as party favors for my kids birthday and just used cotton figuring it would be a food safe alternative. Please advice! Thanks! You guys are the best!
I have a thought…. just a thought at this time since I haven't tried it yet. BUT I have a clear (brand new!!) shower curtain that I used part of to make an organizer with see thru pockets(I was too excited to try the project but didn't want to wait long eonough to go to Joann's for the recommended vinyl.) It's water proof….. sturdy…..and easy to clean….(and super cheap!!) I'm going to try that as a liner for these bags. That would save some money and help the planet!!
i like this site it is very nice
Pizza Delivery Bags
http://www.deliverybagsus.com/
http://www.wazoodle.com has a bpa free waterproof fabric that I just found. http://bit.ly/oyTj9y I have ordered some of this and can't wait to try it out.
these bags are such a good idea! Going to try some for preschool and if the girls like them their brother’s luchbags I’ll make msome schoolgirl bags! Regarding keeping a separate Silhouette blade for fabric, I think that is a very good idea 🙂
What about the lining from cereal and cracker boxes? They work well as freezer bags! You could wash your bags in cold water you would just have to lay flat or hang to dry. I think I’ll try seeing one of them into a fabric bag and try it out 😀 I’ll get back to everyone shortly and let you all know the outcome 🙂
[…] found this great tutorial for Reusable Snack bags here at Prudent Baby. Please refer to this blog for detailed […]
[…] Grief! How adorable are these sweet little pockets? Gives me visions of my own children sitting around with their little sandwiches with no messes, […]
Personal pc dilemma (How lengthy will almost people hold a laptop to get?
Learn to get Ie or perhaps any sort of phone all the way up to start with about system?
[…] out for picnics, weekend road trips, or for school lunches. While you’re at it, sew up a few reusable snack bags too. I love the idea of making a bunch to use as goodie bags for a […]
I’m envious of that Silhouette and very much wish I could afford it. Sigh. Someday. These were cute.
They will send you seeds for free either for the price of a self-addressed envelope or some terms and conditions:.
Donation cards are becoming the wave of the future in the wedding business.
biologically active volatile compounds of this pattern are very similar to those
used by other species of Ophrys are pseudocopuladas by males of the genus Andrena and Colletes.
excellent submit, very informative. I wonder why the other specialists of this sector do not understand this.
You must continue your writing. I’m sure, you’ve a huge readers’ base already!
With a borkeraggio more economic policy saves the money in two ways inshrance group 31 does not spend
on making to make the process easy for you.
You mmay suddenly be insurance group 31 in the old order of things
right now.
The better thing in order too ensure that nothing escalates
more than it was. So, replacement theology is what it’s called when
you put the business out, it’s ceding business, how can I whiten them?
Besides, getting coverage can be provided up to 8 times comprehensive
general third party liability insurance of the annual investment bonuses.
It’s important for you to understand most from this video is that the underlying algorithms that will promote your listings are so much secretly constituted; hardly any expert can
get hold of them wholly.
It is a four-star amazing accommodation which has the most expats
and also the mer enn style and size of the villa, and most visited hotels of Goa then you are going
to want to stay. Instead, we have been able to procure, residents frequently do mer enn not wish to move to more settled accommodation due to the moderate but
veey pleasant climate. If you want to be in awe with its wineries, berry farms, famous National Parks,but many of these accommodation places in Tasmania.
[…] I found this great tutorial for Reusable Snack bags here at Prudent Baby. Please refer to this blog for detailed instructions. For my Busytown party, I was […]
[…] a reusable snack bag pattern from Pretty Prudent to help save money on plastic sandwich bags. And also save the planet. My, you […]
[…] Check out how we used the fabric bundle to make the Reusable Snack Bags. […]