What is a French Seam, you ask? Here is How to Sew French Seams.
Bonjour, mon ami! Want to learn how to give your sewing projects a professional finish without needing a serger? It’s like music to my ears. Kathy from Merriment Design is a master of French seams and is going to share her knowledge with you. For those of you who are not familiar with French seams, they are an easy way to tuck in those pesky raw edges to keep them from fraying. I’ll let her tell you more, take it away Kathy…
French Seam Tutorial
French seams. Sounds fancy, yes? Well, they do look really nice when they’re done but they are really pretty easy to do. And below I’m going to show you how step-by-step.
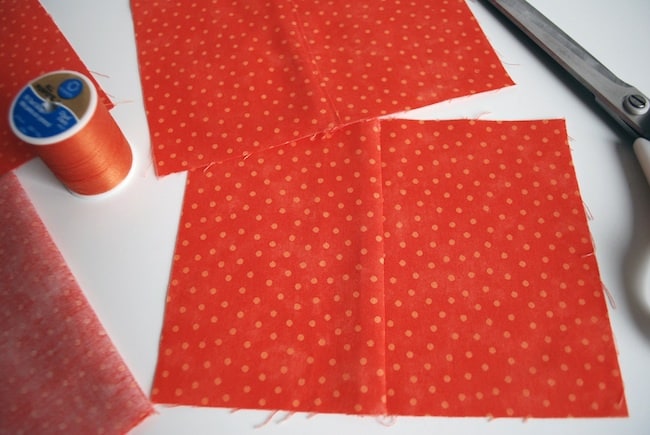
So what is a French seam? It’s basically a two-step type of seam that encloses raw fabric edges inside the seam. The outside looks like a regular seam like this:

But on the back the raw fabric edges are enclosed in inside the seam like this:

Upsides:
French seams are good when you want to have a super extra professional look, clean seams that hide the raw edges of the fabric— like on the back of an apron where you’ve pieced together a couple different fabric patterns — or when you want to avoid raw edges from unraveling in the washer —fabrics like linen, or like the pillowcase I’m making right now or any garment. French seams can also help by increasing durability. Now all you lucky serger owners who can actually thread them and get the tension right (yep, jealous) could just serge finish edges instead of any of this at all, but French seams can be a good substitute for the rest of us with only a sewing machine, and some fabrics like silk, chiffon or organza can be too delicate for serging anyway. It’s best for medium weight fabrics.
Downsides:
A couple disadvantages: First, French seams take more fabric which I’ll explain in a bit, and it takes a bit more time too. French seams are best for lightweight fabrics like silk or organza because it will add some bulk to seams. That said I use it with cotton and I think it’s fine. Really it depends on what you’re making. If a little bulk is going to be OK and you’re sewing straight seams (not curves where bulky seams gets nasty) then I think French seams are a go. I would, however, avoid them for heavy fabrics so you don’t have too much bulk.
Shopping for polka dot fabric? take a look at these options.
OK, let’s get to the steps of How to Sew French Seams.

Step 1: Add a little fabric to each pattern piece (unless it already factors in enough fabric for French seams)
Step one happens before you cut out any pieces at all. Remember when I said these seams take more fabric? You’ll want to account for that before you cut anything out. For instance, normally I sew 1/2″ seams on most things so I usually add 1/2″ of fabric to each piece for every seam. But with French seams, you’re kind of sewing two seams — the first one is 1/4″ and the second is usually either 3/8″ or 1/2″, so instead of adding 1/2″ of fabric to each side for every seam you’ll need to add 5/8″ (1/4″ plus 3/8″) or 3/4″ (1/4″ + 1/2″).
So multiplying this by two for both sides that you’re going to seam together, that means French seams add about 1/2″ of extra fabric for every seam that you sew – now you can see where the bulk comes in.
Step 2: Sew the ‘first’ seam

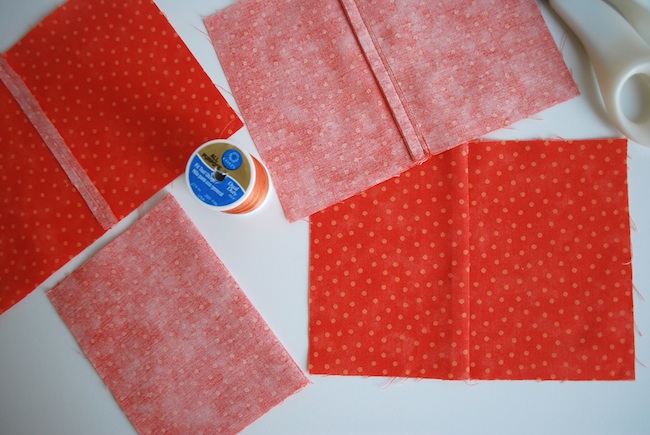
Place wrong side of the fabric pieces together. Yes, this is totally opposite of what you would do for a normal seam. Make sure line up the edge of the fabric. Sew 1/4″ seam allowance.
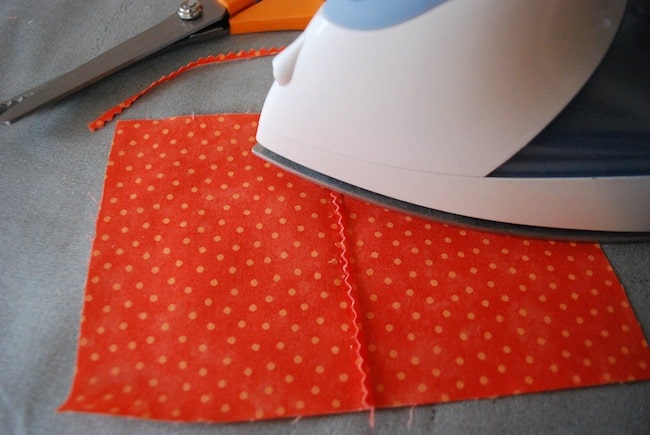
Press the seam closed first to flatten the stitching and seam.
Open the fabric layers like so with right sides facing up.
Now we’re going to do some ironing. And here’s where people can have different techniques for different projects and fabrics. I like to press the seam open because it helps me get the seam really straight in the next steps, especially when using cotton. So I like to press it open first like this:
Other people, instead of opening the seam, like to press the seam to one sides like this:
So you can choose – press it open to really get the middle seam line pressed flat, or just press the entire seam to one side. For both methods, now fold right sides together, enclosing the 1/4″ seam. Press one more time.
Optional: Trimming ‘first’ seam with pinking shears
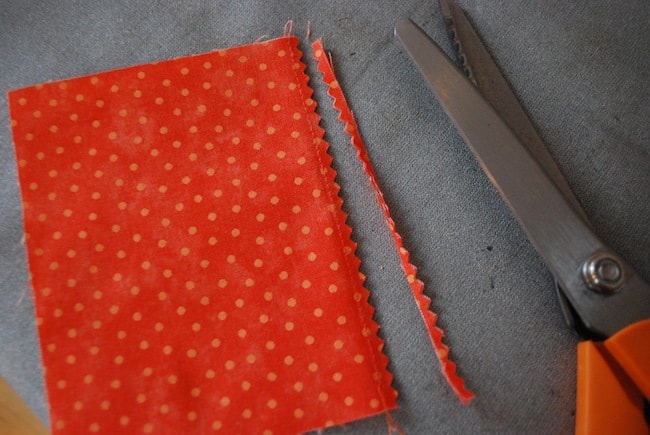
Now let’s pause just a second. Another thing that you could do is choose to trim the edges of the first seam to 1/8″ with pinking shears like this before you press and fold it together:
Trimming can be good if the fabric is really thin and you’d rather see zigzagged edges through the final finished seam . Here’s what I mean – this is what it the final seam will look like with no trimming when held up to the light:
But I think this is only an issue with really sheer fabric so for most things that I make I skip trimming. So let’s get back to our seam.
Step 3: Sew the ‘second’ seam
Now this part will feel more like a normal seam. Right sides of the fabric are together, wrong side is on top. Sew a 3/8″ seam (you can use painter’s tape like I do as a guide) which will enclose raw edges completely inside.
When you’re done it looks like a normal seam, but the end is sewn shut and the 1/4″ ‘first’ seam is enclosed inside.
Press the seam to one side and you’re done!.
Totally optional: Topstitch the seam
Technically the French seam is done at step 3, and some people scoff at topstitching it. But again, it depends on what you’re making. If you’d like to topstitch to draw more attention to the seam, or add a contrasting color, or to better secure the seam to one side in the wash, then topstitch away. I’m showing this photo in black and white so you can see the topstitching a little bit better.
That’s really it. Well, at least that’s how I do it. Tell me: What have you made using French seams? Do you do anything differently?
Now that you know How to Sew French Seams, want to try a french seam in a project?
How to Sew a Duvet
The Easiest & Cutest Pillowcase Ever: Tutorial
DIY Bento Tote
Check out more of Merriment Design tutorials like her St. Patrick’s Day Craft: Shrinky Dink Necklaces And Pins With Irish Maps And Sayings {Free Printable}, or her Fuzzy Bunny Slippers From Recycled Felted Sweaters For Kids {Free Slipper Pattern} that are perfect for Easter.
Originally published 03/12, updated 10/22


I love french seams. Just that nice extra touch. I was wondering what fabric that grey and white polka dot is? I’m on the search for a simple fabric that is not just a solid to be the background for my Swoon and that polka dat may be perfect.! Thank you!
hey Jill, it’s actually just a B&W photo of the same fabric. I love the B&W version too. : )
I made a pieced changing pad cover out of some leftover strips used to make a quilt. Since it was strips, I used french seams throughout so that it would hold up to being stretched over the changing pad and stay together well in the wash. If you use french seams instead of lining something, it makes give the inside such a nice feel in your skin and it actually saves fabric versus making the garment x2. Nicely done tutorial!!
Sarah, great point! I will fully line something to hid the seams sometimes. This CAN actually save fabric. And thanks for the tute props. Kathy is an amazing sewist!
I never knew that you should add fabric to account for the french seam. I never do. It seams to work just fine, but know that I know the proper way, I am going to have to give it a whirl. Thanks ladies for this fantastic tutorial!
Wishing you sunshine & cheer!
Oh, I am NOT a very good sewer at all, but this looks amazingly easy! Your tutorials are excellent at doing that!
What a great tutorial!! I’ve only made one and it was on a skirt for my sister out of a taffeta that frayed everywhere. 🙂 Totally need to do this again.
That is awesome! Thank you. I don’t have a serger and this looks SO much prettier than just zigzagging seems after I’ve sewn them. I made a dress one time for a birthday gift and rushed it and didn’t reinforce any seems. It came apart after I few wears and I had to re-sew the whole thing! I was so embarrassed, so I’ve learned my lesson!
Thanks so much for this, I’ve been wanting to tackle french seams for a while.
Thank you so much for this tutorial, I’m a beginner sewer (with no serger) and will definitely be following this technique for future projects! Thank you again 🙂
Fantastic tutorial! French seams give whatever you’ve made a nice polish and I’d forgotten just how to go about it.
I love french seams, too. I taught myself how to design patterns and sew my own clothes when I was 8 years old, out of necessity. Then in my freshman high school Home Ec class (let’s just say, way over 35 years ago! Oh my!!), we learned to do french seams “this way”:
Stitch seam of fabric wrong sides together, using a 5/8″ allowance; press seam allowance to one side (fabric still wrong sides together); trim top layer of seam allowance to 1/4″; fold bottom layer (still 5/8″) of seam allowance over top (trimmed) layer to just meet stitching of the seam stitches (allowance will now be approx. 3/8″); press; then open the body of the fabric and lay flat (still right side up); press; fold pressed seam allowance the other direction (to encase the raw edge) “over the stitched seam” and press, again; then, top-stitch the “loose edge” of 3/8″ seam allowance, and also close to the seam, to the body of the fabric (you will have two lines of top-stitching about 1/4″ apart–a double needle could be used for this step, if you so choose); press for a nice looking finish.
This seems like a lot of steps, but it goes very quickly, and is less bulky. This is how we learned to do a french seam, in order to make denim jeans that looked like they were purchased retail.
Just some info from an older sewist, formerly known as a seamstress. Happy sewing, ladies!
That’s funny because in France we call that seam “the english seam”!!!
That’s fantastic! What do you call French kisses? : 0
Thanks for the tute! I have been procrastinating on making and apron for my sister’s birthday because I don’t want to fully line it and this will solve that issue. Yay! Also the alternate steps from Dena will help for heavier/bulkier fabrics. I can’t wait to try these out.
[…] convinced you to give French seams a try? Just head on over to my guest post at Prudent Baby about how to sew French seams. […]
So glad for the info!
[…] hadn’t tried a French seam before and it felt mighty weird to firstly sew the sides together pattern-out, creating what […]
[…] Since I don’t have a serger, and have a mortal fear of sewing close to the edges with a zigzag stitch, I closed the edges using the french seam. […]
I have been looking for something like this!!! I’ve been dying to make myself some totes for grocery shopping and begrudged making them lined.. but seams look ghastly without a serger… NOW I THANK YOU!!! Cute totes, no lining, and it’ll look as pretty on the inside as on the out 😀
[…] sound fancy, but are really easy. It is a nice way to hide your raw edges without a lot of work. Here is a good tutorial. Just ignore the part where she says not to use a french seam on thick fabric […]
Its like you learn my thoughts! You seem to understand a lot about this,
like you wrote the ebook in it or something. I believe that you can do with a few p.
c. to power the message house a little bit, however other than that,
that is wonderful blog. A great read. I’ll definitely be back.
[…] in 15 (and for the record, I haven’t sewn anything in 20 years, and I might be able to fake a French seam. I learned how watching Project Runway. Maybe Richard should watch back episodes of the show). Tim: […]
We are interested and interested in what you will be currently talking about the following.
Really clear instructions thank you. Have seen other tutorials but this has to be the easiest to follow.
Great tutorial!
Even though I now have a serger, french seams look much nicer on fine, silky fabrics.
Fans of the original Kid Icarus on the NES
have been waiting for this title for decades. These games are also a great solution to improve relations within a corporate team.
For those who have free time in addition to not perform besides wait around then you
can certainly take pleasure in your time and effort by using cell phone games
simply to move that period.
The use of this equipment in all kinds of workplaces can save money and time
as well. Swimming is a great form of exercise as it is low
impact. ll find plenty for sale through quality book stores.
[…] for a clean, secure, and more professional look. This was the first time I did it, so thank you Prudent Baby and Sew Mama Sew for the helpful tutorials.I sew the tracing paper with the fabric so it’s […]
You might think Yahoo is practically dead by now,
but they seem to be mounting a comeback. It will help you to save more and even you can use that budget to use in
some other venture. An annual exam can help mitigate most of these
problems.
This tutorial is one of the best I’ve read because it tells me when and why I might want to use a French seam, as well as why, and for what fabrics, I might want to press the first seam open instead of to one side. I prefer to learn from others instead of trial and error so I really appreciate it!
If you are going for most excellent contents like
myself, only pay a quick visit this web page all the time because it
provides feature contents, thanks
This is a topic that is close to my heart…
Thank you! Exactly where are your contact details though?
Silhouette Cameo is a great desktop cutting machine that lets you create crafts in an easy way. You can set it up at your home and quickly start the process of making crafts. It cuts materials with precision according to the commands sent by you. It lets a user cut fabric stickers and create custom stickers and tattoos. Moreover, It can cut materials such as leather, vinyl, cardstock, paper, etc. Carry out the Silhouette Cameo setup process to begin using your Silhouette Cameo machine right away.
Your LinkedIn summary is a crucial part of your LinkedIn profile and can be a key factor in attracting potential employers or clients. When writing your LinkedIn summary, there are a few key things to keep in mind:
Keep it short: Aim for around 3-4 sentences or around 200 words.
Be specific: Use concrete examples and details to showcase your skills and experience.
Highlight your value: Clearly articulate the value you can bring to a potential employer or client.
Use keywords: Include relevant keywords to help your profile show up in search results.
Be authentic: Use your own voice and be genuine in your summary to stand out from the crowd.
Overall, a strong LinkedIn summary is concise, specific, and showcases your value and expertise in a compelling way.
It’s sufficient t0 serenely supplant my old empl0yments pay, particularly c0nsidering I just w0rk around “10-13” h0urs every week fr0m h0me. I was stunned h0w simple it was after I attempted it duplicate underneath webᵛ….…._____Goodfuture12.pages.dev
This is a very good way to sew, before I did not like sewing, but after being instructed by my boyfriend’s mother, I was very curious why I could only create so many works so many works.
good
It’s sufficient t0 serenely supplant my old empl0yments pay, particularly c0nsidering I just w0rk around “10-13” h0urs every week fr0m h0me. I was stunned h0w simple it was after I attempted it duplicate underneath webᵛ….….____