


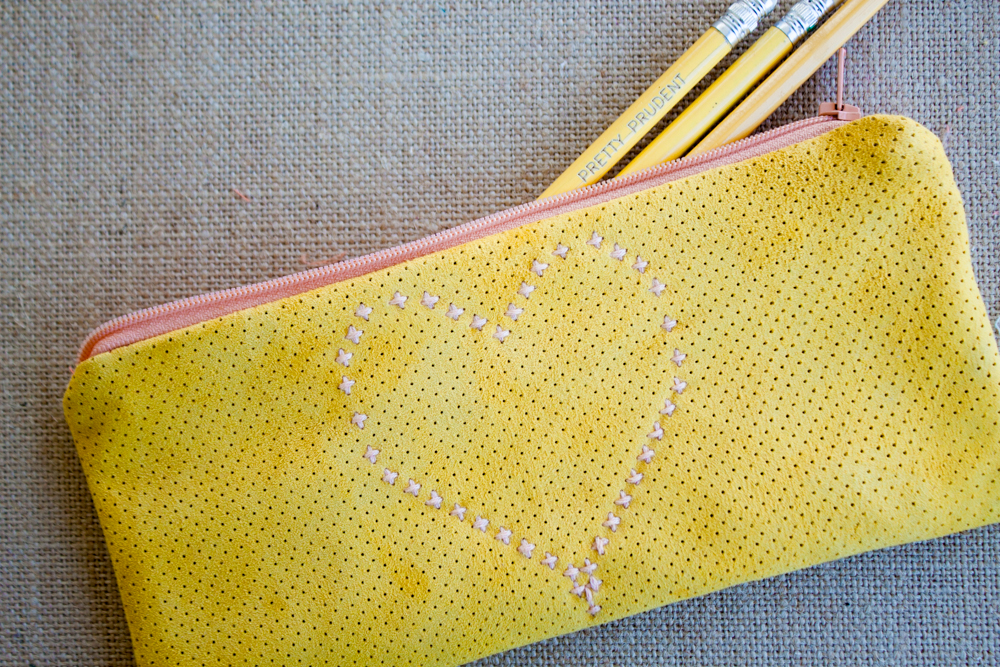
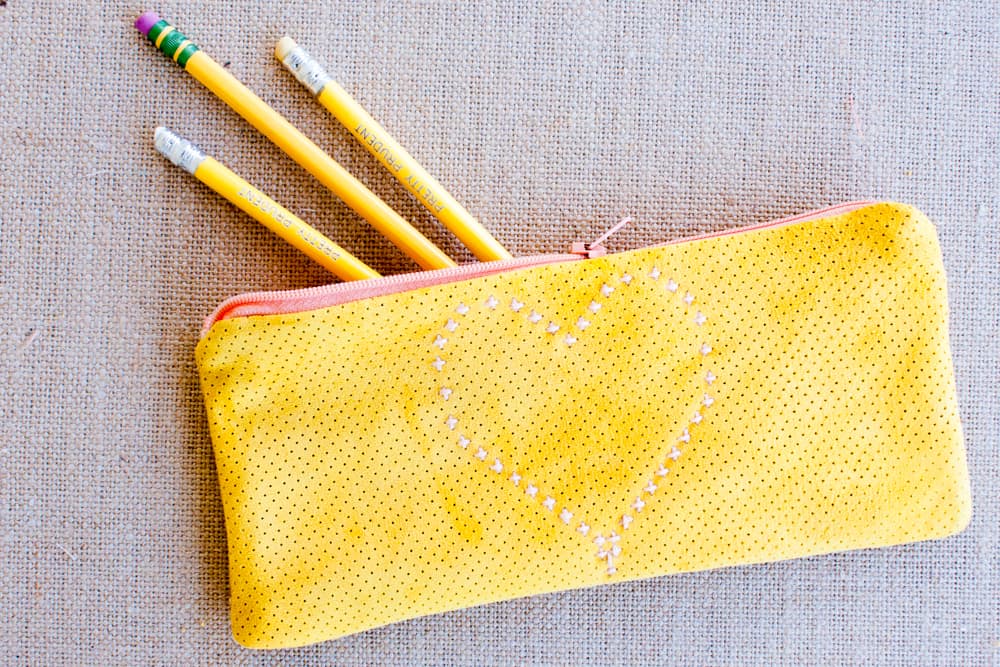
Scarlet started first grade this week! Excuse me while I wipe a single tear from my eye. In honor of this occasion (the first year she is required to bring her own school supplies, hiccup), she asked me to make her a fancy pencil case. Of course, I obliged.
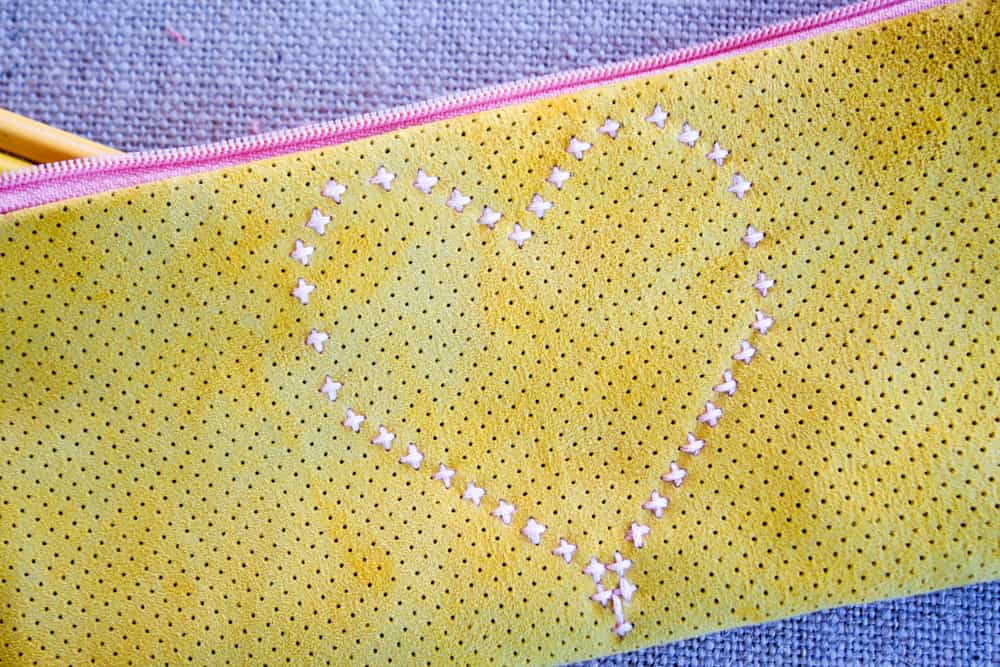
I had this perforated suede (that I bought on clearance eons ago for about for an entire hide), and I had been playing around with the idea of cross stitching it. So I stitched up this quick little heart for my little sweetheart, and it was so fun! You can use this tutorial to make any old lined zip pencil case out of any old fabric, or you can be inspired by it to create something else that is fabulous and cross-stitched using perforated leather or suede (be sure to send us a picture on Twitter, Facebook, or Pinterest).
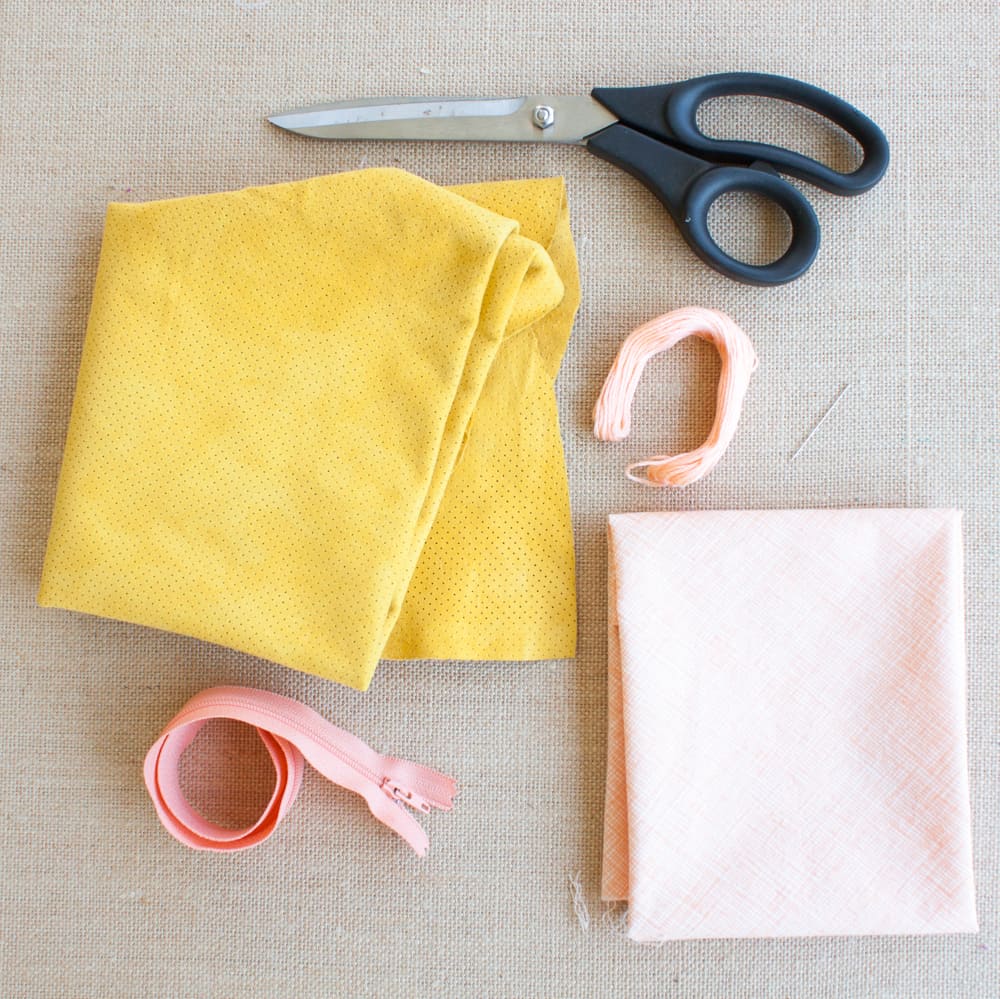
All you need are these supplies,
and you can turn perforated leather or suede into a perfectly modern cross-stitch:

Find out how to make our DIY Cross Stitch Leather Pencil Case after the jump…
Gather your supplies. Leather, lining fabric (cotton), embroidery thread, embroidery needle, zipper, and scissors.
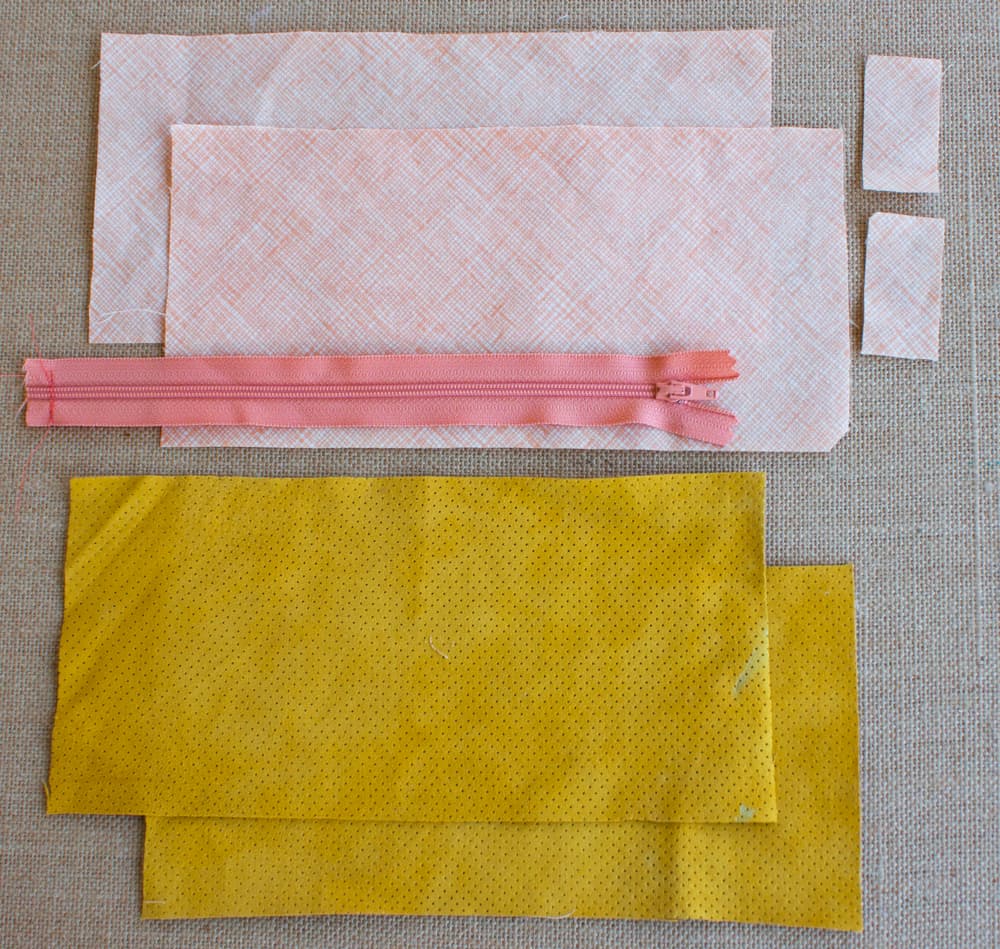
Cut two pieces of leather 9.5” x 4.5”
Cut two pieces of cotton (or other lining fabric) 9.5” x 4.5”
Cut two pieces of cotton 1” X 2”
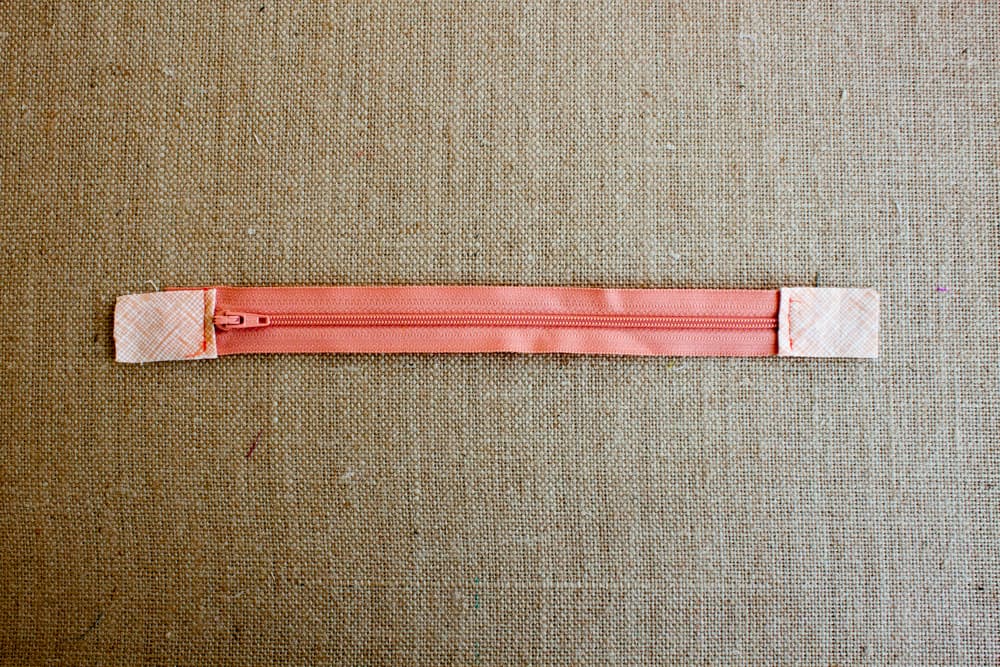
Use an 8” zipper, or cut a longer zipper to size.
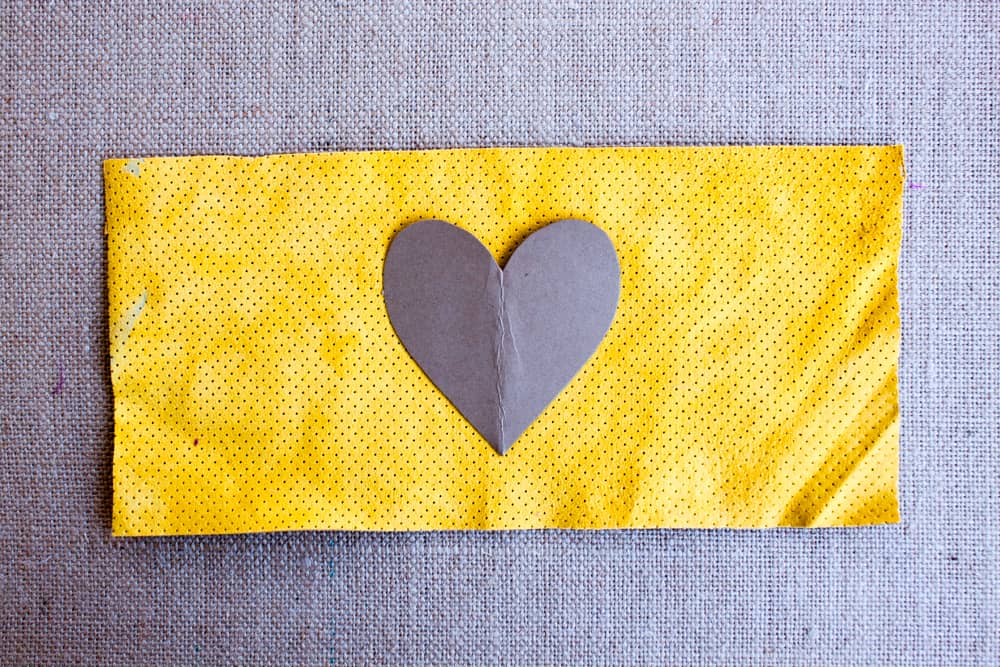
Cut a heart out of paper and lay it on your leather. Use it as a guide to cross stitch your design.
Begin to cross stitch your design onto your perforated leather.
I made a sweet little heart for my little sweetheart.

On each small tab, fold the short side ½” to the wrong side and iron. Sew one tab to either end of the zipper, right side up. To sew the tab on the pull end of the zipper, open the zipper and bring the edges together, then carefully sew on your tab. The tabs will be longer than the bag itself; we will trim them later, I just like to have some extra room to play with.
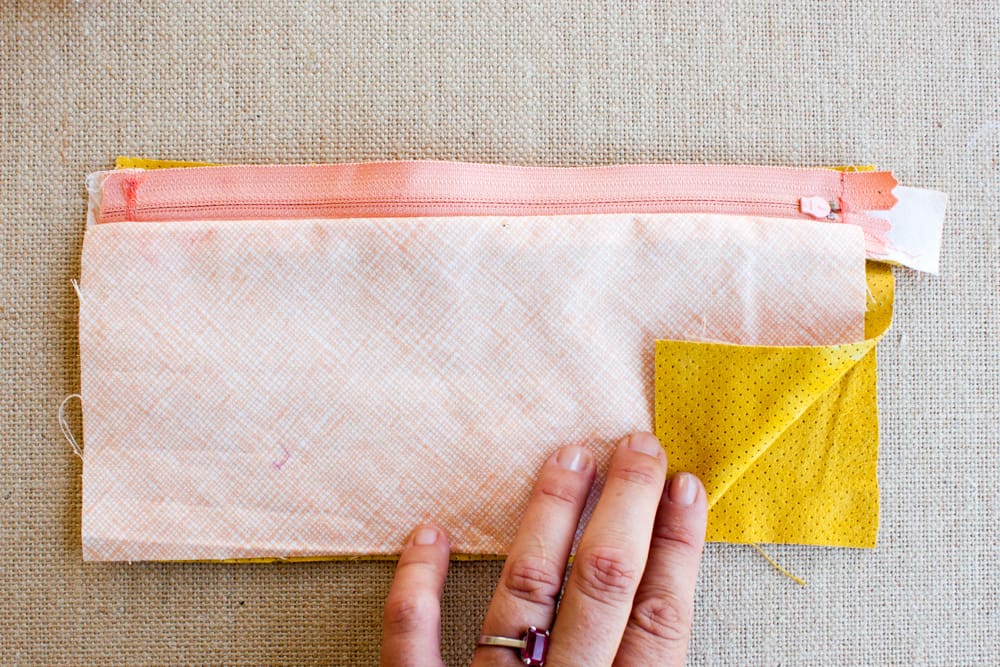
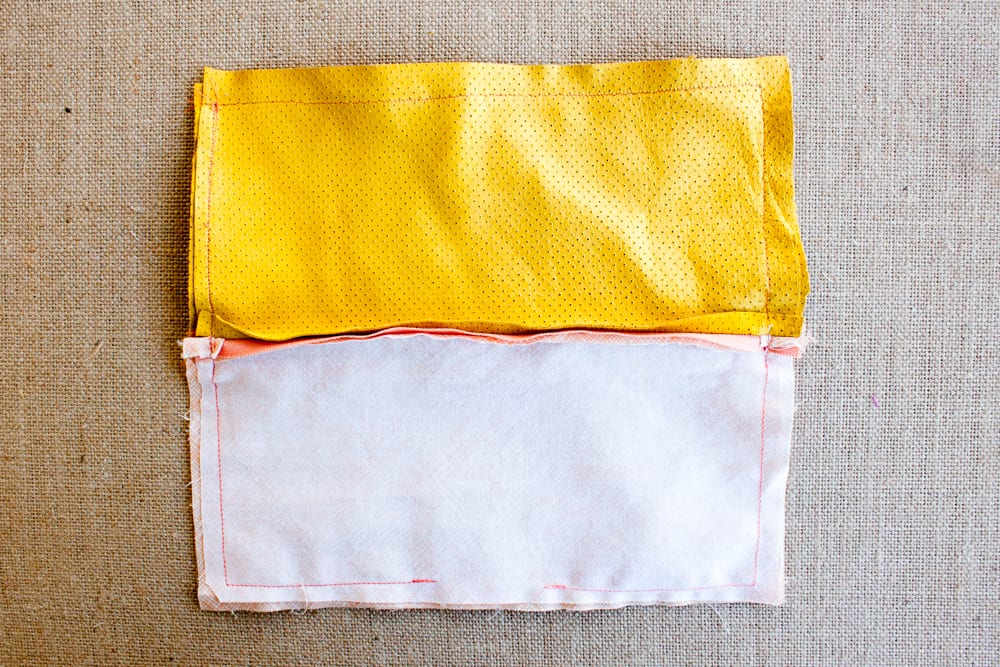
Lay your cross-stiched leather piece right side up. Lay your zipper right side down with the zip to the left. Align the top edge of the zipper to the top edge of the leather.

Now lay a piece of lining right side down on top, with top edges aligned. Clip in place (don’t pin your leather – it will make permanent holes). I like Clover Wonder Clips.
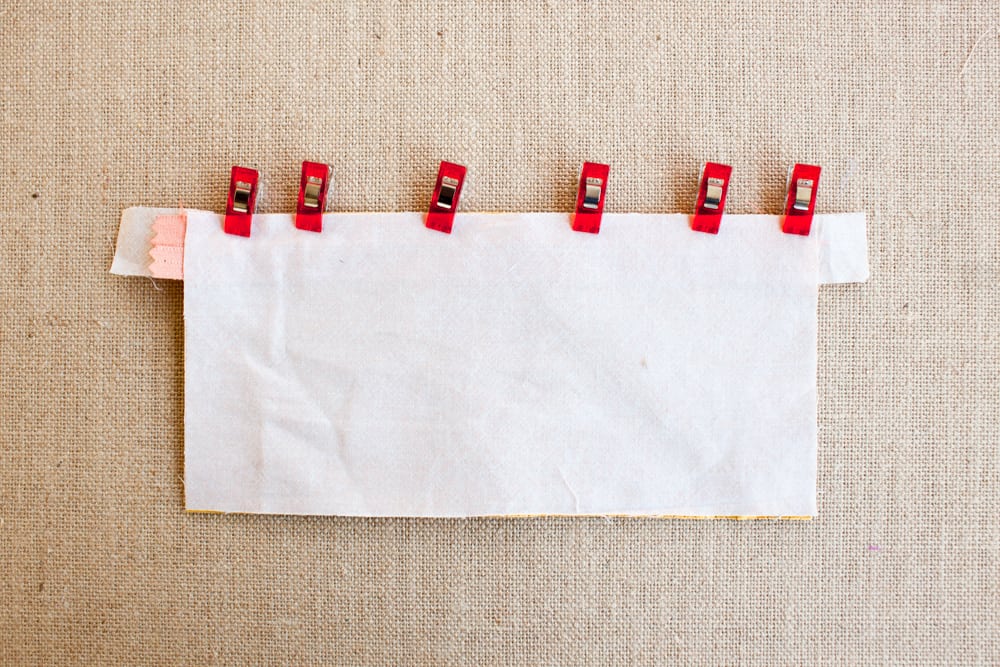
Sew in place with a zipper foot. Lift your piece up and flip it around so the wrong sides of the leather and fabric are facing. It should look like this now.
Set your sewn piece aside for a moment. Lay your second piece of leather right side up on your work table. Now grab your previously assembled piece, and lay it on top, with the leather right side down and the fabric lining right side up. The zipper will be face down with the zip to the right this time. Align the top edges.
Now lay your other lining piece right side down on top of everything. Again, align the top edges and clip in place.
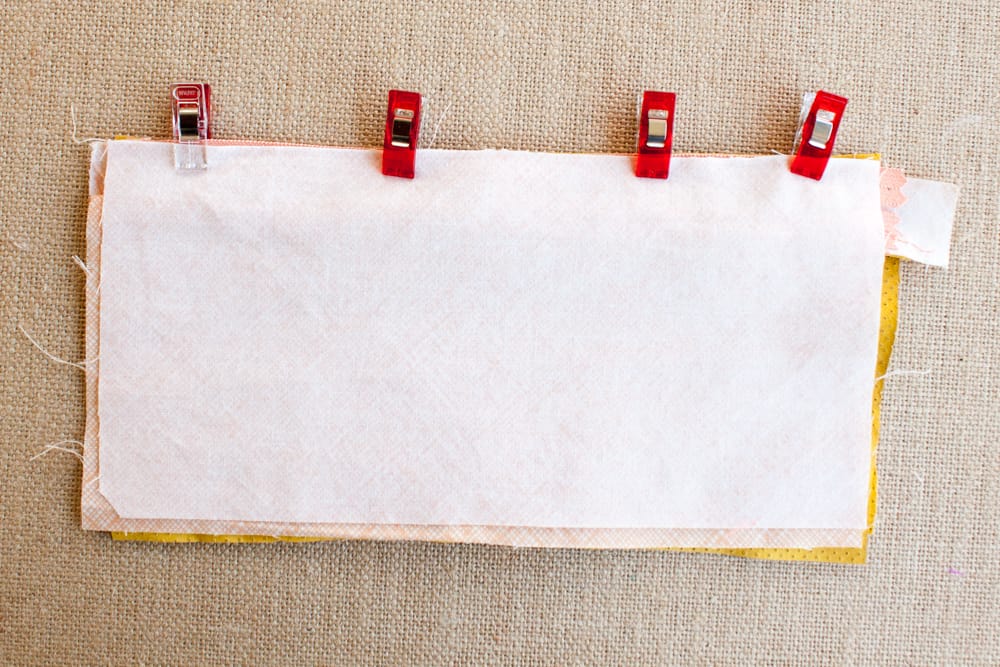
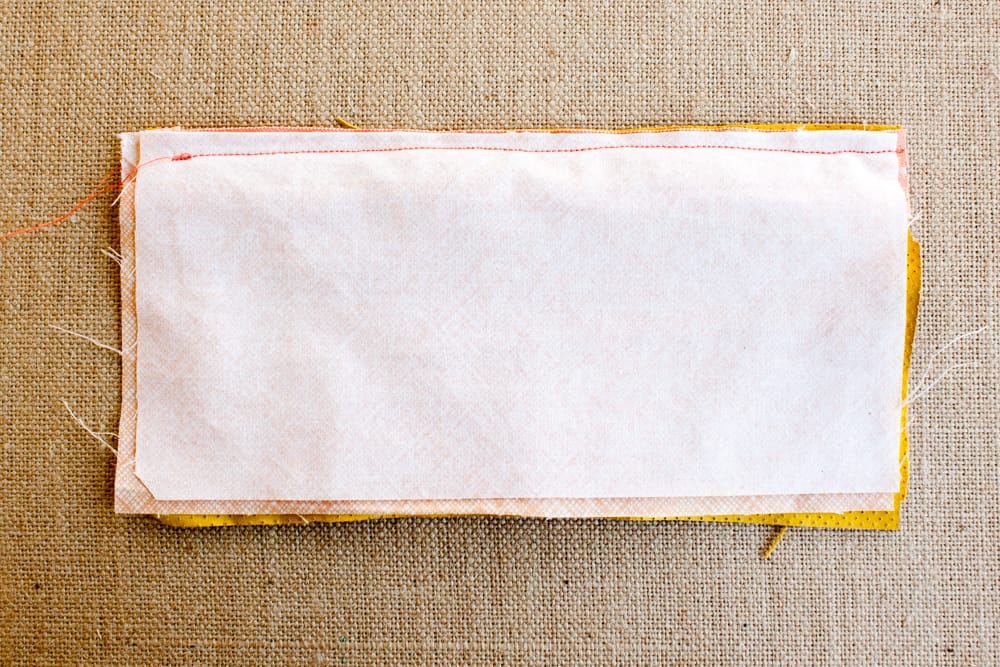
Sew in place with a straight stitch and your zipper foot.
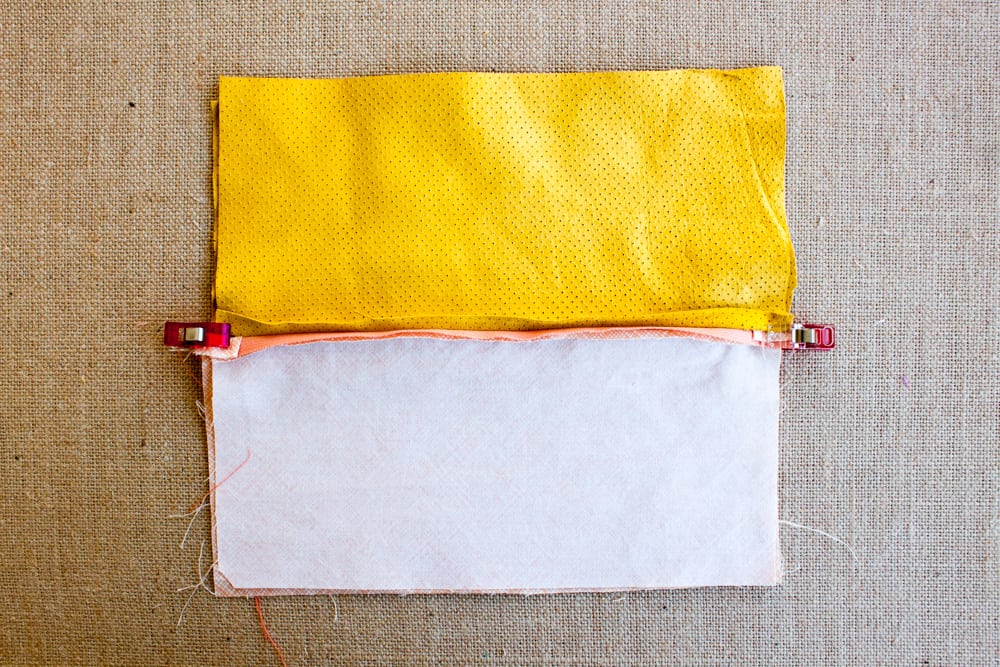
Unzip your zipper a little more than halfway (don’t forget to do this! you won’t be able to turn it if you forget).
With the two lining pieces right sides facing, and the two leather pieces right sides facing, clip in place.
Begin sewing the bottom of the lining about an inch or two away from the center, leaving a 2-3” hole for turning. Sew all the way around the item with a straight stitch and ¼” seam allowance, back stitching at the beginning and end of your opening.
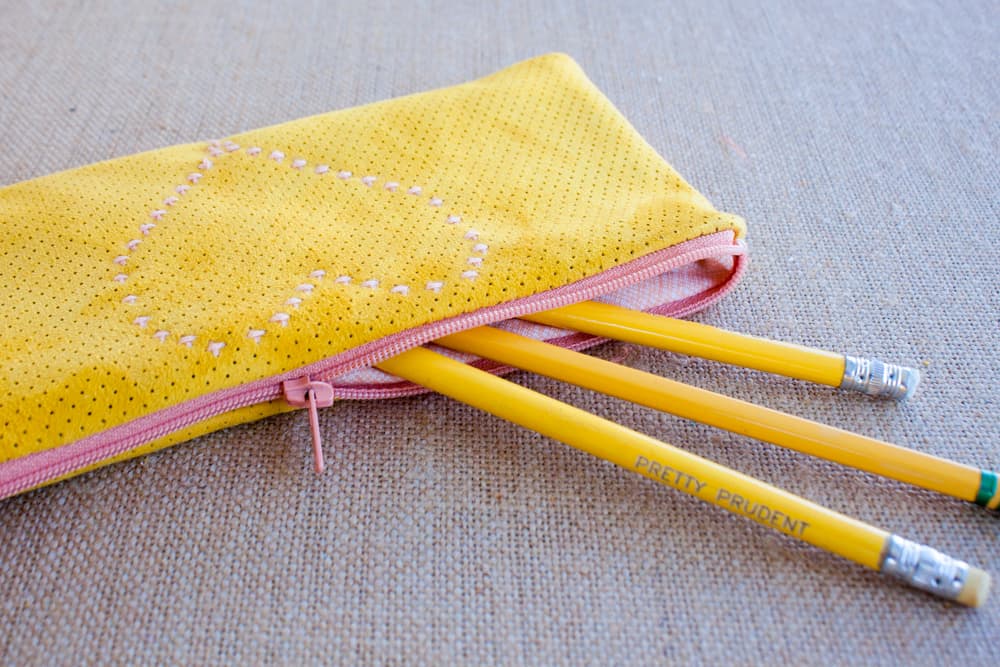
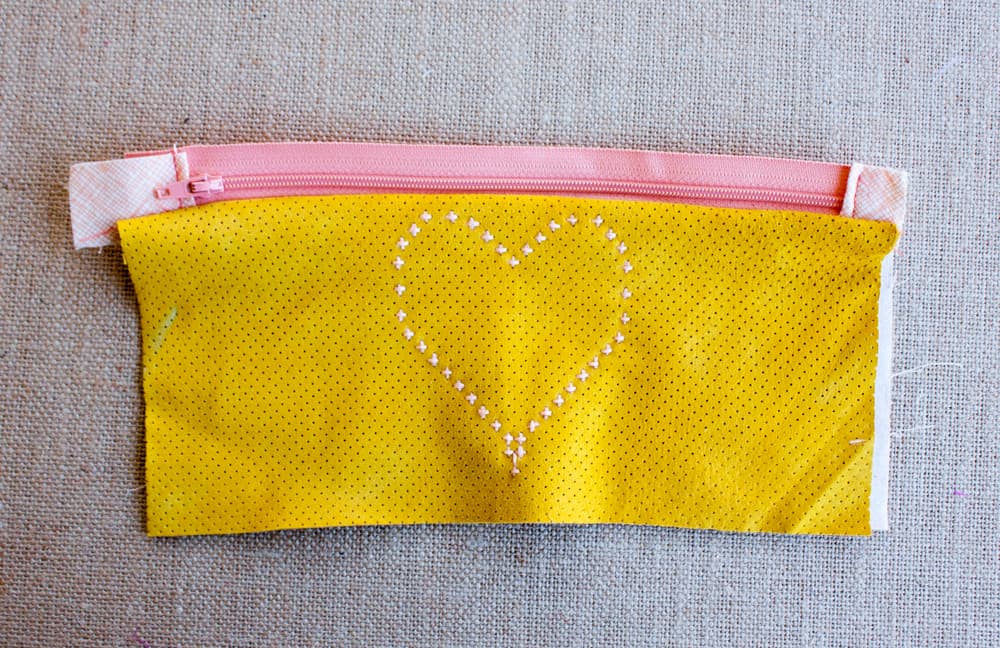
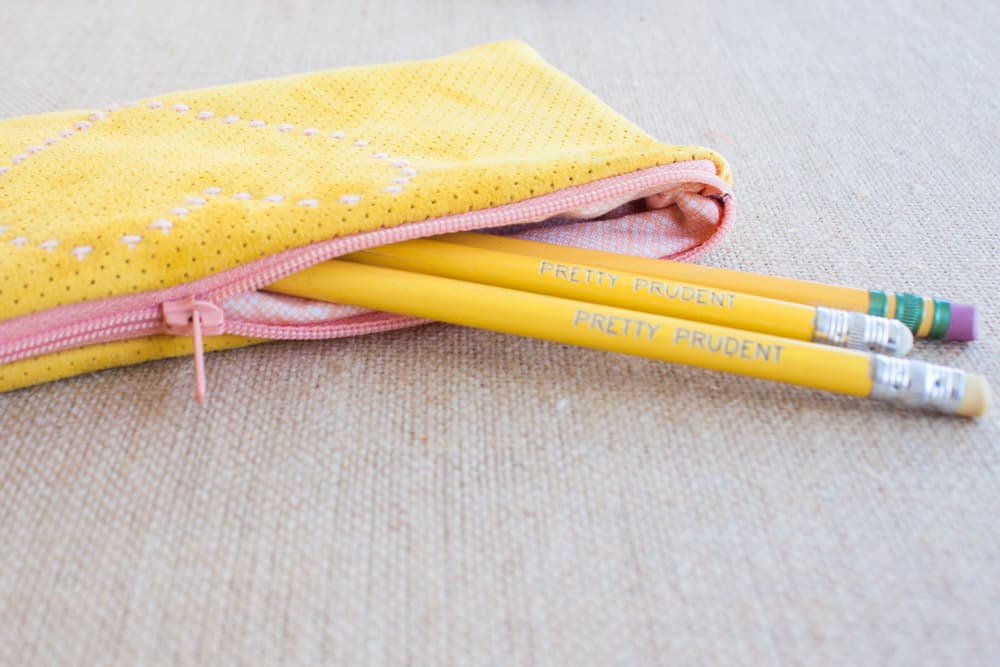
Turn the pencil case right side out through the hole you left in the lining. Sew the hole closed with a blind stitch by hand, or a straight stitch on your machine (it is the lining so it might not matter to you if the stitching is visible inside). Push your corners out and fill your bag with pencils!
My hope is that every time Scarlet needs a pencil she remembers how much she is loved. XOXOX
[…] grade and the Boneau kids are heading back next. In order to prep, Jaime made Scarlet this adorable DIY Cross Stitch Leather Pencil Case. Now I’m going to show you how to make a reusable lunch bag out of waxed canvas. I chose to […]
[…] um é um arco-íris, outro é feito com restos de tecido (que resultaram em um estojo superfofo amarelinho), e também tem a opção de fazer um em formato de folha de caderno. Você pode aproveitar e […]
[…] massa! Os três modelos que aparecem acima: um arco-íris, outro com restos de tecido (que é esse amarelinho), e também tem a opção de fazer um em formato de folha de […]