


Disclaimer: This project has not been tested for safety. Use at your own risk.
Note: This project has not been tested for safety. Consider this project at your own risk.
My friend Anna and I like to get crafty together, so when she needed a new pendant lamp for her home office/guest room, we put our heads together. I’d been wanting to make a paper mache lamp for a while, ever since the Paper Mache Table DIY, so we decided to go for it.
This is a totally rewarding project that requires no special DIY skills, and is definitely a fun one to do with a friend. Let me show you how to make a paper mache lamp…
How to Make A Lamp from a Balloon and Paper Mache
First you’ll need to gather supplies:
-A balloon the size you’d like your final lamp to be, blown up (no helium). We used a 3 foot balloon, which costs about $2: Standard White 3′ Latex Balloon![]() .
.
-A rope to hang the balloon, and something to hang it from. It will get heavy, but we were able to hang ours from an outdoor umbrella with no problems
-Plaster strips. We used two packages of this: Plaster Gauze Bandage Roll 4in X 5yd![]()
-Newspaper
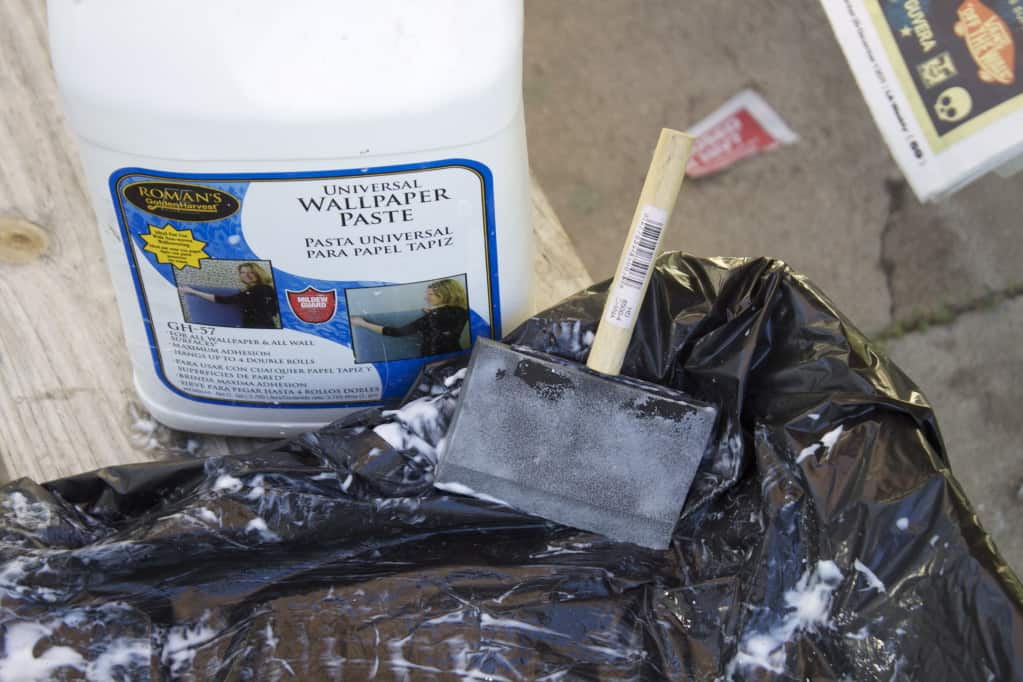
-Wallpaper paste or lots of white glue: Rust-Oleum 2874 1-Quart Suregrip Universal Border Adhesive![]()
-A bucket to get all messy, and something to mix with that you don’t mind ruining (like a paint mixing stick)
-Then to finish the lamp, a pendant and cord set (we used this one from West Elm) and a conversion kit (to hardwire it from the ceiling).
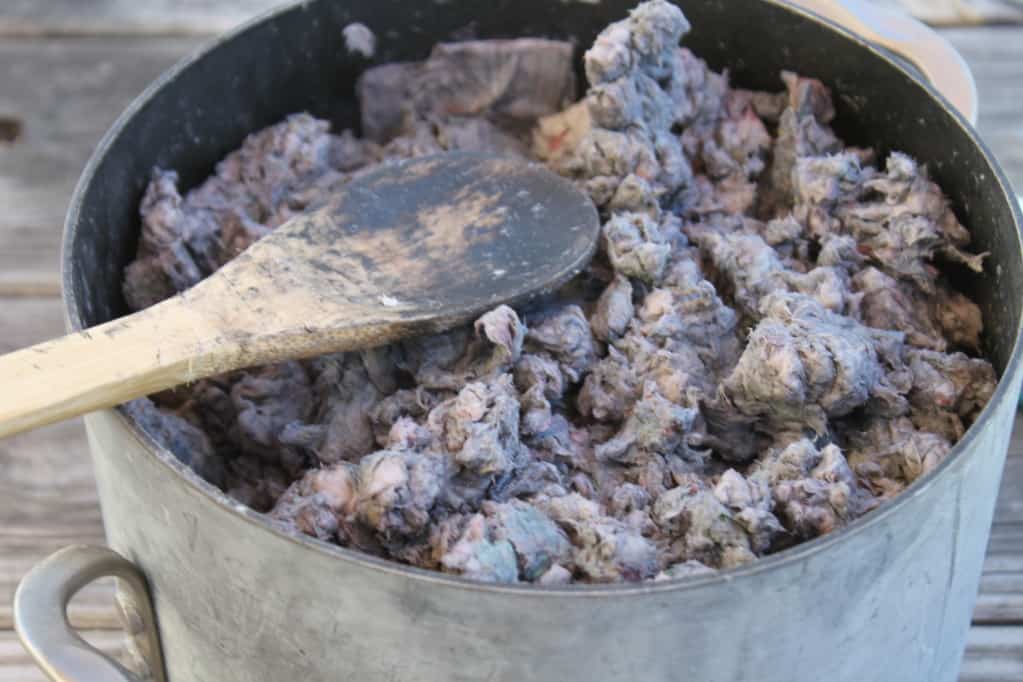
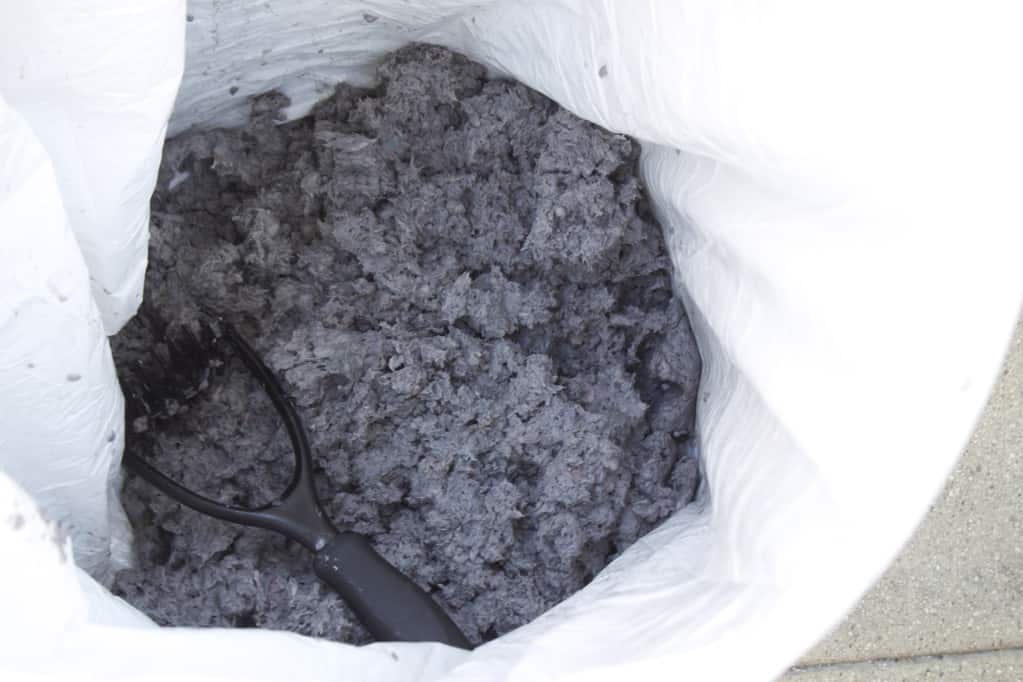
-Start the night before by making paper pulp. To do this, shred newspaper, lots of it, into strips/chunks. Fill a bucket 3/4 of the way with newspaper, and then fill the whole bucket with water, and let it all soak overnight. Agitate it occasionally to help break up the fibers. Alternately, you can put the shredded newspaper in a pot, fill with water, and boil, agitating the mixture to break up the fibers. If you do the soaking method, you can make more at once. But if it comes time to make your lamp and the fibers are still not pulpy enough, you can boil them at anytime to make your pulp smoother.
-Once you have your paper nice and pulpy, you’ll want to squeeze the water out a bit, and mix in glue. I used wallpaper paste, but you can also use white glue if you have lots. I can’t tell you exactly how much to use, because that depends on how much pulp you have, but you’ll just need to coat it and mix it up well.
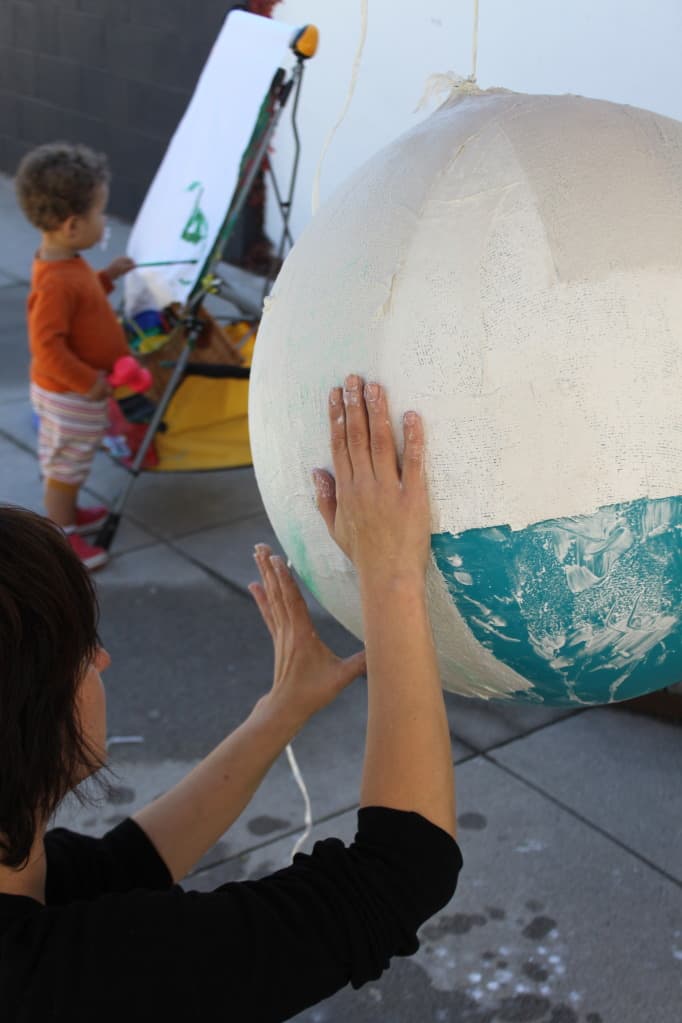
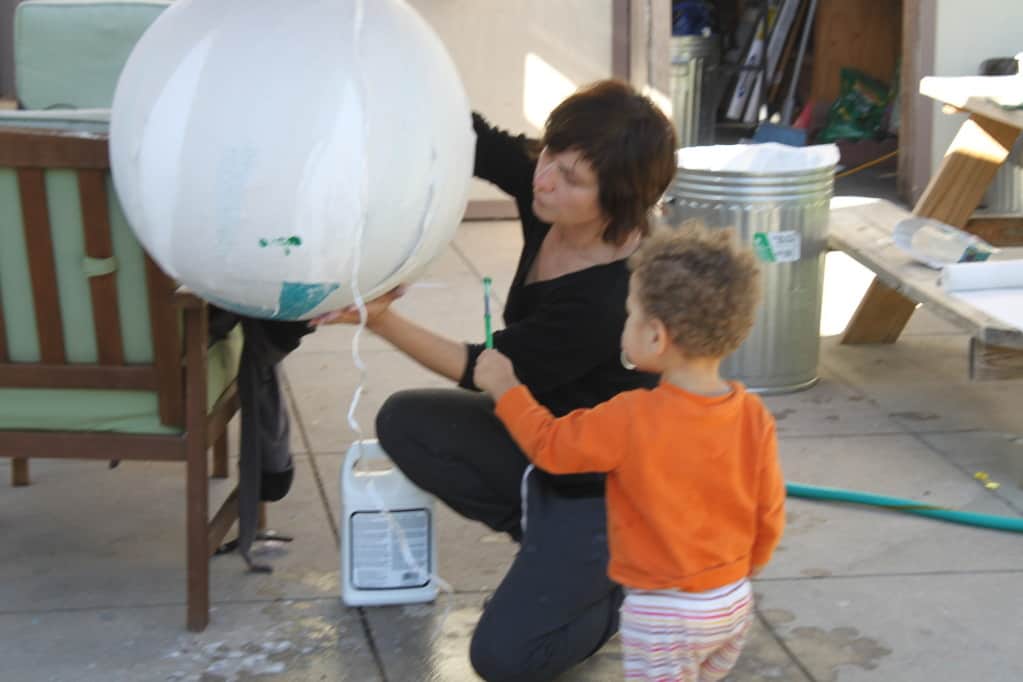
Next, hang your balloon. Place a pan or bucket of water nearby. Cut or rip plaster strips, dip them in water, and smooth them onto your balloon. You could go straight to using pulp, but I like the plaster layer for ensuring your lamp keeps its shape.
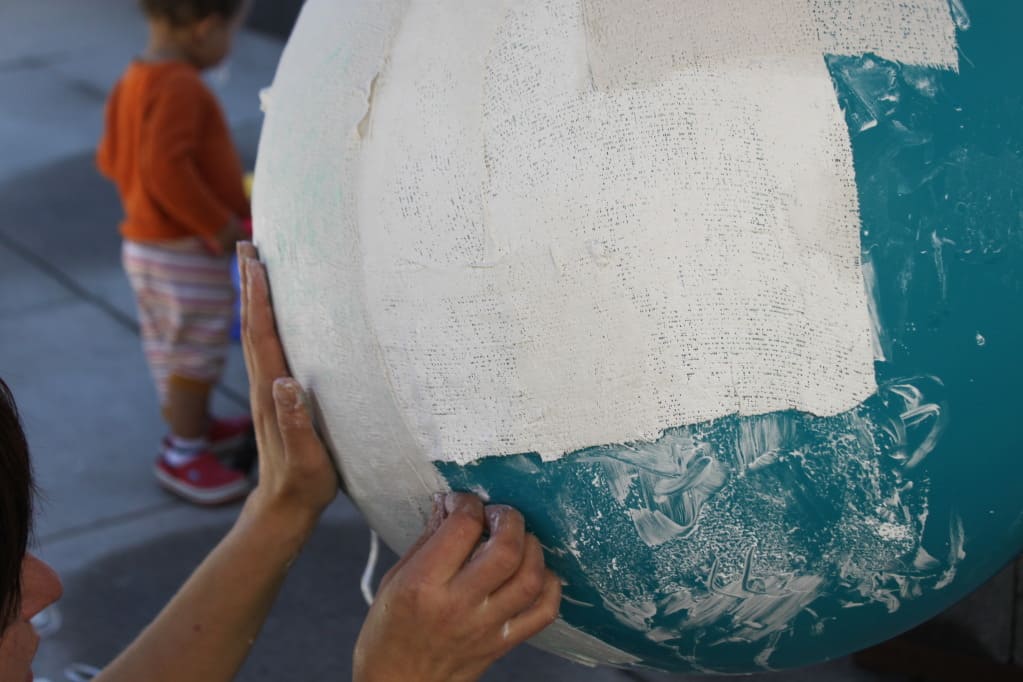
You don’t need to go all the way down to the bottom of the balloon, you’ll need it open when you are done so light can come out. You can cut the edge of the lamp later so don’t worry about making a perfect edge. Smooth the plaster out as you wish, but don’t worry about making it perfect, as we are going to cover it with pulp anyway.
Little helpers can get involved here, if you like.
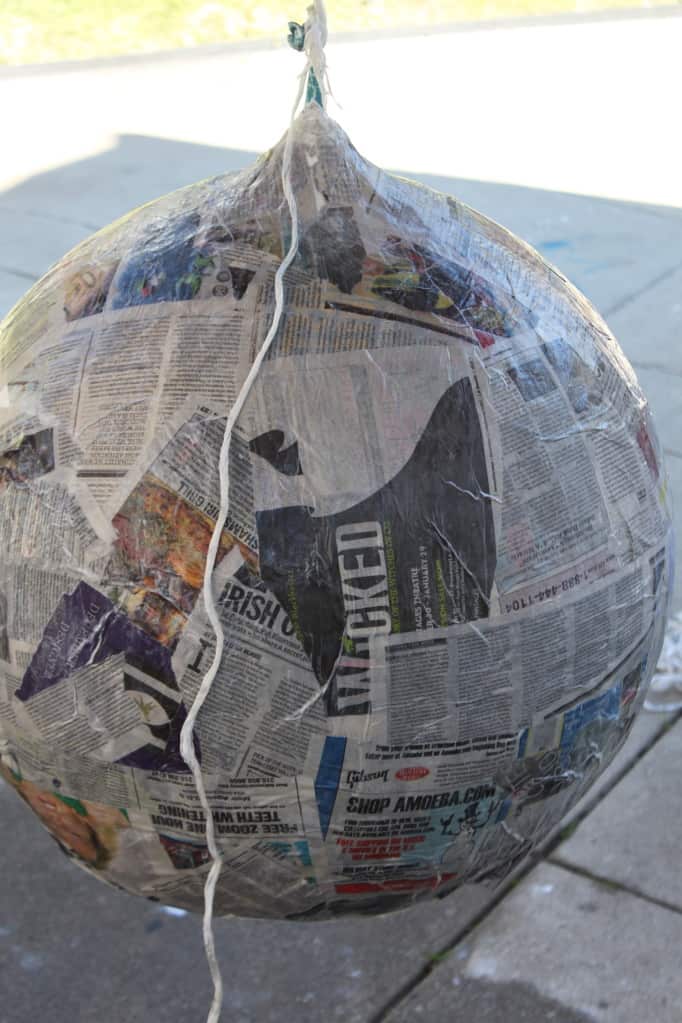
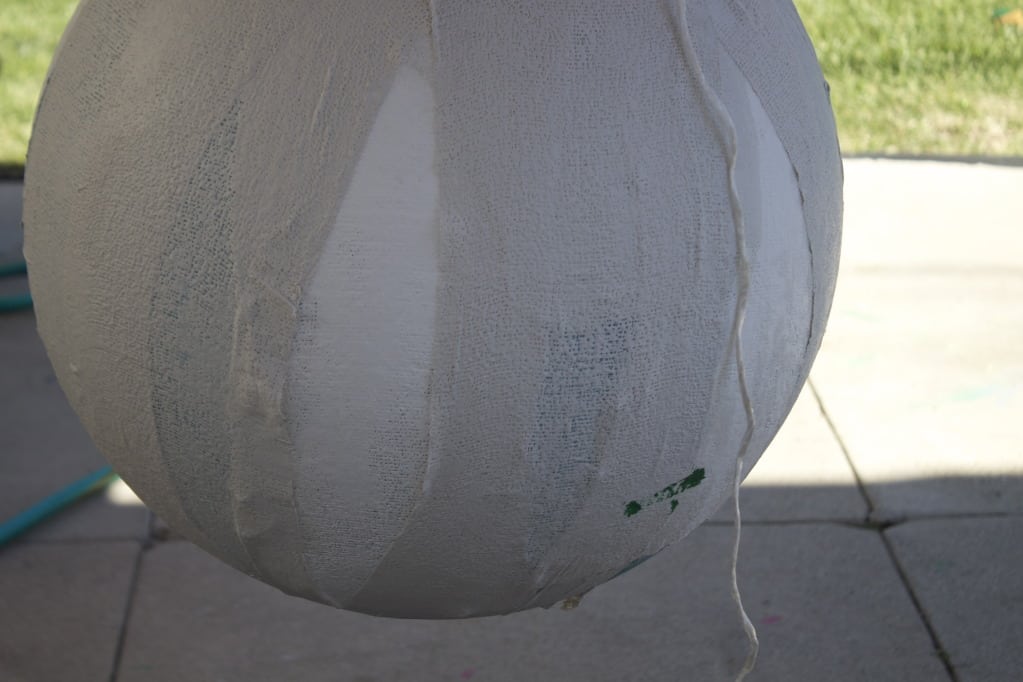
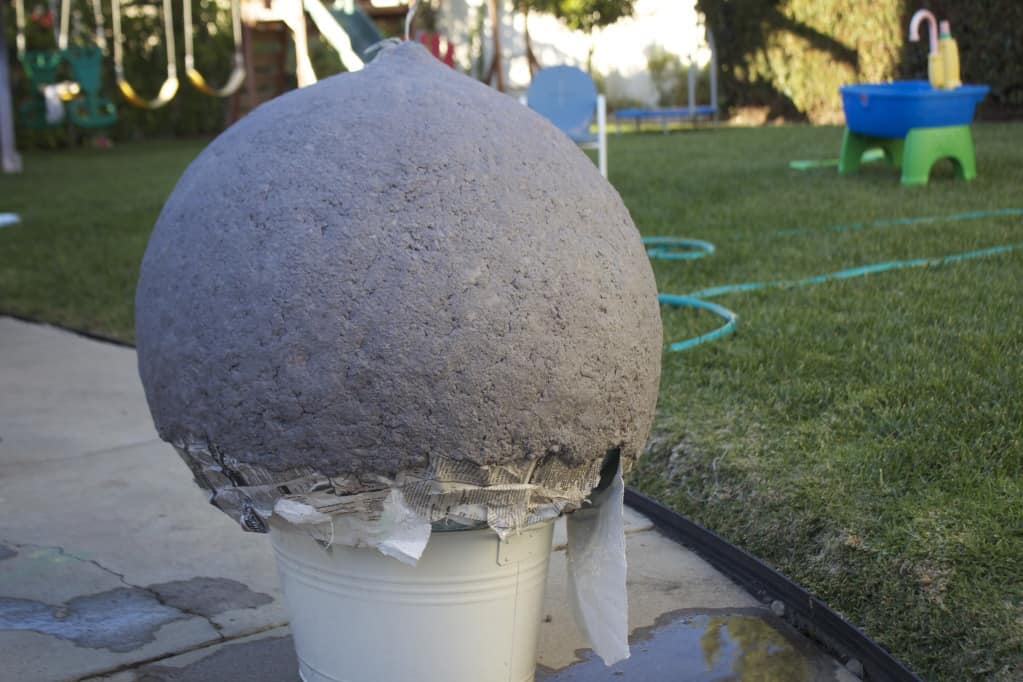
Here is our balloon with a few layers of plaster.
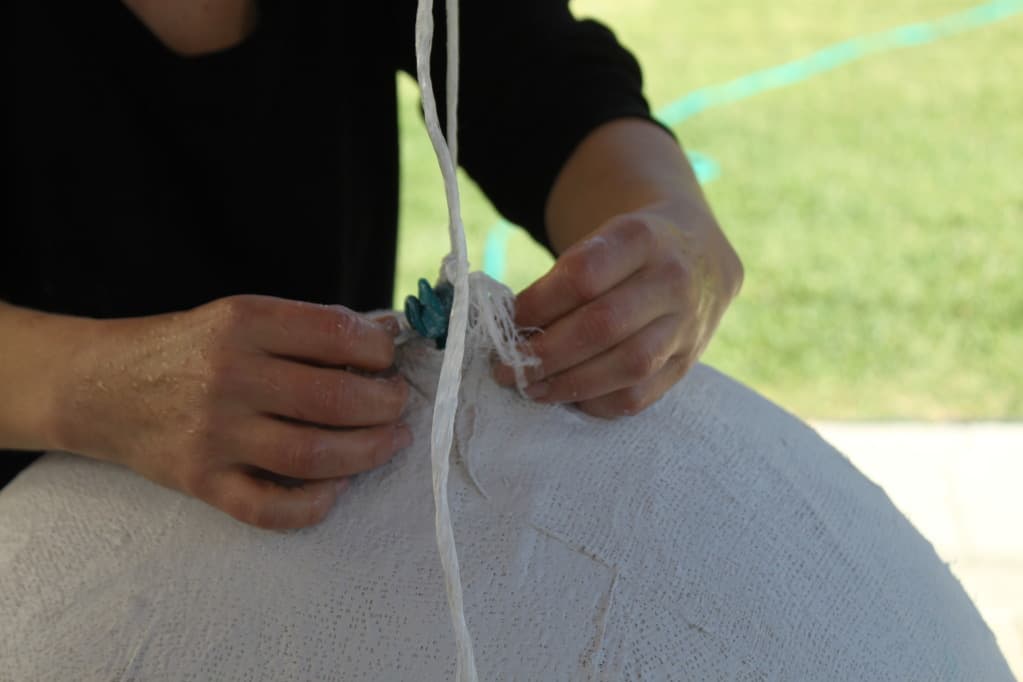
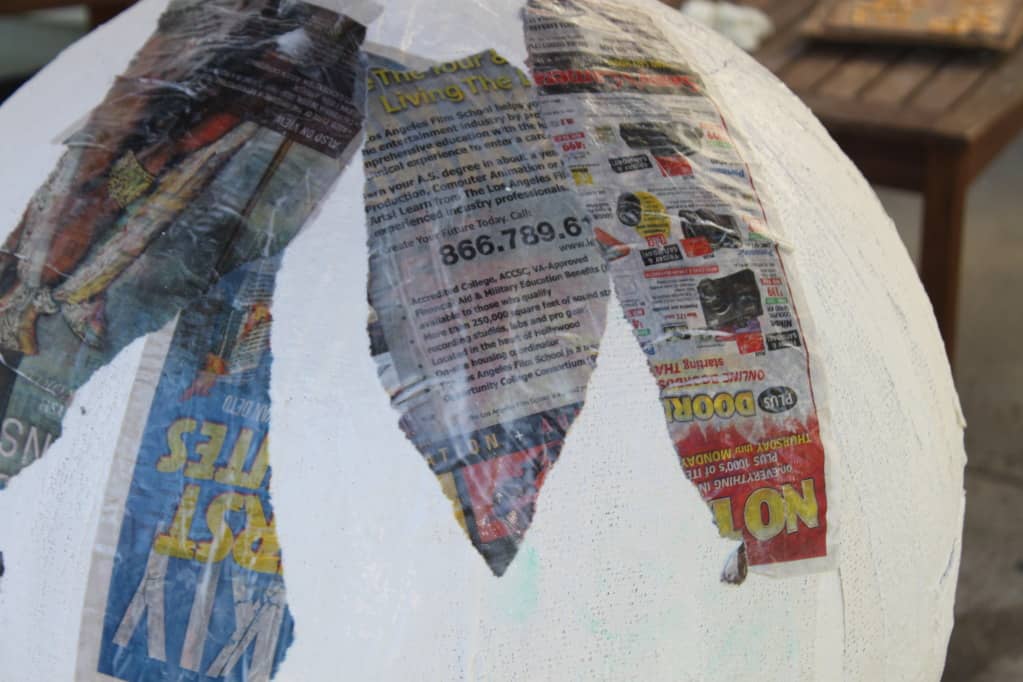
At the top of the balloon, we took care to make a tear drop shape, because that is what Anna wanted for her lamp. You just want to make sure the opening is not too wide, if it is too small you can always cut it later, but if it is too wide for your lamp socket, that’s hard to fix.
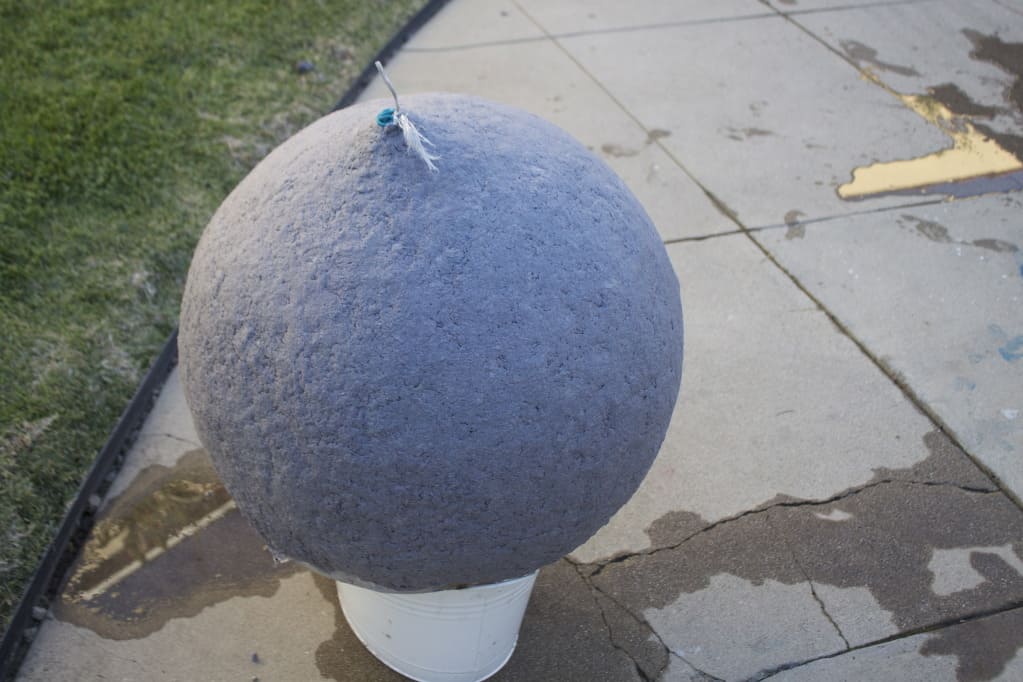
We did a few layers of newspaper strips before doing the pulp. So we tore strips of paper, ran them through wallpaper paste with our fingers, and smoothed them onto the lamp. Not necessary but we thought we’d prefer it this way. I like the way it looks so I took lots of pictures. It would be fun to do this with craft paper and draw a globe on it, no?

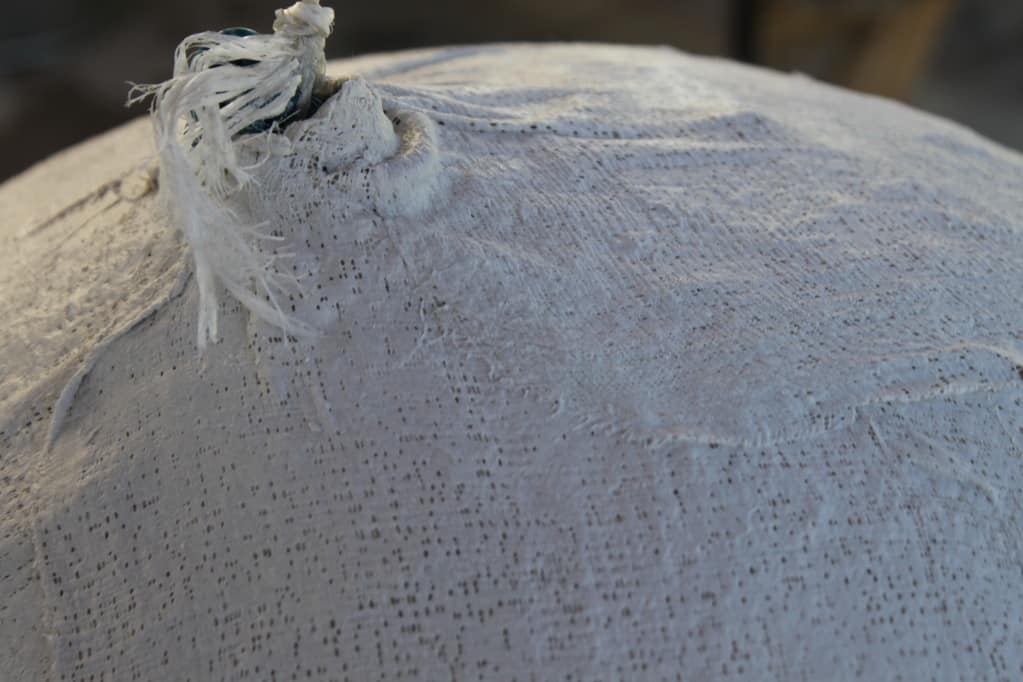
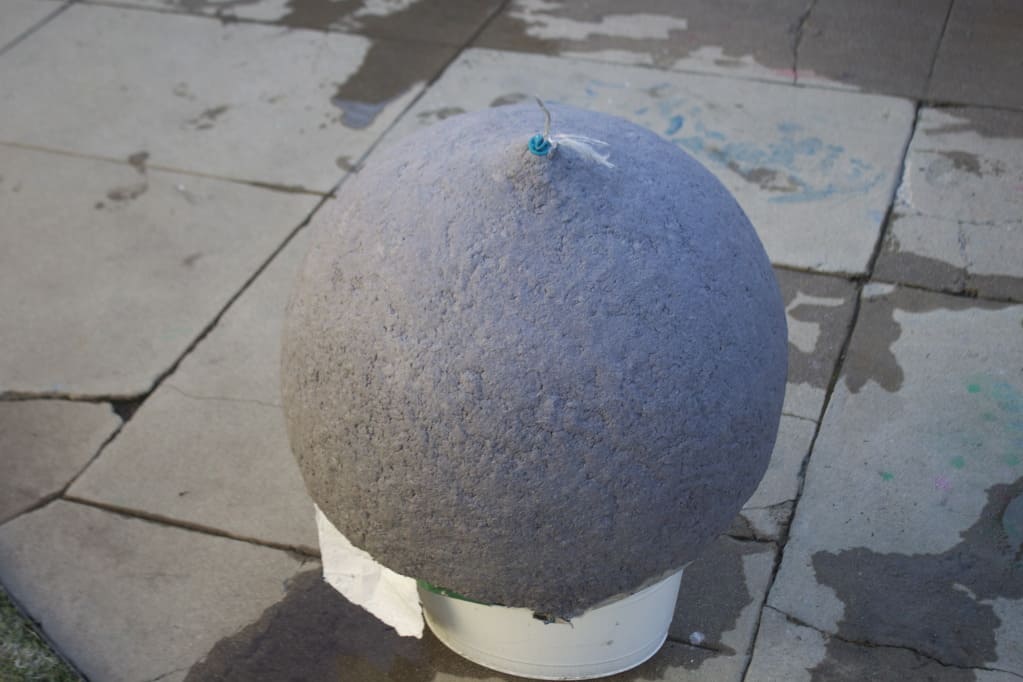
The bottom of our lamp looks like this, it all will get adjusted later so don’t stress it now.
Let this all dry, overnight or maybe even a couple of days.
Now we are ready to add our pulp. We started by adding the glue to the paper pulp. We put it all in a large trash can with a bag in it for easy clean up.
I had a foam brush but we didn’t end up needing it. Gloves would be a good call though.
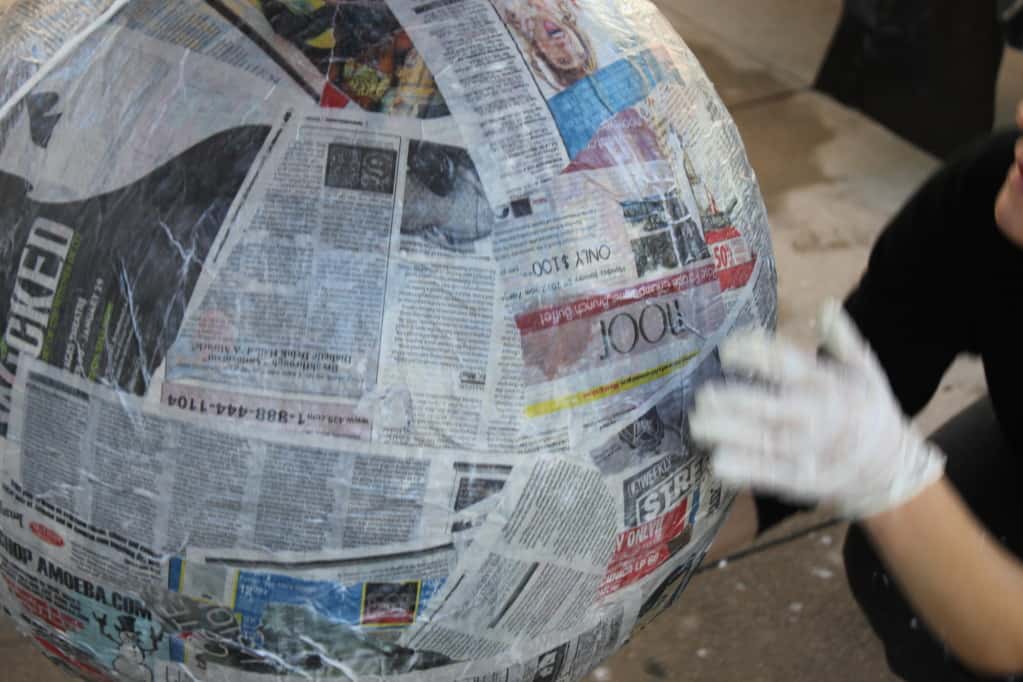
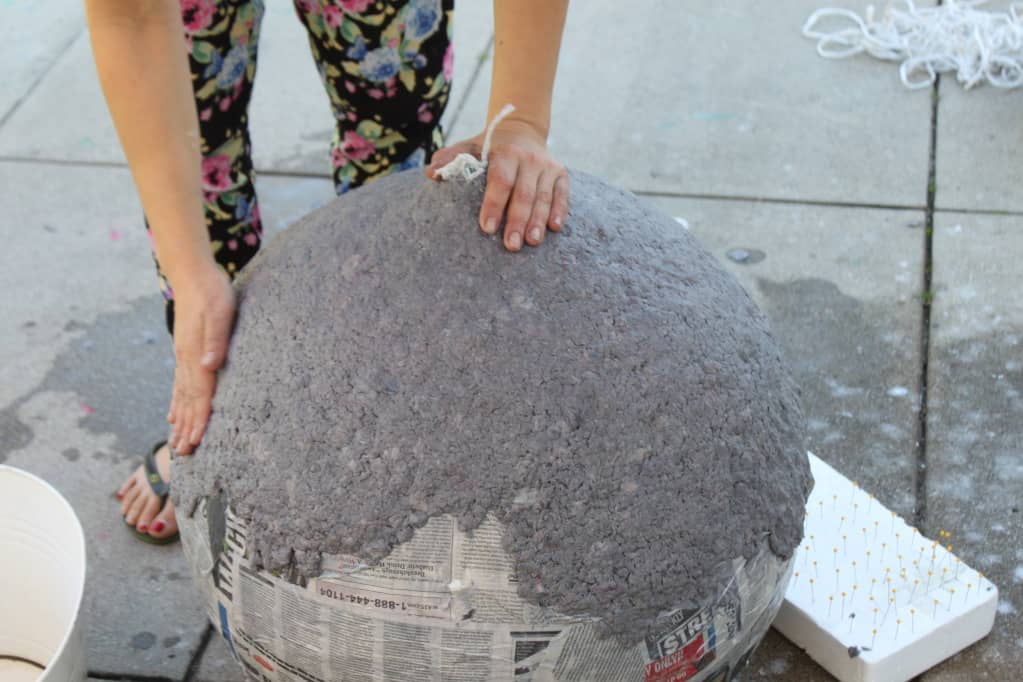
Now you grab a handful of pulp, squeeze out some of the moisture, and pat it onto your lamp. After awhile, the lamp may get quite heavy, if you are making a large one. At that point set it down on the ground.
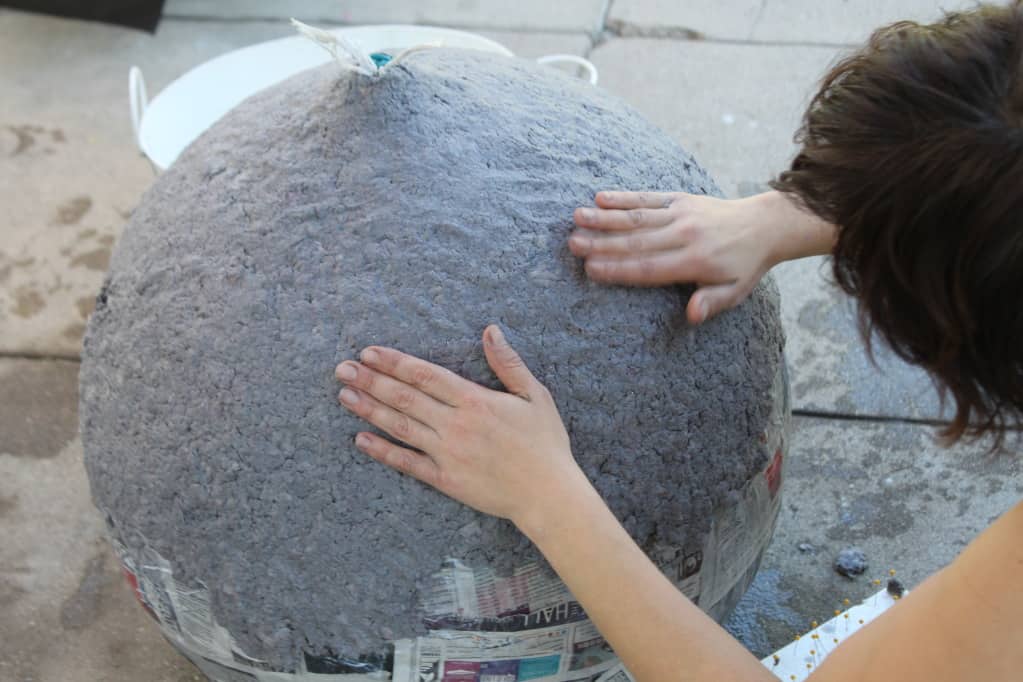
Gently shape your pulp, smoothing as you desire.

Work your way down the lamp.
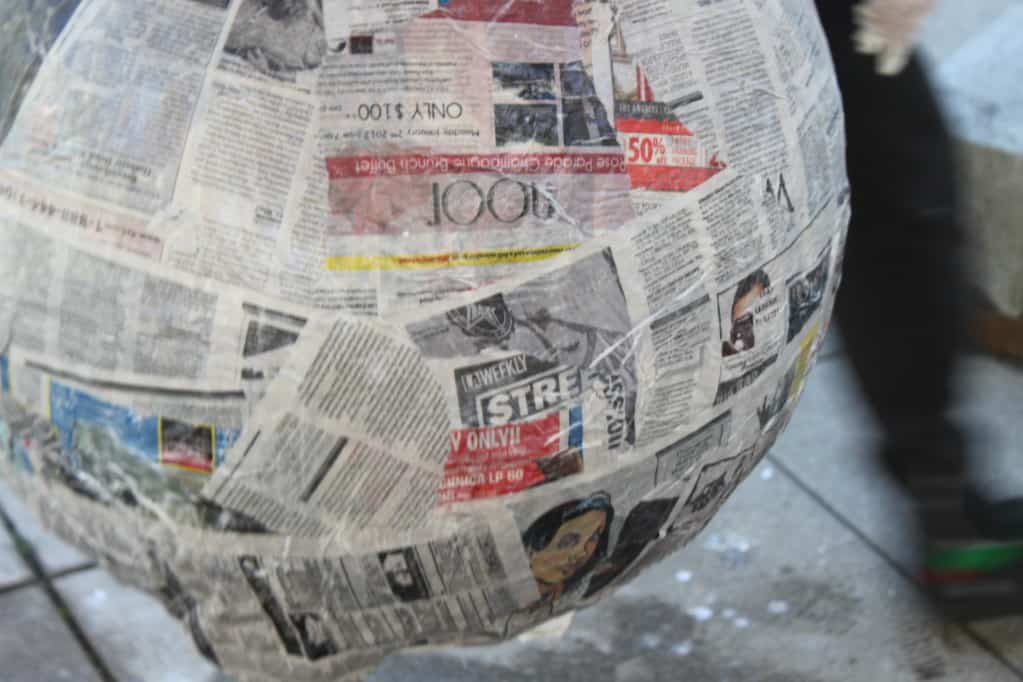
Continuing to add. I thought it was easier to apply with less moisture in the pulp, but Anna found that with a little more moisture, she could get the smoother finish that she wanted.
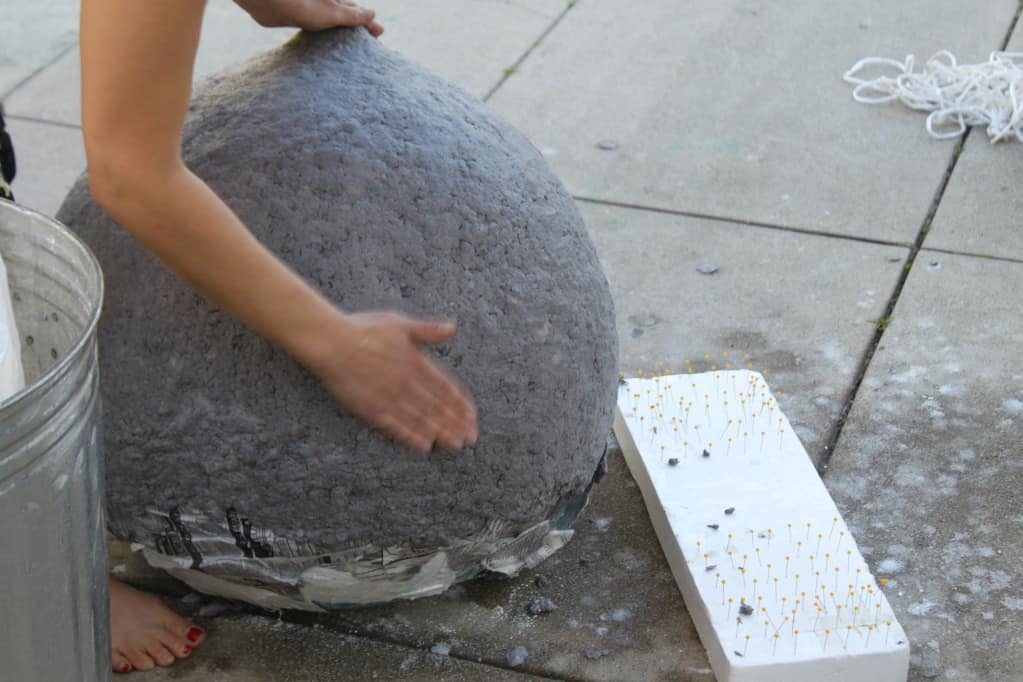
Keep going…
and going…
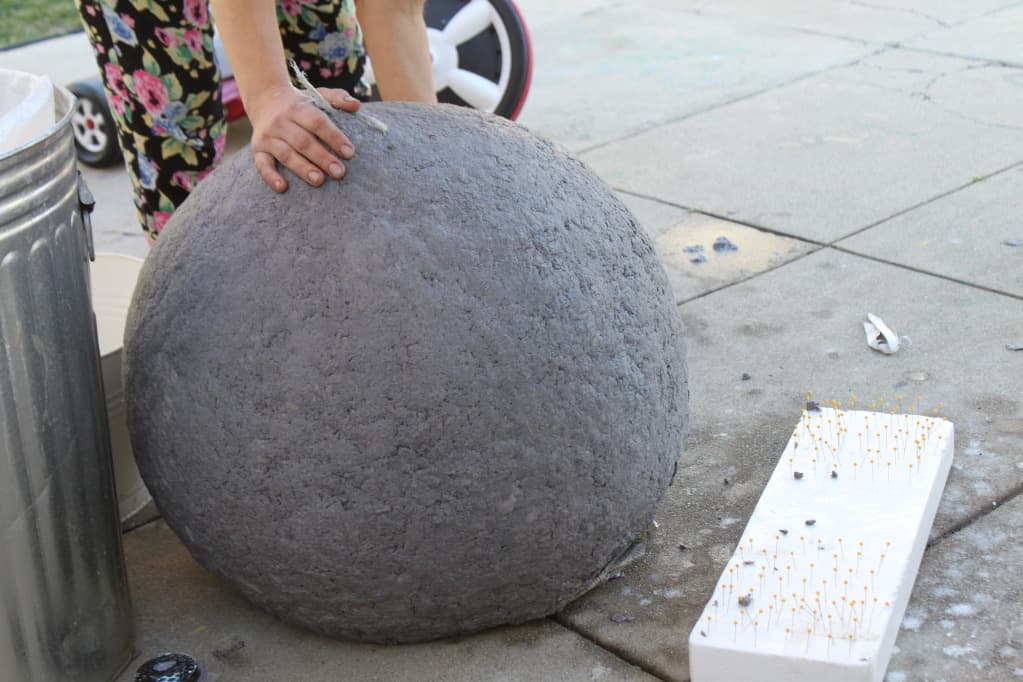
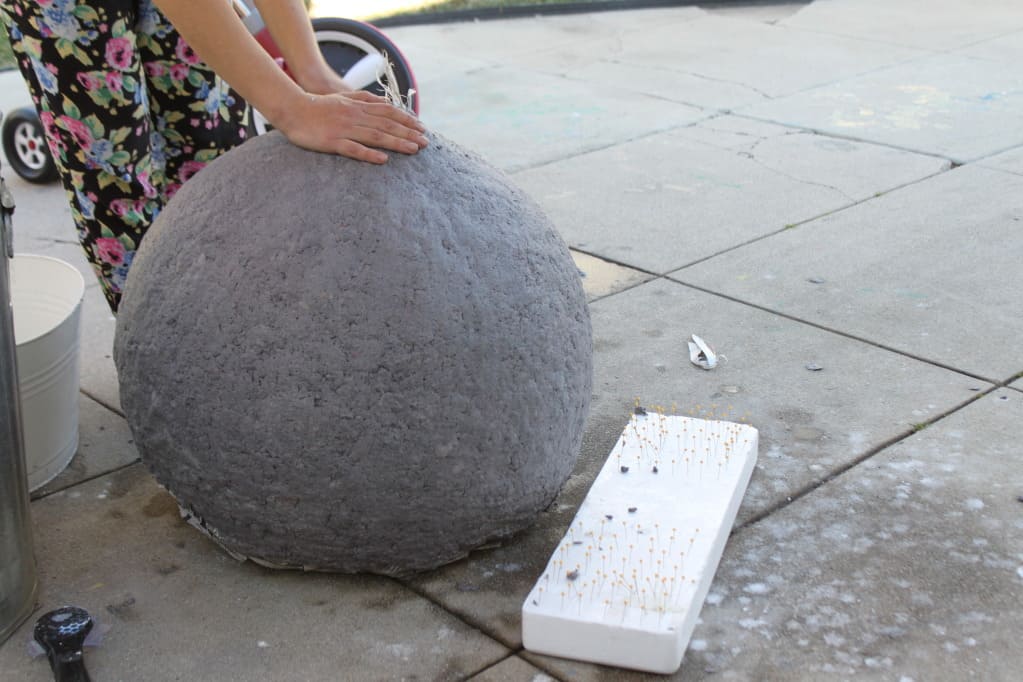
and going, until your lamp is covered in pulp and is as smooth as you want it to be.
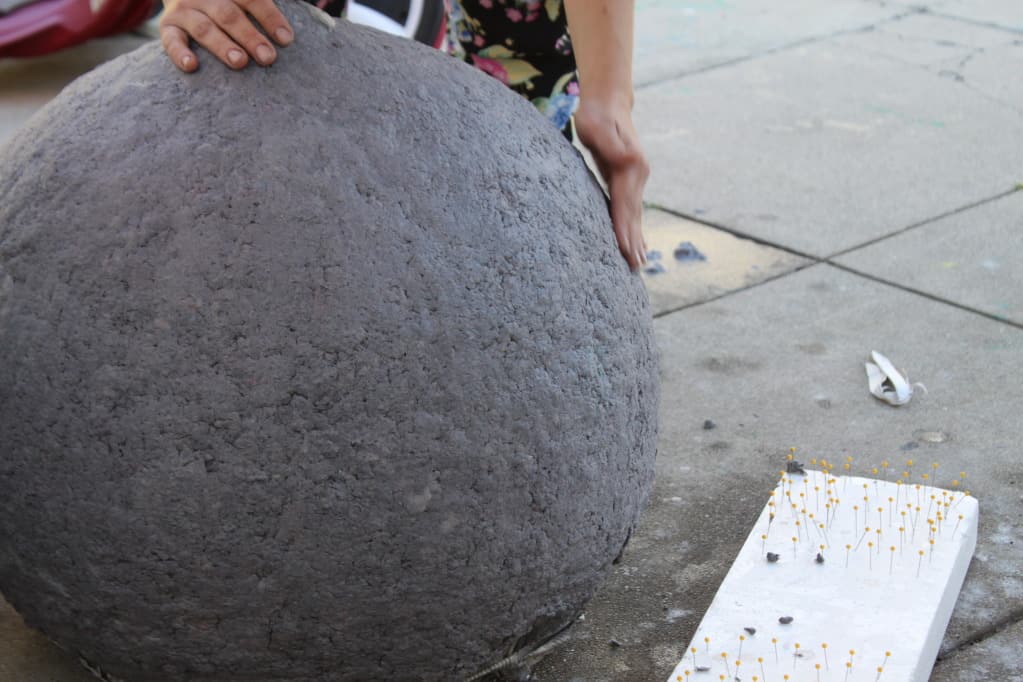
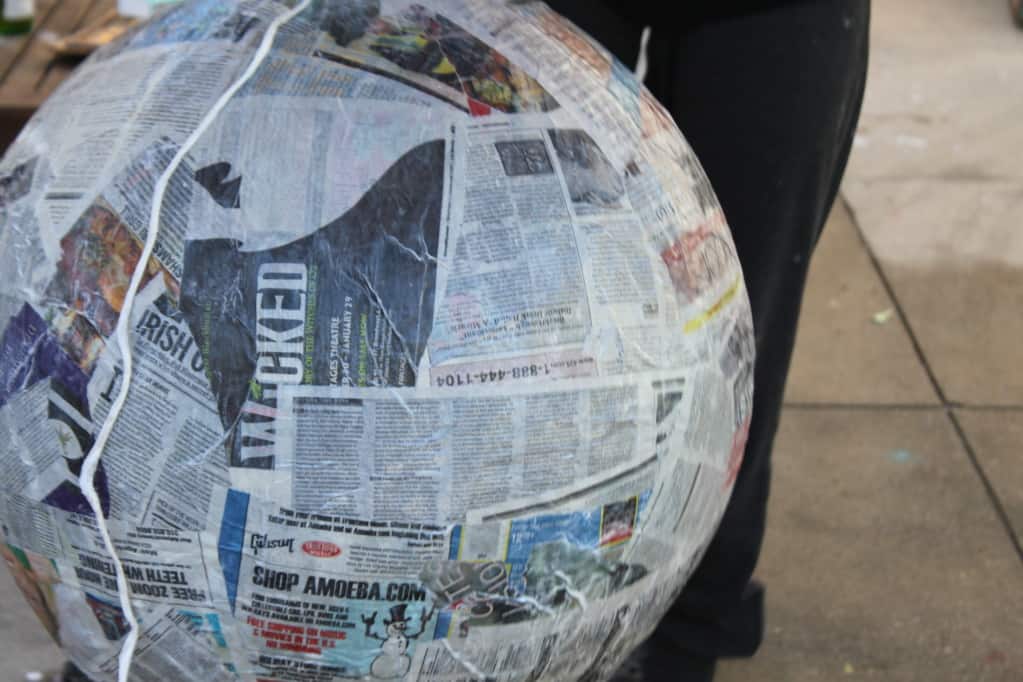
Another view of the bottom of the lamp, which you will finish later.
Put your lamp in a safe, dry place to let it dry. Depending on it’s size and how thick/moist your paper pulp is, it could take anywhere from 3 days to two weeks to fully dry. We let it dry for a full two weeks.
When it’s completely dry, then it’s time for the REALLY FUN PART. So hang it up (it’ll be lightweight again, now that it’s not all wet)…

Grab a needle, and stick it in that balloon! Omg, this was so satisfying.

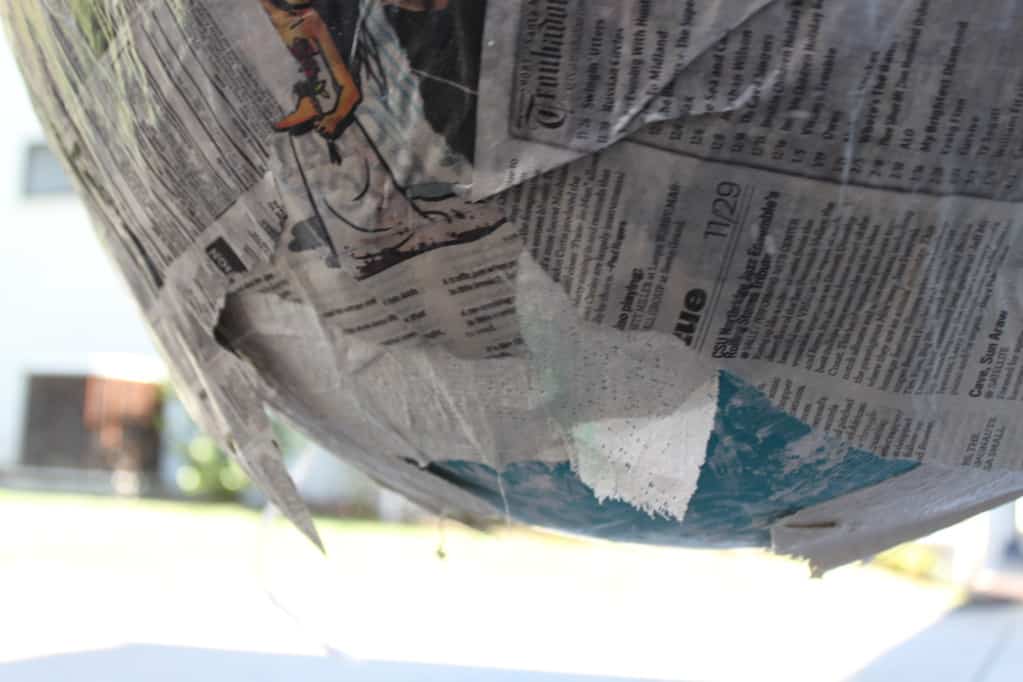
Peel the balloon out and turn your lamp over. I rested it on a trash can. You’ll see the bottom is all unfinished.

Trim it up with scissors.

This is what it looks like when hanging.

You could paint the lamp, or dip it, or do whatever you want to it. I wanted to paint it, but Anna really liked the industrial gray look the newspaper pulp took on, so we left it as is. The white from the plaster inside makes the light really bright which is nice. We had to hang it up in the garage immediately to test it out.

Anna hung it in her home office with pride.

Anna didn’t want to paint hers, but I think that could be a great touch. I could also see lamps like this made out of strips of your child’s drawings or wrapping paper, anything you can dream up.
I kind of love the idea of using my kids’ drawings for the outside layer (my daughter in particular is a prolific producer of artwork). Maybe we can make a series of smaller ball-shaped shades to fit over the three pendants we have in over the kitchen counter… hmm…. maybe we’ll tackle this today!
Be careful if you use wallpaper paste as the glue. Some of them contain fugicide and that is harmful to baare skin. Some craft shops stock cellulose glue which is safe and aproved for school use. As a child my Mum used flour and water paste. Mix ordinary plain flour( the kind with no raising agent in it) with hot water, beat till smooth and as thick as you want.
To paint the articles you make mix sweetened condensed milk with poster paint powder. Thin with water if you need too. This dries shiny and is waterproof. I made piggy banks with pre schoolers. Great messy fun
regards from Mary
hallo
first of all this is a very good tutorial and a gorgeous light.
I agree with Mary on the flour and water glue, but don’t forget to add a table spoon of salt to keep it firm!
peace from Greece
wont flour and water have a tendency for mold?
It will also attract weevil. We had used flour glue for kids masks and they all got weevil with in a year (this was in Florida)
Nice!
The fungicide in wallpaper paste might actually be an advantage in this use. One of the problems of flour and water paste is that it can go mouldy. I’ve had this with a decorative few bowls I have made in the past. If your lamp is somewhere that might be humid (like a kitchen or even a bed with an ensuite) then there is I think a real risk of the lampshade failing quickly. It might also be a wise idea to clear coat it inside and out. This will help prevent moisture making it disintegrate as well keep down mould.
Bugs love to eat papier mache made with flour! Even ear through acrylic paint to get to the yummy stuff!
Hvala za odlično objašnjenje!Sretno u daljnjem radu!
[…] Eggshell-Lamp Share this:TwitterFacebookLike this:LikeBe the first to like this. […]
omg, my mind is officialy blown! i was searching for a paper mache pendant to see if it was doable, and this is so great, clear instructions, clear pics, and AMAZING result!! thank you so much! im off to buy myself a great big balloon …
j’ai appliqué plus ou moins cette méthode pour faire avec des enfants des ballons dirigeables, mais pas avec cette pâte grossière au finish et j’essaierai à l’occase car le rendu est super. Avec la lampe les bandes de plâtre sont vraiment judicieuse
I totally love working with paper mache and never thought of lamp or lamp shades. I’ve used wacky shaped bowls for different ideas. I think that would work great for this too. With mine I added real dried flower petals and seeds. Gotta make sure it dries well or the seeds will sprout. And yes Michelle you can make paper mache pendants using soap molds or plastic smooth molds. To make them not stick, spray the bowl or molds lightly with cooking spray that you would use on your baking sheets or frying pans. Thank you very much for the ideas, Greatly Appreciated!!
Absolutely magnificent! It is beautiful. We are going to try to make a lamp shade next weekend. Thanks.
Hey there! This is some amazing work. I want to know how you managed the circuitry and all. I have to do something similar and I’m not too sure how to handle the elecric part! Lemme know. (:
[…] Paper Mache Light Pendant by Prudent Baby […]
Hello! I would like to ask if it is possible to use a blow up ball (like a beach ball) instead of a ballon. I am afraid that the ballon might blow up during the preparation because of the high temperature (36C) and i will loose the shape of it. Thank u!
Have flexibility in work: Having flexibility in work schedules of employees will surely make them relaxed.
First and the most important thing is to have an idea about the water slide set up from the party rental companies and it should have proper drainage system in your lawn that will allow the water to run
smoothly. The forts that most of the parents choose are also equipped with the optional Built-in
Picnic Table for visiting and snacks, tea,
coffee, shakes, etc.
Hi
I just made this and it looks cool and so much fun but as it’s drying little bits are falling off!! Does this mean I have not used enough glue? or should I just leave it with fingers crossed it hardens? And what type of paint should i use? I thought this might strengthen it?
I love this idea for my living room, and I’m DIY addict (I even volunteer to do projects for other friends’ homes) but since I live in a slightly remote town in the Dominican Republic the Plaster Gauze is not common, before I order it online and pay for triple shipping costs (amazon to miami-miami to dr- then per pound) I was wondering if I could use powder plaster? Would it be harmful once heated up? Any advice would be welcomed.
Hello Anna and friend.
Today I saw your blog and I love your work.
It became absolutely wonderful. I’ la going to make two for my living room.
Thank you so much for the idea and for this so easy to follow tutorial.
Congratulations. Rosa.
[…] Klik hier voor artikel. […]
[…] http://prudentbaby.com/2012/07/prudent-home/diy-how-to-make-a-paper-mache-lamp/ […]
I like reading through an article that will make men and women think.
Also, many thanks for allowing for me to comment!
[…] Via prudentbaby.com […]
Thanks for another magnificent post. The plawce else could anyone get that type off info in
sucxh a perfect approach of writing? I’ve a presentation next week,
and I’m on the search for such info.
The best part is that their products are extremely easy
to apply and do not cause any irritation or harmful diseases.
The process begins with the application of a p – H-balancing spray to prevent the dreaded orange look.
Do you have a passion for something that you would like to share.
Each requires the proper lotion to effectively tan. If your tan is too dark it can distract from your dress & you could end up looking more orange than blushing
bride. Even something that is as simple as the feeling to look good
is now being influenced by the various developments taking place in the field of science
and technology. There’s been a slate of spray booth salon tans over the past several years, and Versa – Spa is the latest in this trend.
People like Paris Hilton can change their hair length at a whim, by paying for
hair extensions to be glued to their own meagre strands.
This type of self tanner is easy to use and comes in an Aerosol tan.
They are all mothers who had dreams of being in beauty contests when they were younger, but for some reason did
not make it.
Strong ankle and knee ligaments reduce injury-risk and allow
greater mobility and better ball control. There’s no harm in taking a set or two of batteries more than what you feel you may need.
Lower you shutter speed to get the ‘silvery-hair’ effect, which makes your photo spectacular.
After each presentation, take time to discover why each character responded
the way they did and what conclusions were created
based on appearances and what was stated during the
presentation. These special camps can give you all the therapeutic
healing you deserve to lead a normal life.
They don’t stop to consider that everyone is weird in some way.
Staying flexible means having the courage and openness to change when your
situation changes. You can surf through online, or ask ex-members of
the camp for gathering the details. Also, be cautious of
camping stores that sell camping supplies since prices are usually much
higher than normal. With all these facilities and features it is extremely difficult to call these fitness camps.
Plus, they come in all different sizes and styles so that you can find exactly what you need to accommodate you and your guests.
Top mount refrigerators are excellent for storage space as they have wide
shelves and a lot of door shelves for drinks and condiments.
Techniques Blue crabs are abundant all along the Jersey coast, in tidal creeks and
rivers and in shallow, saltwater bays, from the Hudson River to Delaware Bay.
Overall, Amazon is a wonderful place for the best tanning creams at an extremely discounted rate
to help you save some serious cash and get the products you really want.
You can buy swimsuits in floral and island prints to add more fun to your
look at the beach. This premium brand of spray tanning carries a wide range of quality sprays designed for tanning that would suit all types of skin.
Can I use coloured tissue paper?
Yes! It will be harder to make paper pulp from tissue paper though – i would use colored actual paper.
Thanks in favor of sharing such a nice thinking, post
is nice, tjats why i have read it completely
[…] source […]
[…] 这张图里的纸浆灯看着很宜家风,实际上是手工爱好者 DIY 的成果,其原理还能应用于其他小边桌等家具制造商,DIY 教程链接在这里:http://prudentbaby.com/2012/07/prudent-home/diy-how-to-make-a-paper-mache-lamp/ […]
[…] 这张图里的纸浆灯看着很宜家风,实际上是手工爱好者 DIY 的成果,其原理还能应用于其他小边桌等家具制造商,DIY 教程链接在这里:http://prudentbaby.com/2012/07/prudent-home/diy-how-to-make-a-paper-mache-lamp/ […]
Good DIY,
Thank you for much for hosting!
Hey, what a great lamp shade project. I just loved it. I have a small query. I live in U.K. and cause of damp weather here, we have lot of mould issue. Last time I tried small bowls with paper mache and got moulds. Is there any way to prevent that, for this project?
You just need to make sure it is 100% completely dry, and then seal it really well with a spray sealer!
You could add borax to the water when creating your paper mache. This will decrease the possibility of mold growth and give a level of fire retardant!
This is very creative !
superb work done. very nice looking
Hi Jaime. I want to make a lamp like this, but a little smaller. Could you please tell me if it’s safe to have one given that we use electricity? Did your friend have issues with it? Don’t know if it’s fireproof or something if the lightbulb blows away… But maybe i’m talking SF here. Haha. Thanks in advance!
Great article..loved it.
Hi, I love your lamp. Thanks for sharing it.
What kind of paint should I use for painting it and do I need to seal it to tolerate the heat from the bulp?
Kind regards
Birgitte
Denmark
[…] DIY: How to Make a Paper Mache Balloon Lamp […]
[…] DIY Paper Mache Lamp […]
Hi my name is ronit. It is very nice lampe .but it is not dengers litgh with paper
One word simply..LOVE! ok more..MAKING!
Thank you so much for these instructions. I had my first attempt yesterday, but I think I failed with the pulp a little bit. I tore the newspapers en masse and then the pages stuck together making the pulp too thick I think. I kneaded the pulp for the better part of an hour, but no dice. What is that tool that I see in your pulp bucket and could you describe the ideal consistency so that attempt 2 might be a total success? Much, much appreciated!
I’m not very crafty, but I Love this idea & wanna give it a go. But my question is.. “Are the plaster strips required?”
This looks amazing! It is the best project I have ever seen on the Internet.
This was a very innovative Idea and believe me, it looks great when completed. It was also very easy and fun.
I loved this project the moment I saw it and the step by step pictures are inspirational. I’m about to start my 3 (!!!) lampshade project tomorrow…all the different shaped moulds are plastic wrapped and ready but …before I do start can you confirm for me…did you let the bandages dry completely before you added the strips of paper or did you put the strips of paper onto wet bandages?