 Kathy from MerrimentDesign is here with us today to share another of her awesome Sewing 101 Lessons (see What You Need in Your Beginner Sewing Kit and How to Sew French Seams). Take it away Kathy… I’d like to thank Jaime and Jacinda for letting me talk with you today about gathering. Gathering is one of those techniques that you’ll see in a ton of sewing projects like skirts, blouses, puffed sleeves, dresses, and pretty much anything you’ve ever seen with a ruffle. Gathering is just a way to bunch up fabric so that it’s a little more ruffle-y and full. Gathers can either be really tight and frilly like the ruffle I made for Elise’s baby sunhat:
  as well as Jaime’s magicalist magical tutu dress of magic:
 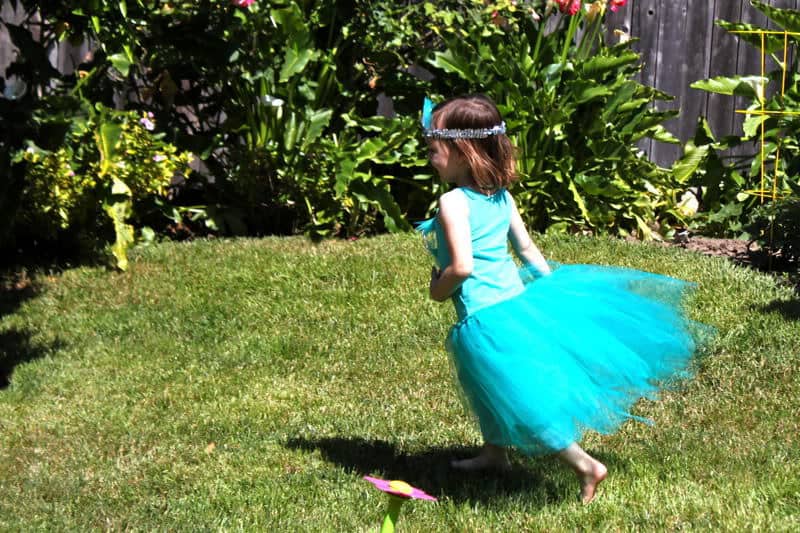 and Jamie’s delicious layer cake skirt:
  Or they can be more subtle and streamlined like the delicate gathers on my tiered baby dress pattern that features Jacinda’s lovely and striking Modern Texas fabric available at Spoonflower:
 You can use gathering on teeny projects like on Jacinda’s pin cushion ring…
  …or along super wide edges like Elise’s gathered crib bedskirt
  And in practice, there are as many different gathering techniques as there are applications for it. Today I’m going to share how to gather fabric with your sewing machine… How to Gather Fabric There are handfuls of old fashioned manual ways to gather fabric. This is the method that I learned to do it from my mom Norma back during my 4-H Clothing days (yep). I like it because it makes pretty gathers while eliminating the frustrating process of tinkering to get the gathers even only to realize that the gathered piece is now too long (or too short) and needing to fiddle around again. First set your machine to a really wide straight stitch width (or basting stitch). I set mine to 4 which is the highest that my machine will go.
  Now this is very important: You’re not going to backstitch when you start sewing this basting-slash-gathering stitch. Trust me, I’ve mindlessly backstitched a gathering stitch many a time which guarantees a do over. So…start sewing a straight gathering stitch close to the edge of the raw fabric edge that you’d like to gather. Because I usually end up sewing 1/2″ seams I usually sew about 1/4″ from the raw edge like so.
  And remember: Don’t backstitch! Leave a couple of inches of thread free on both sides.
  Now this is a step that I like to do that many gathering projects I’ve seen out there don’t include: I sew a second gathering stitch just shy of 1/2″ parallel to my first row of stitching. I do this because: (1) It’s the way my mom taught me. (2) I think it makes it easier to pull evenly spaced gathers. (3) If you get a little rough by pulling too hard and breaking one of the gathering threads, you have a second one to fall back on …this happened to me when I was making Elise’s gathered crib bedskirt with its really super long ruffles.
  OK so everything’s sewn and you’re ready to gather. Starting on the left side, gently pull the two front threads, leaving the threads on the back alone (the wrong side) and gathering up the material as you pull. When your gathers reach the middle, shift to the two front threads on the right side and repeat.
  Keep gathering, left side, right side, until your gathered fabric is the exact width that you want it to be. In my case, I was making ruffles for a ruffle tiered dress. Don’t worry too much right now about getting the gathers even — you’re going to even them all out soon. Just focus on getting the exact overall width that you need it to be; getting the overall width right is the key.
  So again this is a step that I like to do and others may skip. Important pause here! First, again, be extra sure that your gathered fabric is the exact overall width that you need it to be. Now starting on the left side, tie the two front gathering strands together into a knot. Trim the threads.
  Tie off the two left back threads and trim. Now repeat on the right side for the front and back threads.
  So why did I tie these off before making sure that my gathers were even? Well, if you first can constrain the gathered ruffle to its proper overall width, then you can more easily wiggle your gathers around using your fingers to spread them as evenly as possible.
  I like to tie off and trim the gathering threads because it locks in the overall width so that you are just fiddling with spacing. And times when I haven’t tied off the threads I’ve gotten so frustrated cycling between evening out gathers and then discovering while pinning that the ruffle is now too long, or too short, all Goldilocks back-and-forth …arg. This tie-off method also helps you flatten out the areas that will be inside the side seams so the fabric will lie flat there rather than catching part of your ruffle in the seam (keeping the frilly on the front). But I’ll say it again: Only tie your gathers once you’re sure it is the width that you want it to be. And now that your gathers are even and lovely you can pin. Pin your seam with the flat fabric layer on the bottom and gathered layer on the top – it will sew more smoothly that way. And gathers are an occasion when I do use pins, as much as I generally try to avoid it if I can.
  Switch your stitch length back to its normal, non-basting stitch length and sew. My seams are usually 1/2″ so I sew just to the left of my gathering stitches.
  Now if you want to be extra sure that your item wears and washes well, stitch the gathered piece to the fabric again, but this time sew on top of your 1/4″ gathering thread. This extra stitching will prevent strain on the 1/2″ stitch line to avoid the seam pulling loose. But if you’re going to topstitch your ruffle like I did on my tiered baby dress then you can skip the 1/4″ reinforcement. If you’re lucky enough to have a serger and know how to thread it, it’s nice to overlock the edges. I zigzagged mine in lieu of overlocking.
  So that’s basically the way I do it. Let me know if this the same or different from how you like to gather.
  This post is sponsored by Disney Baby. We’ll be joining the Disney Baby blogging team next month, and look forward to sharing these kinds of stories (projects/ideas/etc) with you over there! Stay tuned for more details!


I use this same method, but I usually just do one line of basting stitches. I would use two if I were gathering a very long piece, but I sort of feel like the two lines is just an extra that I prefer not to do.
I haven’t used the double basting stitches, but think I might start doing that. I think it produces more even ruffles and it is easier if you have a larger piece of fabric 🙂 And I haven’t used the “tie-off” method, but that looks very helpful! Thx!
My mum taught me the same method when I was learning to sew for 4-H. Whom I am certain learned it from here mom. On the few occasions I opt to not follow this gathering method, I am not happy with how the gathers turn out.
I’ve contemplated picking up a gathering gadget, but there is nothing like the feeling of accomplishment you get when see the lovely gathers and know you did that by hand.
I always use 2 lines of gathering because it really is the right way (I’m not trying to be horrible to anyone who doesn’t do it this way, but I am super passionate about it! It really does make the difference between something looking homemade, or professional! Your gathers are not only even with this method, but you don’t get any of the slipping or twisting that comes from only one line, and it really is just a million times better for the 30 seconds of time it takes! When we spend so much time and money on our projects, I cannot even begin to take unnecessary short cuts like one line of gathering when it can make or break a project!) I can always tell when another blogger did or didn’t use two lines of basting for their gathering, it is always telling in the final project!
Yep-2 rows of gathering stitches make all the difference.
Another tip would be to make marks on your ruffle piece where the ruffle should meet the sides seams and center front and back, before you do the gathering. That way it is even easier to spread the gathers evenly when attaching to the dress. Make them prominent, or they will get lost in the gathers.
Great tip Sheila! Thanks! I’m guilty of the single line of basting (read: lazy). Definitely going to try two and see how it compares!
my mom taught me this same method! 🙂 i love the baby sunhat.
Maybe this is ridiculous question to some of you, but I am a super novice sewer. I understand how you get the extra thread at the end when you sew your seam, but how do you get the couple inches at the beginning?
Before you start sewing, you’ll want to make sure that you have a couple inches of thread pulled out before you go. If the threads are super short, just tug on the lower thread coming out of your bobbin case and also tug on the upper thread coming out from your needle to give yourself a couple inches. Then put your needle and presser foot down and sew.
Sounds about the same as what I’m used to. The only difference is that instead of tying off the ends, I just wrap them in a figure eight pattern around the pins. That way, if I truly did make a measuring mistake, I am still safe.
Laurie, that’s a good idea. I’ll try that next time.
Thank you! Thank you! Thank you!!! Your step by step tutorial was a life-saver!!! I am making my niece’s outfit for our local Czech heritage celebration and had to gather the apron to fit the waistband. I also learned to sew in 4-H many, many years ago, and remember the frustration of gathering material! This has been an immense help–especially since I don’t sew very often any more!
[…] Now you want to gather the fabric along the front of the shirt, to the final width you’d like it to be (measure on your child’s chest). For details on gathering, read our post: Sewing 101: How to Gather Fabric. […]
Really helpful! Thank you for sharing it.
Somehow, I just can’t gather! I’ve tried gathering with 1 seam, so I think maybe 2 seams is better? The only one that works for me is the zig-zag gathering. This will be my how-to when I try with 2 seams! Thanks a ton! <3
I found an even easier way. Before you start stitching, just pull out a long section of top and bobbin thread. zig zag over the l;ong threads . Pull the long threads and you have gathers!
I was suggested this website by way of my cousin. I am not sure
whether this post is written via him as no one else know such
special about my difficulty. You are wonderful! Thank you!
See this: darmowe seks filmy – link, http://www.bzykanie.com.
pl
[…] up on the edges; you want the stitch to run off the material. Then, grab one of the hanging strings to gather the material evenly along the length of the skirt. Sew the edges together if […]
[…] place of the darts, I gathered the front and back sections using ease stitching (a good tutorial here). I kept the fabric near the side seams and pockets flat so that it would be easy to sew and so […]
I don’t drop many responses, but after browsing a great deal of remarks here Sewing 101: How to Gather Fabric | Pretty Prudent. I actually do have a few questions for you if it’s allright.
Is it just me or does it look as if like some of the comments come across as if they are written by brain dead individuals?
😛 And, if you are writing at additional social sites, I’d like to follow you. Could you make a list of the complete urls of all your social sites like your Facebook page, twitter feed, or linkedin profile?
[…] Baby shows us the classic method, or “right way” to gather fabric with a sewing machine. photo credit: […]
I blog often and I truly appreciate your content. This
great article has truly peaked my interest. I will book mark your site and keep checking for new information about once a
week. I opted in for your RSS feed as well.
Hi! I know this is kinda off topic but I’d figured I’d ask.
Would you be interested in exchanging links or maybe guest authoring a blog article or vice-versa?
My website discusses a lot of the same subjects as yours and I
feel we could greatly benefit from each other. If you might be interested feel free to send
me an email. I look forward to hearing from you!
Great blog by the way!
It’s going to be ending of mine day, except before ending I am reading this
impressive piece of writing to increase my experience.
[…] the other side. If you need a tutorial on how to do a gathering stitch you can go HERE or HERE or HERE. Once your stitch is done DO NOT worry about gathering it now. Set your skirt to the side and lets […]
[…] of your pattern. You will follow this by sewing all of the pieces of your skirt fabric together. Gather Stitch the top of your skirt. Attach waistband to the upper edge of your skirt. Adjust the gathers; baste. […]
[…] 1 stitch. One of my favorite blogs for quick and easy to follow tutorials has a great one for gathering. Expect multiple links to this site by years end. Just saying. Probably wouldn’t be here […]
[…] the other side. If you need a tutorial on how to do a gathering stitch you can go HERE or HERE or HERE. Once your stitch is done DO NOT worry about gathering it now. Set your skirt to the side and lets […]
I have had so much trouble figuring out how to FIRST gather THEN how in the world do I sew it to my other fabric pieces!?! THANK YOU! I can now see how to do this technique. I’ve tried & had several epic fails ;p
[…] Prudent Baby shows us the classic method, or “right way” to gather fabric with a sewing machine. […]
Thankyou! I just made a perfectly ruffled skirt using this method, my first ever try 🙂
Kathy, what a cute little dress. Thanks for the tutorial (and I am clicking over to when I finish writing this, to see that magical tutu dress!) I have been a professional dressmaker/seamstress for 30+ years, and I would like to add two tips (and a clarification).
1. If you dial down the tension on your machine to 0 or 1, so that the top stitches are loose, and sew on the right side of the fabric, you can easily slide the fabric along the bobbin threads on the back side of the fabric. This will also allow you to use a much shorter stitch length on lightweight fabrics, if you want your gathers to be very fine. ALWAYS use two rows of stitching. :-0
2. Instead of tying off the threads, when pinning the gathered piece to the un-gathered piece, place a pin with a large head at the place where your basting stitches start, pull the threads to gather to length (I gather half the width from one end of the gathering, stitches, then gather the other half from the other end), then wrap the threads in a figure 8 around the pin a few times to temporarily tie off. This allows you to adjust gathers, letting out our taking up thread as needed. When you sew the seam, do not sew through the figure 8; start sewing just past it, and end the seam by just sewing up to it, keeping your needle in the fabric, remove the pin, pulling the thread tails out of the way, and stitch.
The clarification: in the beginning of your instructions, I think you meant to say to adjust the “length” of your straight stitches to the longest setting, not the “width” of your straight stitch, which would result in a zigzag.
[…] the top of the skirt to gather it. You can find more information on how to gather fabric on our Sewing 101: How to Gather Fabric […]
[…] We began by manipulating our fabric to show the desired surface textures; we used pin tucks, gathering, slashing and fraying, machine cords and trapunto to represent Earth. This took 2 weeks to complete […]
Thanks for the information. This was very helpful
I saw a video on Youtube where a girl was using an old singer and she adjusted the stitch length as far as it would go and the tension to 8 or 9. It was instant gathers. I would love to know if anyone has tried this on a computerized machine? It look easy and great. I use your method but too many times the thread breaks and when doing a quilt ruffle its tedios.
Cousin told me about this site. It’s my first time here but for sure i’ll stay longer. Good job!